WELCOME TO RIVER DAVES PLACE

F26 Restoo

Dcb.blake

Well-Known Member
Joined
Jul 25, 2021
Messages
499
Reaction score
713
Well finally decided it was time to start one of these with the persuasion from a fellow member….I enjoy reading these and find lots of them very informative. I wish I had taken more pictures of stuff I had done in the beginning when I first got the boat but I just didn’t take many pics and still is something im learning to do.

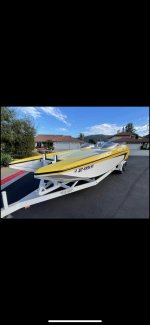
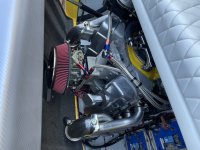
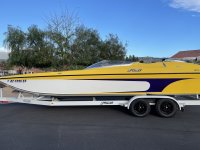
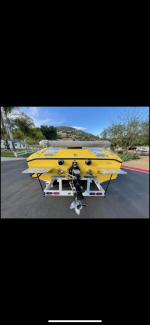
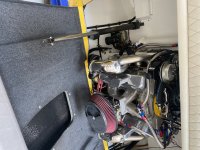
Started out as a 03 DCB F26 and this is my first DCB and cat for that matter. Last boat was a XT Ski Laveycraft 21ft. I bought the DCB right in April of 21. Boat was in pretty good shape a few spots that I looked over and missed as far as the gel goes just because it’s my second boat and I’m not too too familiar with gel coat yet. Oh well nothing that can’t be fixed. Motor seemed to be in great shape. Not too sure on the exact ci but was told it was a 540ci right at 700-750 built by Teague? Not too sure on that, I found an old ad later on that said it was a 509? Drive seemed to be in good shape good oil color no discoloration on pain already had a drive shower and full dual ram hyd steering. Interior was in good shape as well just a bit dated no rips or tears nice soft material. Trailer was told to be in good shape and upon arrival to my standards it was not at all up to par. It had nice rims and tires. Fenders were bent later on figured out the axles were shot. Rust on the diamond plate areas. Random spray paint to cover spots and they didn’t even mask it off. Oh well what are you going to do after driving 6 hours. That’s fairly easy to fix. Over all the boat was in decent shape and for the price I couldn’t pass it up.
 

Attachments

  • 672AB831-4DDA-4054-B3D7-ABA7EA8303E3.png
    672AB831-4DDA-4054-B3D7-ABA7EA8303E3.png
    1.9 MB · Views: 288
  • 73D0E830-5ADD-48F1-AAA1-DB000C1E3EFD.jpeg
    73D0E830-5ADD-48F1-AAA1-DB000C1E3EFD.jpeg
    862.4 KB · Views: 278
  • 2B0C3860-ED6A-4CC1-8CAF-D6E13A81872E.jpeg
    2B0C3860-ED6A-4CC1-8CAF-D6E13A81872E.jpeg
    976.3 KB · Views: 281
  • 48C03483-ECCB-4FBE-92EC-A13F87FF52B9.png
    48C03483-ECCB-4FBE-92EC-A13F87FF52B9.png
    1.9 MB · Views: 268
  • 3BD58658-172D-4651-8A96-11802EC24869.png
    3BD58658-172D-4651-8A96-11802EC24869.png
    2.1 MB · Views: 277

Dcb.blake

Well-Known Member
Joined
Jul 25, 2021
Messages
499
Reaction score
713
First thing I did but didn’t picture was just mostly some maintenance. Just basic oil change check bolts etc etc. Took it out and shitty enough it started raining but still sent it anyways. That’s what windshields are for? To my surprise ALL the gauges worked properly and really the boat ran well. Two of us full fuel ran 90-92ish with a bit more left, ran out of lake.
FD28A1FE-40ED-4387-9A06-262A985F97A9.jpeg
My buddy and I put the first time, the lakers should be paying us lol

As stated everything really ran good so there wasn’t much to do other than use the boat get used to driving it. Simmer of 21 not too much went on as far as upgrades went. Just had my detail guy do a light buff and wax as it wasn’t in bad shape at all.
C6E77DCD-AD62-4BA9-AC9F-A8BD04F5D6D6.jpeg
Here’s one of the spots I missed on the gel. Not too sure how 2 of us missed it lmao. I’m not even sure what’s going on here.


8253EA31-F15B-4EE7-912E-6F9493092A1C.jpeg
I think this was after the polish blah blah
 

Dcb.blake

Well-Known Member
Joined
Jul 25, 2021
Messages
499
Reaction score
713
Not too sure what made me want to add some watermelon lights to the trailer but I did 😂 trucker buddies rubbing off on me too much.
ECE70697-06D5-411F-BB0D-B5AA2F8CAFDB.png
8578968F-C7CC-4CB6-B021-CA35279E0821.png
Went and got rid of the rectangle marker lights and added the clear watermelons we call them. The circles fit perfectly over the holes of the previous small marker lights. Wish I had some pics at night because the pattern looked really trick on the back.

At this point I was just trying to figure out what I wanted to do and what all I had in the boat motor and drive wise. Trying to find serial numbers figuring out drive ratios what prop was there etc. I’ve been fortunate to have a lot of used stuff and learned that not everyone knows what they are talking about or are not being honest so o found it’s easier just to find out yourself to be 100%.
 

Dcb.blake

Well-Known Member
Joined
Jul 25, 2021
Messages
499
Reaction score
713
1418069C-62EE-4C41-97CC-33A0A87263B5.png
C94CE3CA-F0BB-44F4-9C8B-FEBAAC36A444.png
Went ahead and gave all the diamond plate areas a quick polish to get the haze off. Forgot how much I hate polishing let alone diamond plate 😂. Turned out pretty good for a quick 2 hour job
 

Dcb.blake

Well-Known Member
Joined
Jul 25, 2021
Messages
499
Reaction score
713
0CCC077F-2CBF-4882-978B-C537B004F3B2.jpeg
BC462151-139E-438B-8231-6EEFA26ABEAE.jpeg
My summer started slowing down so I figured it would be a good time to run the lash. Found some good old school crane rockers. People say they crack but after inspection I didn’t see any. Found out the lifters were solid roller. It was a bit tricky because I didn’t know who built the motor and had no cam card. So with enough research I found a safe range so to say to set the lash. I tried to check the previous lash but it was all over the place. Not to consistent so I went with the internet. If I remember right i went with .014” to account for when it heated up. It would be too hard to attempt and do it hot. Been running great since. Sounds like a high hp sewing machine 😂
F4D3607B-5412-4587-B414-4DB2D60E6292.jpeg
1DEA9130-077A-4ED6-B076-3A9B984F405A.jpeg
all back together and cleaned up. Tried to research tbt head numbers but couldn’t find too too much info at all
 

Attachments

  • 762BF7DB-1A5F-48F3-B0FE-332483AF278E.jpeg
    762BF7DB-1A5F-48F3-B0FE-332483AF278E.jpeg
    1.4 MB · Views: 66

Dcb.blake

Well-Known Member
Joined
Jul 25, 2021
Messages
499
Reaction score
713
Winter time passes and of course out of sight out of mind. I didn’t do much other than cover it up.
CC8CF3C1-3BEF-410D-A920-CFD5E1A2D968.jpeg

Later in the year is where most the progress happens. Decided I’m going to keep the boat rather then taking advantage of the market. Boat has solid bones and a very good start. First thing I wanted to do was make the trailer a bit easier on the eyes. It was driving me nuts. I knew I wanted a drive gaurd, new rims and tires and replace those ugly melon lights I had worked so hard to put on.
FE46B362-9462-498B-8E8C-73CF07CFB904.jpeg
6246B535-7064-49F8-B516-F3B2BAD379CF.jpeg
Started out by ordering a set of 18in US Mag Ramblers. I really wanted the full chrome ones but had to settle on these because covid still…. 😐. Wish I would of went one tire size up but was concerned about clearance. Live and learn. Went ahead and ordered 5 to replace the spare because I think the tire was from 03 lmao.
 

Dcb.blake

Well-Known Member
Joined
Jul 25, 2021
Messages
499
Reaction score
713
Next up was a drive guard and some of those flashyyyy lights. Kinda had a look in mind that I wanted I just wasn’t too sure how to relate that back to the measurements. Wanted to make the rear step easier to get onto from the back because I dislike people walking on the bow. But I also didn’t want it to be too big and in your face flashy. More of a sleek factory look. I plan to add a extension box in the future so I accounted for that as well. When I took measurements I made it wide enough in the prop area so if for some reason my prop was between that section it really had no chance to hit the metal.
7A49DB22-2608-456A-BD88-ED274C5B59E8.jpeg
This was the initial design. Later the design got changed and instead of tapering straight back on an angle the new exterior went parallel to the frame then tapered back to a point to give more room to stand when getting on the boat step.
50401C57-1E99-4D86-9646-D0F455A4C59C.jpeg
Built them off the trailer then later welded them on as it was easier to keep everything square this way. With the amount of material I got number wise it worked out for me to add about 8ins or so to each side and essentially make them longer. Wasn’t too sure how this would end up looks wise but figured it was easier to shorten then add. Still has no idea what I wanted to do for the flooring.
 

Dcb.blake

Well-Known Member
Joined
Jul 25, 2021
Messages
499
Reaction score
713
AC39166D-0B8A-4A9A-AFA0-7706AC3DB9B2.png
C50B1AF9-281B-46A9-ADB4-3F7D61653548.jpeg
D4FEA394-3747-4BC2-9C04-951A32477E34.jpeg
Got them all welded on and a bit of bracing added. I moved the boat back maybe a good foot or so so I could get an idea where the prop would be with the extension box.Turned out a bit longer length wise than I expected but still ran with it because why not

078CEFE9-88F5-451B-BDB4-30437DDD17D2.jpeg
19A5EA5E-3D7F-4F0C-9F94-336D730E05BC.jpeg
40452D03-EEE8-4086-9E5F-6A8D77B5BA5B.jpeg
My buddy went ahead and volunteered to weld the bottom of the sheet metal lol. Traded it for a couple lake trips fair trade 😂. Got the two lights wired and cut in. I haven’t figured out a good way to out these in other than a plasma. Not too hard after doing a few of them. Tried the hole saw method and I’ll give it a go on my painted areas where I plan to add more of these lights.
7DED699A-375A-4187-8B75-F50A90846668.jpeg
4BFE0D14-CA26-4552-BEB3-F9AF078E876E.jpeg
got a bit out of order but the first light I added. First attempt was with a small die grinder and a revaluation grinder. Not the way to do it if anyone was wondering lol 😂

Also some may notice the lower got switched out. I didn’t take any pictures because idk 🤷🏼‍♂️. I went with a Teague platinum internals in a IMCO Sc -1 case. I stayed with the standard 1.34 ratio that I had that way I didn’t have to change props as I’m running a labbed 28p. First time swapping a lower and I think I didn’t get a chance to take pictures because it was such a fast and easy process.


Next up paint, carb to efi conversion and a new stereo…..stay tuned
 

Dcb.blake

Well-Known Member
Joined
Jul 25, 2021
Messages
499
Reaction score
713
I'm tuned in. Have you ran it with the -1? How does it act?
@Dcb.blake
yes I’ve had it out quite a few times and I like it. The biggest difference is getting on plane. Before when I would have say 4-5 people ice chests and I’m a full fuel guy I kinda had to work it a bit. Now it’s a breeze the motor can just cruise up on plane and don’t have to work the motor so much. Also I don’t get the blowout I had prior at higher speeds when trimmed at certain spots. Gained a few mph as well. I was worried about the -2 and blowing out getting on plane so after some research I went with the -1. Worth the money
 

AZmike

Eastsider
Joined
Aug 18, 2008
Messages
647
Reaction score
863
As a trucker I dig the watermelon lights! Thats definitely something I haven't seen on a boat trailer.
 

Dcb.blake

Well-Known Member
Joined
Jul 25, 2021
Messages
499
Reaction score
713
FD0055CA-EF8E-4C36-B67D-D0839C41AB4D.jpeg
7975D84A-51DC-4EC9-BDBF-468E61575B6F.jpeg

Added a few more lights on the side of the gaurd. I really wanted to center them between the diamond plate and the start of the taper but the factory cross tube was damn near in the center of where the light would be. So instead I centered it off the new tube. I plan to possibly MAYBE add another axle and or add the bigger steps so putting the light there looks kinda funky now imo but in the future will be working in my favor. After this I prepped for paint. My least favorite part 😂

526EFDF9-30CB-4C6A-B61B-238A0CF06F69.jpeg
Went ahead masked everything off and prepped some of the rusty areas that needed to be touched up. I plan to repaint the whole trailer in the winter so I wasn’t too too worried about finding a line to blend the paint in. I pretty much sprayed all the way to the rear of the trailer fender. I was painting outside and of course it decided to get windy immediately after primer so this took a few days.
 

Dcb.blake

Well-Known Member
Joined
Jul 25, 2021
Messages
499
Reaction score
713
C1377C83-6AD3-4FA5-B06F-EB68292CF35C.jpeg

Little better picture of the other light and the issue I ran into.
13C32AEC-3EE2-453B-B5CC-5B4CAD155296.jpeg
EC041FCD-6211-4788-BADD-A49DCD505A10.jpeg
Got it all painted and was surprised that it did have some shine for implement paint. Also matched pretty well I was veryvery surprised 😮

A2F3ADDE-BC89-40BA-9B63-B724A952FD58.jpeg
EFA3FABD-FE9D-4AE7-B509-10EEA6F47AFB.jpeg
63C632C4-FA74-4855-AA0A-AF27549A30A5.jpeg

Finally done with it, 100% turned out to be a lot more work than planned. Pretty happy with it, came out a little longer looking than I was shooting for but I think once I get the gator step along with the extension box it will shorten the look of it. Also the longer steps will help. But for now DONE.
 

Dcb.blake

Well-Known Member
Joined
Jul 25, 2021
Messages
499
Reaction score
713
3669E3D3-D29C-4A1A-9242-8313D22B5C4D.jpeg
17802A62-CD14-4AF0-B8B9-3335583060C5.jpeg
Almost forgot the icing on the cake the stainless fender, really completed the look imo. The thing is finally coming together.

Next up to address was the stereo. The current setup was 6 6.5 JL m3 with 2 W2 12in JL Subs which were somewhat new and sounded good but I really wanted to hear the music at a decent level when going through the water. Don’t get me wrong the engine noise gets my nut off but I like music too 😂
 

Dcb.blake

Well-Known Member
Joined
Jul 25, 2021
Messages
499
Reaction score
713
4A97CA7A-51A2-4587-9F89-4A125DAAC8A6.jpeg
951019D1-0493-4C0F-8136-FAE58E0CCBFB.jpeg
3C3616D8-8304-4DD8-BB3A-C975AE00FE00.jpeg
9654207E-207A-41B7-A8B7-46AB1A08FD7D.png
The old setup like I said sounded good but you got out of the boat to float it wasn’t that loud. Definitely couldn’t hear it above 30mph. The subs sounded great plenty of bass to rattle the boat apart.
3C3616D8-8304-4DD8-BB3A-C975AE00FE00.jpeg
475232AD-CA6E-4E7B-9099-28B31A042C2A.jpeg
Went ahead and spent some dough on wetsounds. Went with 4 Revo 6.5 in front of the back seat. I wanted to go 8s but there just wasn’t enough room. Then went with the revo 8s in the front where I had room. I didn’t do any of the work, I was way too slammed at work to do it.I have a pretty good local guy that does pretty clean wiring so I had him do everything. He installed all new cables from the batteries, new speaker wire and cleaned up some of the previous wiring. With the bigger 8s I had him run a new amp with room for future addition of speakers. I think it was a 6 Chanel wetsounds, not sure on amps. I had a stupid Kenwood radio that was pointless to look at in the sun. So instead of going with another radio we did a Wetsounds EQ with Bluetooth. I like this option because it fit in the old radio slot, when I killed the battery I didn’t loose my tuning and it came with a mic LOL. Can now yell at the slow people at the launch ramp lol 😂
 

Dcb.blake

Well-Known Member
Joined
Jul 25, 2021
Messages
499
Reaction score
713
3D631EB8-F27E-499B-936B-4BE554741113.jpeg
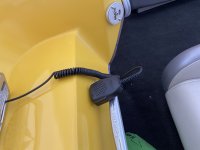
There’s the EQ which stayed in the same spot and was able to keep the DCB lid. Like the fact that I can cut the bass completely out as far as the subs go. Then the wonderful “get the fuck out the way” mic.


I think @02HoWaRd26 disliked the depth finder more than I did 😂 Regardless the damn thing was annoying as fuk let alone one ugly piece even with the old gauges. Adios
2D50371D-EAE6-436E-AFA8-6855954AAFBC.jpeg
5D050837-50FB-44E0-BDE0-AA45145E6790.jpeg
It was the perfect spot for a remote just wasn’t sure if the whole EQ and no radio would work out. Sure as shit wetsounds makes a BT remote that fit perfectly into the hole 😛. It connected to the EQ via RCA cables couple powers and a ground easy as could be. Not the fanciest thing in the world but functionally +100 and much easier on the eyes than the depth finder.
0FCC47E9-6145-4357-9ADD-91FBA9D1E7A1.jpeg
I guess you get the lights too 🤷🏼‍♂️
87A97372-F425-4A1A-92C9-910D649F1395.jpeg
Figured why I’m at the dash might as well do gauges too. This is the color livorsi sent me and it’s damn near spot on I couldn’t believe it!
 

Attachments

  • CDC72229-4BA3-4782-9786-02303C231719.jpeg
    CDC72229-4BA3-4782-9786-02303C231719.jpeg
    695.4 KB · Views: 56

02HoWaRd26

DCBroke
Joined
Dec 19, 2007
Messages
12,219
Reaction score
29,084
View attachment 1149071 There’s the EQ which stayed in the same spot and was able to keep the DCB lid. Like the fact that I can cut the bass completely out as far as the subs go. Then the wonderful “get the fuck out the way” mic.


I think @02HoWaRd26 disliked the depth finder more than I did 😂 Regardless the damn thing was annoying as fuk let alone one ugly piece even with the old gauges. Adios View attachment 1149073 View attachment 1149074 It was the perfect spot for a remote just wasn’t sure if the whole EQ and no radio would work out. Sure as shit wetsounds makes a BT remote that fit perfectly into the hole 😛. It connected to the EQ via RCA cables couple powers and a ground easy as could be. Not the fanciest thing in the world but functionally +100 and much easier on the eyes than the depth finder. View attachment 1149075 I guess you get the lights too 🤷🏼‍♂️ View attachment 1149077 Figured why I’m at the dash might as well do gauges too. This is the color livorsi sent me and it’s damn near spot on I couldn’t believe it!
The gauges tho…. Yes that’s what is going to really make that dash pop. I almost wonder who’s more excited to see you get those fuckers in, you or myself lol.
 

Dcb.blake

Well-Known Member
Joined
Jul 25, 2021
Messages
499
Reaction score
713
The gauges tho…. Yes that’s what is going to really make that dash pop. I almost wonder who’s more excited to see you get those fuckers in, you or myself lol.
Yea I’m so eager just to see them in. If I didn’t have to pop bigger holes I would just set them in there. Maybe next week MAYBE had to order some non insulated connectors to keep it clean 🧼
 

Dcb.blake

Well-Known Member
Joined
Jul 25, 2021
Messages
499
Reaction score
713
617D4AD1-2E9A-42DA-8359-E82B8FB5FE2E.jpeg
0820D381-3A76-45DC-A1F7-EB93307CAD53.jpeg
So news to me but Livorsi stopped painting there needles any color and cut it down a lot on the color selection. That really threw a wrench into my ideas but I’m glad I came to the conclusion color wise that I did. One of those oh shit that’s better than I expected 😂 had To put the famous DCB logo on the gauges and of course had to get “permission” which I think is hilarious 😆 Also went with the bigger tach and Speedo so new holes will be made.
9FC34F69-C404-45A9-A1F8-EA96550B7A3B.jpeg

By the time we got all the colors squared away the whole process was about 2 weeks which I thought was pretty quick. Got all the gauges buttt no logo smh. The purple is pretty trick the light really changes how the color looks so to say.
3E17D56E-0139-42EC-B443-02024960B47F.jpeg
Maybe a week later after talking to livorsi I get these! Pretty top notch service if you ask me. Just waiting on my stainless bezels and going to send my trim card to get painted matching colors. Super happy with how these came out. When I do the interior I’m going to incorporate more of the purple into it and hopefully it will all come together. 🤞🏽
 

Boat211

Well-Known Member
Joined
Dec 20, 2007
Messages
1,724
Reaction score
1,029
I am really liking how this is turning out. Thanks for sharing.
 

Dcb.blake

Well-Known Member
Joined
Jul 25, 2021
Messages
499
Reaction score
713
191B501A-727E-4BB5-8E75-39A3E5EFDC37.jpeg
E80F0938-D987-49EB-976E-8B3EAFDADDE2.jpeg
8424FBD1-3982-420D-B5D3-450BCE62026A.jpeg
While all this stereo stuff was happening I was waiting for my EFI stuff to come in. The carb was a 1150 Dominator which served me well other than some serious soot on the transom, drove me nuts. Other than that it ran great, no stumbles or stalling just maybe running a bit fat. Tried to jet and mess with the needles but still the same thing. I got connected with Brian out of Havasu and he pretty much sold me everything I needed. I opted to just have bungs welded into my intake manifold as COVID had all the new intakes slowed up of course. Wasn’t too worried about the wiring as I understand a basic 12v system and understand how to read a schematic. Here’s some before shots (before the stereo wiring) of what I was working with. I knew I would have to do new fuel line routing pump etc. I’d say I had a pretty good base to start with.
0B39146E-6B19-485B-8400-E07302463294.jpeg
Like I said this whole process looking back made me wish I had documented more on camera because it got a lot more in depth than I thought. I think what took the longest was the wait for the intake manifold. It took close to a month said and done. I had pretty much everything done fuel wise plumbed to the general area. My goal was to keep everything as hidden and neat as possible. So pulled the the carb and had it rebuilt as it was leaking from the secondary shaft as well. Which I still have the carb if anyone is interested.
 

Dcb.blake

Well-Known Member
Joined
Jul 25, 2021
Messages
499
Reaction score
713
0F52669E-77CC-4C4B-8632-4D151EAE7813.jpeg
1CC76D28-C410-4E07-8FBB-FB0B91FCB3B3.jpeg
95BD57E0-9081-4EBC-8D29-F07559A8E764.jpeg
Yanked the intake and off she went. Yanked the old lift pump that was mounted to the transom, the block pump, manifold, regulator and all lines. Whoever rigged the boat prior didn’t mess around with the p clamps. The ones under the motor near the pan were a complete pita to yank. I didn’t have it in me to pull the line and leave the clamps even though it left holes from the screws 😐 Had to pull the exhaust as well for an o2 sensor. I marked where I thought the bung should be placed. I really wanted to put it on the bottom of the collector area but just wasn’t too sure about water even though they were jacketed. Placed it safe and marked it on the side so the bung will face the intake.
3A04050A-4E18-4C8F-932C-499D7922FDEB.jpeg
Decided to roll with AN instead of push lock because shiny 😆 I have a local guy who has tons and tons of AN fittings so that worked well, bill wasn’t too pretty through.He had black and the red and blue and at first I made a list and got all red and blue then the more I thought I decided to get black fittings because it’s all in the small details
56D64342-8C9E-4E58-9E6A-4BCE7018111E.jpeg
Alot of debating went on with myself on where to mount the new A1000 pump and if I should keep the old lift pump which was a Holley black. I knew that if I mounted only the A1000 it needed to be as low as possible on the other hand I didn’t want to keep the Holley in line and have it not flow enough to support the A1000 which would cause failure. Debated a lot about the stringer but ended up keeping it on the transom where the old Holley was mounted. It would keep the rigging a bit easier and use some of the old screw holes that looked hideous with nothing there lol 😂 Now I know it’s not the best but my return from the Rail regulator went back to the filter head so everything kinda stayed in place as before. I also worried about vibration and cracking the gel but The pump manufacturer let me know that the vibration is minimal which once I got the system buttoned up I felt the pump and it was very still
 

Dcb.blake

Well-Known Member
Joined
Jul 25, 2021
Messages
499
Reaction score
713
FC5C6624-B325-492B-B9E1-A94788AA14F6.jpeg
5750F8BB-8CC9-4D06-B7D0-F36C8FE7A395.jpeg
9871D6E4-BF48-4A4B-A602-B858A9F3DAD7.jpeg
FINALLY the intake and throttle body made it in. The wait was 1000% worth the wait. Wilson manifold out of Florida did the work and provided the 4500 flange throttle body and tps. Very nice work from the welds to the billet parts. I also ordered some of these 8AN billet clamps that I found online vs using the rubber P clamps. Just got some stainless countersunk screws that are the correct length for the transom. My worst fear is punching through it, what I didn’t realize is how thick the transom on these F26s are 😳. At this point I had most of the wiring in place and the computer mounted. I opted to put the counter to the engine bay side of the rear seat base. That would allow me to run the main harness up the stringer and keep it as hidden as possible. I wanted all my connections fuel and electrical wise to come from behind the engine so I could run the main harness down the stringer then connect the batteries on the way and come up behind the manifold.
A88A210E-C838-4CC3-B11E-F998AFFFB4C4.jpeg
A7AA5796-EF0F-49ED-9C2C-9D255EED89B7.jpeg
slapped the intake on making sure to use silicone on the bolts and gasket for safe measure. Started the wiring process. Since I decided to run to the back of the motor I had to cut up the Holley harness to extend some wires so I figured why not shorten some of the wires I knew I could. So cut and repinned the connectors accordingly. Also put the AN lines on the rain along with the regulator. Mounted the exhaust back with the o2 bung which I wish wasn’t so just in the way a noticeable.I’ve been tempted to remove it an run closed loop but the thing is running so good it’s hard to change anything!
 

Dcb.blake

Well-Known Member
Joined
Jul 25, 2021
Messages
499
Reaction score
713
8B95E67C-1558-4248-898C-B05756896F9C.jpeg

I was getting close to finishing and a great deal on a prop I’ve been wanting to try came up so I bought that from a local member. Wanted to try and get more rpm’s out of it as I couldn’t pass 5k with the 28p which I think later I figured out was driver error lol 😂. The prop slipped a lot getting on plane but will work out as a great spare.
83082D0C-4F12-4453-B2DD-498DA6BCB65A.png
More of a recent picture as I didn’t get any pics after the prior point. But got all my small clamps in and the small wiring done. I plan to switch all the rubber lines from the tank to AN this winter. Not sure if I should match the 8 AN I went with on the pressure side or go to 10 AN? Maybe somebody can give me advice. Also plan to switch all the rest of the other red and blue water and oil lines to black fittings and new lines probably. At this point I was done and ready for my first fire. Called up Brian and he told me how to hook up the Holley Hp system and which interface to get for the computer. He sent me a base tune I loaded it up and it was time for first fire.

Set the fuel psi to the desired psi put the timing close to a reasonable spot and fired it up! I was impressed there was no long cranking it was almost immediate! Checked everything for leaks and it was good to go. Called Brian and he told me where he wanted the timing set at so I set that and he fine tuned the idle and fuel tables all remotely real time which to me is pretty badass. Got everything set where he wanted it then explained how to go through the learn process for the fuel tables and how to data log so I could email it to him and he could look through it.
 

Dcb.blake

Well-Known Member
Joined
Jul 25, 2021
Messages
499
Reaction score
713
E748333F-14C7-40E9-9550-8B51136AC7AD.jpeg
DC2CCB12-8C3C-4D10-823D-EC5FCE0179AF.jpeg
First time out was a success other than I realized I need more lights. No leaks or funky things going on. Everything was smooth and after I got the learn table done in the various rpm ranges it was perfect. Only complaint was when it dropped in gear in the water the rpm drop would almost kill the engine. The more I shifted and used it the better it got. The lakes pretty small so I didn’t really get a chance to fully open it up but I could feel more power just in the mid range. Most important hardly any soot on the back💰😂 So that was pretty much the end of the EFI conversion for now. Eventually I’ll re do the fuel lines and fittings.
5DC03AAC-1E40-4C5B-A360-AD2272BD2429.jpeg
9B7DB5B7-DCBC-426B-956D-E24347399285.jpeg
Polished up a few parts on the motor. The valve covers didn’t come out as good as I wanted but for what they were I can’t complain. Did the PS pulley and sea pump pulley as that’s all I had time for 😐 had to sand the pullys I think they were anodized or had some sort of clear over them. Very time consuming
1E921D36-2BB3-4D9C-A968-7508FB4C41CE.jpeg
81D034CB-1671-4285-8FBE-E2C88CAAEAF0.jpeg
Added some of those fancy hatch ram sleeves which was a funny process to get. Ordered 2 25” sleeves because my rams measured I think 19 1/8” on the cylinder section so the two options from EMI are 18” and 25” so I just ordered the longer ones and play it safe I’ll cut them down easy enough. After weeks the package showed up, well instead of sleeves I got a brand new 25” hatch ram with the two quick pins which I did order. Contacted emi and long story short let me keep the new ram and sent the correct stuff. Cut them down and a bit of silicone as they advised and shinyyy. Need to seriously do something about that air filter I just haven’t found any that I like yet any suggestions?
55F0822C-92F1-459F-BDF0-489B117135CD.jpeg
The stereo wasn’t cutting it, ALOT better than prior but the problem was I had no speakers coming at us from the front. Solved that problem real quick😂 I made a round bar with plates on both ends and screwed the plates to the bulk heads then hung the speakers to the bar. Went as far to the top as I could because I do store some stuff under the bow so I wanted to sneak underneath if I had to. My amp setup is not pushing these guys to fill potential but they are stupid loud and solved my issue. I couldn’t bring myself to mount them on top of the glass and absolutely ruin the lines of the boat. This way they are hidden and if you are standing in the boat you don’t even notice them at all.

That’s pretty much where I am today. I have a few small things in mind that I would like to do along with some big things. I really enjoy the boat other than getting on and off the sucker when it’s on the trailer and I forget to hike a tool up the first time with me 😂
 

mattyc

Well-Known Member
Joined
Sep 9, 2017
Messages
496
Reaction score
604
You've made a lot of progress! How long have you had the boat now? You obviously have a broad skillset, what do you do for work? I'll be honest, I was disappointed when you started talking efi conversion, but I like what you've done, very cool. Do you have any photos of the air fuel bung? Did you do the bung? I have a suggestion for the air cleaner, I like the look of the oval air cleaner / flame arrestors. Eddie has a nice air filter version but it's not really a flame arrestor. I think gaffrig has some nice looking flame arrestors
@Dcb.blake
 

Dcb.blake

Well-Known Member
Joined
Jul 25, 2021
Messages
499
Reaction score
713
You've made a lot of progress! How long have you had the boat now? You obviously have a broad skillset, what do you do for work? I'll be honest, I was disappointed when you started talking efi conversion, but I like what you've done, very cool. Do you have any photos of the air fuel bung? Did you do the bung? I have a suggestion for the air cleaner, I like the look of the oval air cleaner / flame arrestors. Eddie has a nice air filter version but it's not really a flame arrestor. I think gaffrig has some nice looking flame arrestors
@Dcb.blake
Yea I kinda wanted to keep the clean carb look just simple and not too much going on. For work I sort of farm, and mechanic type of deal. I do a lot of hydraulic work as well as general repairs to keep equipment going. I didn’t do the bung because I’m not the best tig welder lol 😂 basically I had the guy drill through both walls then pinch the two together weld those two together then he welded the bung in. Fingers crossed it’s been good so far. I’ve been looking at those EMI ones as well and that’s what I’ll end up going with most likely. I got the boat last April
 

50onRED

The Metal Lab
Joined
Jun 21, 2014
Messages
395
Reaction score
338
View attachment 1148726 View attachment 1148727 My summer started slowing down so I figured it would be a good time to run the lash. Found some good old school crane rockers. People say they crack but after inspection I didn’t see any. Found out the lifters were solid roller. It was a bit tricky because I didn’t know who built the motor and had no cam card. So with enough research I found a safe range so to say to set the lash. I tried to check the previous lash but it was all over the place. Not to consistent so I went with the internet. If I remember right i went with .014” to account for when it heated up. It would be too hard to attempt and do it hot. Been running great since. Sounds like a high hp sewing machine 😂 View attachment 1148732 View attachment 1148731 all back together and cleaned up. Tried to research tbt head numbers but couldn’t find too too much info at all
Call Brodix, they are awesome and will give you all the info about your heads.
 

Dcb.blake

Well-Known Member
Joined
Jul 25, 2021
Messages
499
Reaction score
713
@50onRED took your advice and holy shit I’m very impressed with Brodix. I guess I’m just not used to dealing with a manufacturer employees that enjoy what they do lol. Called em up and let me know exactly what I have. BB2 plus cnc 26 degree heads. They are older WT casting, also informed me that they work well with low boost…..
 

Dcb.blake

Well-Known Member
Joined
Jul 25, 2021
Messages
499
Reaction score
713
288879B7-485D-42B6-BAA4-008A97C02559.jpeg
Damn Jack gear said no mas, didn’t realize how hard it was to find new gear sets. No way in hell I’m going to cut out my Jack just for a gear set. I think it’s just the standard Fulton gearset? I tried a bulldog but it wouldn’t work without a bit of modification….
26B9AF29-ECC0-4719-AB74-29E5B791EAA4.jpeg
929FCC89-83E1-4B17-B848-85AB1987EA6C.png
I want to replace the basic but very functional toggle switches with the push button style. Found these on the great Amazon, the quality is great surprisingly ip67 rating and all. After I ordered I realized it’s only a 5a switch, I’ll have to look but I’m pretty sure my 3 bilge pumps will pull more than that. I’m sure it would work but it wouldn’t be correct and don’t want to risk a fire. So the search continues, the one I got has a purple ring light I think I’m going to have to go with a white ring light to get a switch with a higher amp rating. Might work out because my gauges have the white/led color light in them so they won’t be completely different.
 

50onRED

The Metal Lab
Joined
Jun 21, 2014
Messages
395
Reaction score
338
View attachment 1150799 Damn Jack gear said no mas, didn’t realize how hard it was to find new gear sets. No way in hell I’m going to cut out my Jack just for a gear set. I think it’s just the standard Fulton gearset? I tried a bulldog but it wouldn’t work without a bit of modification…. View attachment 1150798 View attachment 1150804 I want to replace the basic but very functional toggle switches with the push button style. Found these on the great Amazon, the quality is great surprisingly ip67 rating and all. After I ordered I realized it’s only a 5a switch, I’ll have to look but I’m pretty sure my 3 bilge pumps will pull more than that. I’m sure it would work but it wouldn’t be correct and don’t want to risk a fire. So the search continues, the one I got has a purple ring light I think I’m going to have to go with a white ring light to get a switch with a higher amp rating. Might work out because my gauges have the white/led color light in them so they won’t be completely different.
You can always use a small 12v relay to keep those switches and still power anything on the boat. Those little relays are a fine a dozen and extremely easy to wire up.
 

Dcb.blake

Well-Known Member
Joined
Jul 25, 2021
Messages
499
Reaction score
713
C14D88B8-348B-48F8-A4EA-16BE6B53AB53.jpeg
6F564D66-69A9-4695-9110-B3E730AD4D5D.jpeg

Had a bit of free time so I figured why not start yanking the old gauges out and get an idea on the wiring what I’m going to do. After looking things over it shouldn’t be too bad at all. I think I’m going to roll with some of the split loom that’s the mesh type stuff that I used in the engine bay vs 1/2 million zip ties. I think I’m going to carry it all the way to where it goes under the gunnel with a couple different sizes of loom. Always kinda irratated me being able to see it. That and I noticed my fuse block needs to be dressed up a bit or possibly relocated. Thinking maybe a sealed box for now. Also when I got the gauges I went from a Manuel fuel psi gauge which was pretty low psi but still sketchy having fuel ram all the way to the wheel. So I do have to run a new wire for the sensor. Not a big deal just gotta rip the interior out. I plan to clean up some of the wires that I don’t need while I’m there. All in all as it sits it’s pretty clean and very functional.
529F4F4C-F0F7-4D88-83FD-AF42C84519CB.jpeg
Really like the colors scheme, happy I didn’t have the option to do what I first had in mind. Just waiting now on my oddball 4 5/8 hole saw to come in then we can pop some holes. Also still waiting on the bezels from Livorsi as well as the time card for the trim. Bezels should be here soon I hope 🤞🏽
 

02HoWaRd26

DCBroke
Joined
Dec 19, 2007
Messages
12,219
Reaction score
29,084
It’s winter, let’s see what you’ve been up to. Or maybe just get your ass out from under that cherry picker and back on the boat.
 

Dcb.blake

Well-Known Member
Joined
Jul 25, 2021
Messages
499
Reaction score
713
It’s winter, let’s see what you’ve been up to. Or maybe just get your ass out from under that cherry picker and back on the boat.
I haven’t had much progress at all. Hoping this weekend possibly fingers crossed 🤞🏽
 

Dcb.blake

Well-Known Member
Joined
Jul 25, 2021
Messages
499
Reaction score
713
The little progress that I have done is the gauge wiring. Got all the gauges in there except the bigger ones. Wiring is coming along trying to keep it clean and honor the DCB name 😂😂

Pretty nice to be able to lay down and do it above rather than some awkward position. Anyways here’s some pictures. Got all the connections crimped and made sure not to forget the 3M heat shrink as I normally would lol! In my normal wiring I use just connectors that have all the heat shrink built in but they become pretty bulky and I don’t think would be as clean looking. I might end up using some of the black braided looking loom like I used in the bilge area. Really like the clean look of it. Haven’t zip tied or shrank the shrink yet just wanted to confirm everything worked properly before it got sealed up.
3EDE0170-1780-4979-A9EB-153CED986291.jpeg
AD7323FC-5871-46E5-B7E4-03EE7AAA3317.jpeg
9E5CF7C6-BCC9-4A8A-9E3C-C60571D89AB9.jpeg
 

02HoWaRd26

DCBroke
Joined
Dec 19, 2007
Messages
12,219
Reaction score
29,084
The little progress that I have done is the gauge wiring. Got all the gauges in there except the bigger ones. Wiring is coming along trying to keep it clean and honor the DCB name 😂😂

Pretty nice to be able to lay down and do it above rather than some awkward position. Anyways here’s some pictures. Got all the connections crimped and made sure not to forget the 3M heat shrink as I normally would lol! In my normal wiring I use just connectors that have all the heat shrink built in but they become pretty bulky and I don’t think would be as clean looking. I might end up using some of the black braided looking loom like I used in the bilge area. Really like the clean look of it. Haven’t zip tied or shrank the shrink yet just wanted to confirm everything worked properly before it got sealed up. View attachment 1178931 View attachment 1178932 View attachment 1178933
Good god that white illumination behind the purple is PERFECT! Did you ever get the card back?
 

Dcb.blake

Well-Known Member
Joined
Jul 25, 2021
Messages
499
Reaction score
713
Here’s a couple pics from the poker run at the delta. Super fun time would recommend it just to watch. Watched all the big boys fly by under the bridge then toured the delta as it was my first time then met them back at the docs. Pretty neat deal and relatively local to me.
450BADA3-FC82-46D6-8903-B19033A60029.jpeg
23DEAB2E-8727-48F4-A5BB-1EB8D835BA01.jpeg
344CF5AA-4E08-43AB-B909-6052CFBE64A9.jpeg
DB702769-15B6-4AED-B224-B4CC83FFF4E0.jpeg
C8B410A4-1A5C-4AD7-BD7C-8C101CDF3E10.jpeg
 

Dcb.blake

Well-Known Member
Joined
Jul 25, 2021
Messages
499
Reaction score
713
Good god that white illumination behind the purple is PERFECT! Did you ever get the card back?
Yea it turned out perfect. I was going to do a purple LED but the white looks tits. Yea got the card somewhere with the new trim and all!
 

ToMorrow44

27 Advantage TCM 800efi
Joined
Sep 2, 2008
Messages
2,811
Reaction score
3,088
Yea it turned out perfect. I was going to do a purple LED but the white looks tits. Yea got the card somewhere with the new trim and all!
I redid my gauges a few years ago with blue backlighting and the shit was blinding at night lol. Hopefully that’s not the case with the white backlighting. Definitely looks good tho 👍🏻
8038F6EA-ADB9-44E7-8F46-F6CAF78C26A3.jpeg
 

02HoWaRd26

DCBroke
Joined
Dec 19, 2007
Messages
12,219
Reaction score
29,084
I redid my gauges a few years ago with blue backlighting and the shit was blinding at night lol. Hopefully that’s not the case with the white backlighting. Definitely looks good tho 👍🏻 View attachment 1178983
The blue didn’t bother me at all in my last boat, however the green this time and canopy’s it’s a bitch. I did all white and it was way easier on the eyes but didn’t look as sexy so i went back to green and I toss a towel over them while out after dark.
 

ToMorrow44

27 Advantage TCM 800efi
Joined
Sep 2, 2008
Messages
2,811
Reaction score
3,088
The blue didn’t bother me at all in my last boat, however the green this time and canopy’s it’s a bitch. I did all white and it was way easier on the eyes but didn’t look as sexy so i went back to green and I toss a towel over them while out after dark.
Yeah I had to do the same thing. I know Autometer sells a dimmer that works with those LED lights but I never tried it. Plus it would take a bunch more wiring.
 

Teague_JR

Well-Known Member
Joined
Jun 7, 2018
Messages
281
Reaction score
836
Yeah I had to do the same thing. I know Autometer sells a dimmer that works with those LED lights but I never tried it. Plus it would take a bunch more wiring.
I did autometer pillar gauges in a dodge I had (I was younger alright)

Used that autometer dimmer, worked bitchin... FYI
 

02HoWaRd26

DCBroke
Joined
Dec 19, 2007
Messages
12,219
Reaction score
29,084
So let’s see the gauge install….. spring is coming bud.
 

Dcb.blake

Well-Known Member
Joined
Jul 25, 2021
Messages
499
Reaction score
713
Well started back up on the 6 month gauge install 😂. Dropped it down and realized even with a cover it’s FILTHY, minor details lol. This year it will be professionally done as I like to have it done every 2 years with a machine of it needs it. If not leave it alone!
84C43295-01A8-4ABD-89BB-B17AE4851C5A.jpeg
415E6116-346A-4ABA-8EE9-B7BC24E27020.jpeg
Got it all down and went into the mess… empty beers cans, cut wires, lights and switches strung out, sounds about right 😂
9F0FED15-374B-482C-A889-529C68D0C326.jpeg
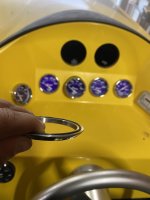
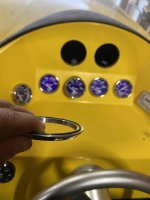
Last I left off I got some of the wiring loosely in there with the new deutsch connectors for the gauges installed. Popped the new gauges in with out bezels. Didn’t have much time so I did some simple stuff. Just installed the o rings on the bezels which I’m glad I was able to round some up with o rings so my gel dosent get completely destroyed.
05511E88-EAA4-4BFB-8043-23DDF54DFF6E.jpeg
3D04A94B-63CE-48D2-BB22-28FDAB37F268.jpeg
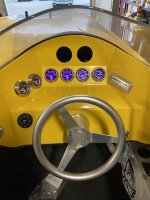
Still undecided on the bezels. I thought I would like them more. Not too sold just yet. I think a new steering wheel will make them pop as I wanted a new one anyways. Good excuse to get one now! TBD on the bezels.
C824A7A4-F36B-4514-BE33-32103381858E.jpeg
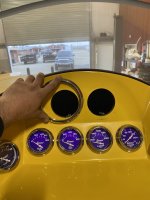
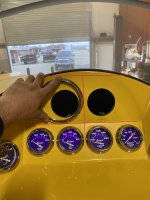
Well I was hoping to be able to just mark the center line of the existing hole and use the inside edge as a guide of where to put the hole saw. Not going to be the case because of the face of the dash. The gauge would be pushed too far down off the plane if I did that. So that being said back to the drawing board. Other than degreeing the current holes based off the center lines I’m not sure how else to mark the holes.Plan to hit it hard this weekend and knock the holes out.
 

Attachments

  • EE1B4EBA-D948-4742-BBF3-6C03F5E03886.jpeg
    EE1B4EBA-D948-4742-BBF3-6C03F5E03886.jpeg
    363.6 KB · Views: 41
  • ECFF9534-0D08-4589-A4B7-E1DB6452083B.jpeg
    ECFF9534-0D08-4589-A4B7-E1DB6452083B.jpeg
    707.3 KB · Views: 53
  • 2029169F-0000-4D40-B43A-ADED08388F7C.jpeg
    2029169F-0000-4D40-B43A-ADED08388F7C.jpeg
    457.4 KB · Views: 46
  • CD02D0A4-614C-4409-8DE5-FB928700087A.jpeg
    CD02D0A4-614C-4409-8DE5-FB928700087A.jpeg
    633.6 KB · Views: 47
  • 03A1E8FA-C82C-490D-AA8C-C0C8E59D2C92.jpeg
    03A1E8FA-C82C-490D-AA8C-C0C8E59D2C92.jpeg
    464.5 KB · Views: 48
  • D8C6B192-FCCC-4950-BAAB-AC9A5E1E7FF4.jpeg
    D8C6B192-FCCC-4950-BAAB-AC9A5E1E7FF4.jpeg
    363.6 KB · Views: 49

02HoWaRd26

DCBroke
Joined
Dec 19, 2007
Messages
12,219
Reaction score
29,084
They match so perfectly, and i personally like the bezels gives more depth on the dash.
 

Bobby_329

Well-Known Member
Joined
Apr 9, 2020
Messages
177
Reaction score
492
Well started back up on the 6 month gauge install 😂. Dropped it down and realized even with a cover it’s FILTHY, minor details lol. This year it will be professionally done as I like to have it done every 2 years with a machine of it needs it. If not leave it alone! View attachment 1204271 View attachment 1204272 Got it all down and went into the mess… empty beers cans, cut wires, lights and switches strung out, sounds about right 😂 View attachment 1204273 Last I left off I got some of the wiring loosely in there with the new deutsch connectors for the gauges installed. Popped the new gauges in with out bezels. Didn’t have much time so I did some simple stuff. Just installed the o rings on the bezels which I’m glad I was able to round some up with o rings so my gel dosent get completely destroyed. View attachment 1204287 View attachment 1204289 Still undecided on the bezels. I thought I would like them more. Not too sold just yet. I think a new steering wheel will make them pop as I wanted a new one anyways. Good excuse to get one now! TBD on the bezels. View attachment 1204288 Well I was hoping to be able to just mark the center line of the existing hole and use the inside edge as a guide of where to put the hole saw. Not going to be the case because of the face of the dash. The gauge would be pushed too far down off the plane if I did that. So that being said back to the drawing board. Other than degreeing the current holes based off the center lines I’m not sure how else to mark the holes.Plan to hit it hard this weekend and knock the holes out.
Mark center lines and put a piece of plywood over it with a 2x behind sandwiching the fiberglass layout and drill, too hard to be accurate with a hole saw without something for the center bit. I would make that 1/4"? gap between the lower bezzels match the upper.
 

Attachments

  • 2029169F-0000-4D40-B43A-ADED08388F7C.jpeg
    2029169F-0000-4D40-B43A-ADED08388F7C.jpeg
    681.6 KB · Views: 54
Last edited:
Top