WYRD
Well-Known Member
- Joined
- Sep 25, 2007
- Messages
- 4,303
- Reaction score
- 9,382
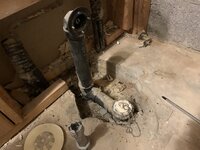
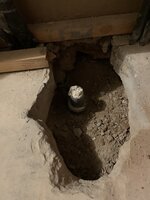
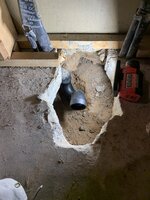
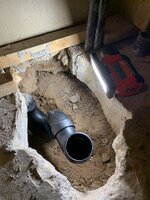
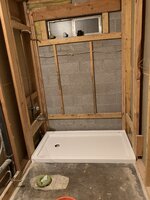
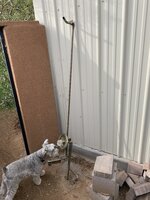
Working on changing a fiberglass tub/shower to a full stand-up. Took out the tub and there's this large hole in the slab where the drain is. Is that normal?
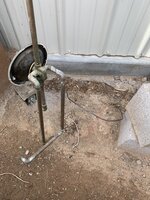
Also for the mix-it valve are these Universal or do I have to stick with the brand that was put in there originally. It's a Moen but would we be able to use other brands so I don't have to swap the valve out to change the handle type?
Last edited:
 I wouldn't say that's normal.
 Before you do any tile work, you'll be checking your valve anyway. As long as you buy good quality copper tubing, and you debur every cut, and clean every joint, that repair should outlive us both. It's nothing to be afraid of tackling.
 Just like electrical work, take your time, plan everything out and the end results will be a solid install and a newly learned skill.
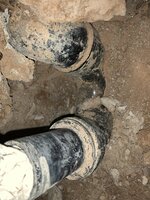
  . As said above the drain looks to be headed in the direction of where you will want to center the new shower drain and also is 2” so you would need to install a new Ptrap “down stream” under the new shower drain. This isn’t by chance in Havasu is it?
 . They pretty much told the homeowner to pound sand, was it because the water in Havasu is so bad, or because in the summer the attic space gets into the 140*+ range, it’s anyones guess. All I know is I’ve replaced them in two separate homes for the same reasons, the plastic collar that holds the pipe in place fails and out comes the water, and for that reason I’m out
  I have faith in you