WELCOME TO RIVER DAVES PLACE

New member, old boat

AngrySailor

Well-Known Member
Joined
Dec 1, 2024
Messages
56
Reaction score
79
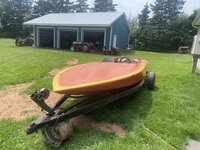
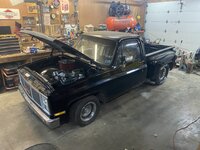
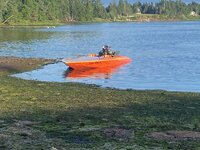
Hey guys first post checking in. Working on my early 70’s Hondo true flat which I’ve owned for near 20 years now but only hit the water again this past summer after work/moving/life put a hold on things for near 15 years... I’m making some big changes so figured I’d sign up and absorb some advice/knowledge.

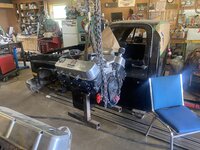
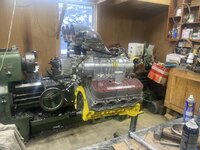
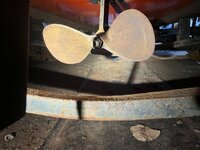
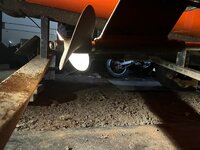
The boat was gutted and new floors/stringers installed back in the early 2000’s, I rigged her up back then from a bare hull with an 800hp 489 BBC. She’s a 10* boat, engine forward (two seater) and has an 11 1/4” 15p steel two blade prop with 18% gears in the casale split case box.

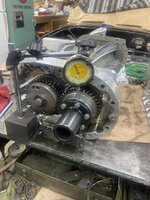
The V-drive is a 12* box so the engine was rigged to compensate however it looked bad. I ran it back in the day like this but hated the look. Obviously a 10* box is the solution but this past summer I dropped the engine level and gave her a shot with a mild 454. I noticed no vibration or issues but she would only haul 6300rpm with that engine.

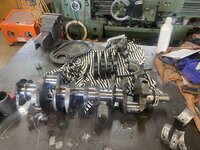
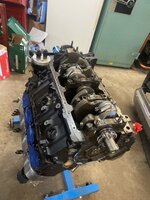
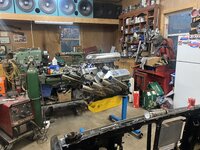
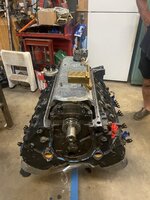
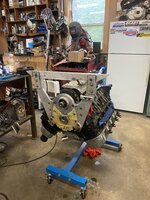
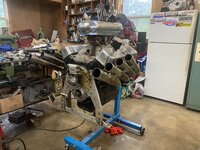
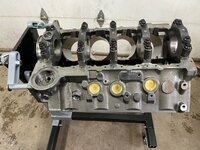
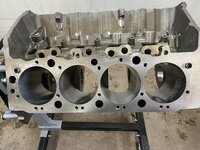
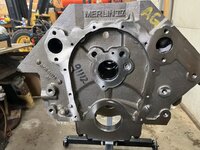
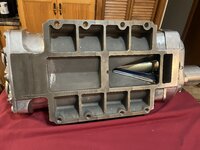
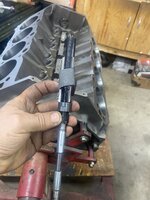
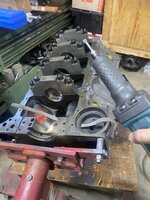
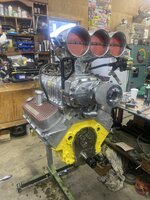
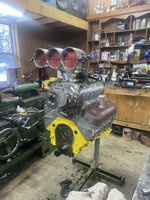
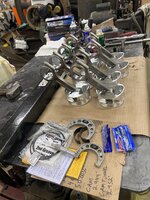
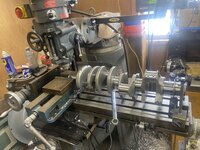
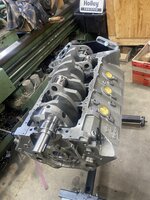
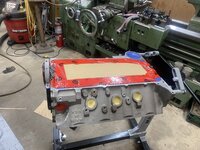
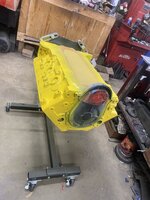
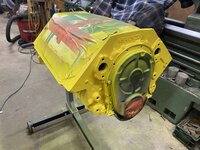
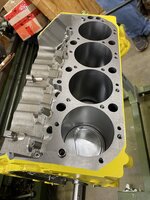
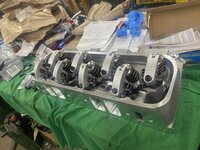
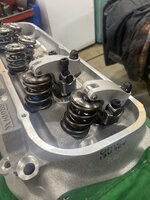
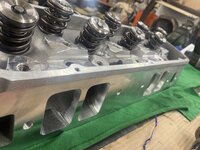
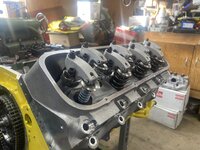
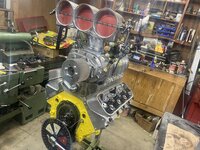
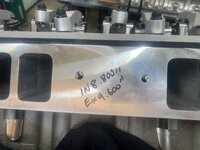
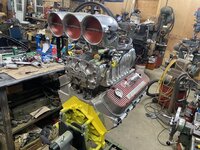
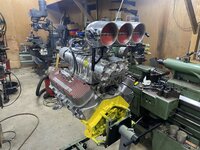
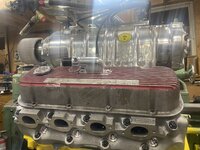
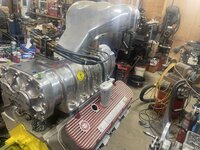
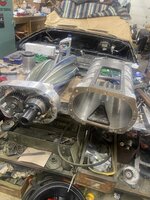
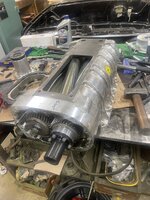
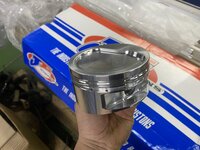
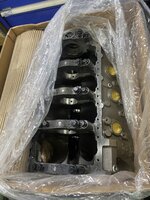
I’m currently in the process of building a blown/injected gas 598 BBC so I figure I need to change things up prop and/or gear wise as the 489 would blow the prop to 7200rpm on the hit. I’ve been in touch with JJ at Beaver Fab who I see posts here occasionally and he’s been very helpful. I’m planning to source some gears and a prop release kit from Beaver Fab this winter which now has me wondering if I should source parts for a 10* box or just roll with the 12* as it doesn’t seem to be an issue. Also is it just a matter of changing the case halves and using my internals or are the guts different? (gears are obviously different). I see some empty case halves on eBay occasionally...

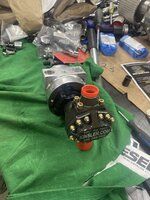
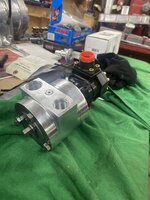
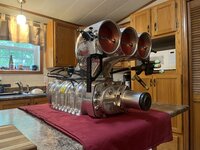
I have no idea who’s prop I have but I discussed a swap to 25% or 29% gears with JJ and testing with my current prop. That’s a good cost effective option however I’m not against changing the prop either. I was considering the Ron Hill 11 1/4x16p as an option and am just looking for any input from those running similar rigs. It’s my understanding that prop rpm works better than increased pitch? My main concern is holding the 598 below 7400rpm on the whack. It should be a solid 1000+hp with a 14-71 and Enderle injection.

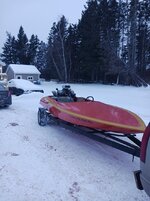
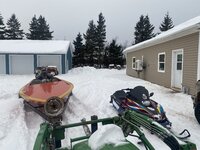
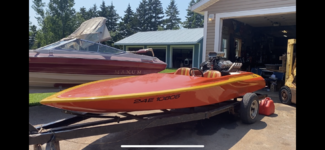
This is a Non competition boat but will see lots of 1/4 mile hits and some river cruising usually at 60+ mph, I am more interested in being 100+mph capable than cruising efficiency so a three blade doesn’t seem like a good option. I have NO vibration issues with the boat in either previous engine combination or angle at the moment.

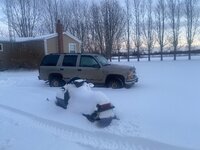
Just putting the feelers out for possible parts and suggestions. I’ll see if I can figure out how to post a few pics. (Don’t make fun of my POS trailer... Its on the list to fix and tandem axle swap. I had to cut it apart and shoved the boat and trailer into a 26’ UHAUL van then tetrised half my shop stuff in with it. Hauled it 1200miles to its new home)...

Thanks guys
 

Attachments

  • F2D5C51A-8F4A-450A-9BCA-E666379B35F5.jpeg
    F2D5C51A-8F4A-450A-9BCA-E666379B35F5.jpeg
    2.3 MB · Views: 0
  • AD8B0E65-CF46-45EA-ADCB-7E17EB888178.jpeg
    AD8B0E65-CF46-45EA-ADCB-7E17EB888178.jpeg
    326.4 KB · Views: 0
  • AB81781D-AA2D-4606-99E0-E5AD22899CE2.jpeg
    AB81781D-AA2D-4606-99E0-E5AD22899CE2.jpeg
    2.7 MB · Views: 0
  • 6AB99E67-EF4F-4D0C-8D5C-59AC372206F9.jpeg
    6AB99E67-EF4F-4D0C-8D5C-59AC372206F9.jpeg
    2.2 MB · Views: 0
  • A4B7109E-33CD-419B-8EAE-33174AE574C6.png
    A4B7109E-33CD-419B-8EAE-33174AE574C6.png
    5.1 MB · Views: 0
  • 36EB2CD0-F037-402F-96D6-B5F226CC9F3C.jpeg
    36EB2CD0-F037-402F-96D6-B5F226CC9F3C.jpeg
    2.9 MB · Views: 0
  • 5A2F8905-298F-4470-9D4D-7A20BB788D7C.jpeg
    5A2F8905-298F-4470-9D4D-7A20BB788D7C.jpeg
    195 KB · Views: 0

AngrySailor

Well-Known Member
Joined
Dec 1, 2024
Messages
56
Reaction score
79
Thanks guys. It sure is good to have dusted the old girl off and pulled it out of storage this past summer. It’s been far too long high and dry. The mild 454 was pieced together with all my left over parts and it’s taken all the abuse I can throw at it but it needs more power. The boat trimmed out way nicer with the 489, I could actually get on the up pedal and free it up, the mild 454 can’t carry the bow and you’re always on the down pedal to keep the porpoise out of it. I think i got the lack of power on the way to being sorted though... some pics fresh out of storage bird poop and all, also the “junk” ‘54 getting the marine treatment after spending the previous summer in my square body.
 

Attachments

  • 9F3E15EE-50F2-470E-A7C7-2808DB77B906.jpeg
    9F3E15EE-50F2-470E-A7C7-2808DB77B906.jpeg
    1.3 MB · Views: 0
  • C3045266-2EF9-400A-AB23-336A7A39561C.jpeg
    C3045266-2EF9-400A-AB23-336A7A39561C.jpeg
    2.7 MB · Views: 0
  • 1731F462-8E4C-4A36-B5C3-259168AB6091.jpeg
    1731F462-8E4C-4A36-B5C3-259168AB6091.jpeg
    3 MB · Views: 0
  • 93A09F02-F9D2-4C39-8C1B-7B2481ED7D18.jpeg
    93A09F02-F9D2-4C39-8C1B-7B2481ED7D18.jpeg
    1.8 MB · Views: 0
  • BC3A43A8-8DD9-48A7-A73C-CA17D6311047.jpeg
    BC3A43A8-8DD9-48A7-A73C-CA17D6311047.jpeg
    3 MB · Views: 0
  • 5CBCCA10-C033-4D6F-903E-55CCFD8361ED.jpeg
    5CBCCA10-C033-4D6F-903E-55CCFD8361ED.jpeg
    2.2 MB · Views: 0
  • 1994DEDC-2C79-4D49-BF64-65FFCBEDC418.jpeg
    1994DEDC-2C79-4D49-BF64-65FFCBEDC418.jpeg
    2.2 MB · Views: 0
  • 6E889736-CED9-46C7-B0FE-5920DD66C4E4.jpeg
    6E889736-CED9-46C7-B0FE-5920DD66C4E4.jpeg
    2.8 MB · Views: 0
  • 3E9DEA1D-3797-4A8A-8DE6-C46A50AF6023.jpeg
    3E9DEA1D-3797-4A8A-8DE6-C46A50AF6023.jpeg
    2.8 MB · Views: 0
Last edited:

AngrySailor

Well-Known Member
Joined
Dec 1, 2024
Messages
56
Reaction score
79
Fuel system question for the Mechanical Injected guys... Fuel tank placement/surge tanks... How are you rigging your fuel systems? I have two 10gal tanks going side mounted using the original fill locations however the mechanical injection pump wants no suction head and the shortest possible inlet line. I was planning two small surge tanks mounted vertically either side of the injection pump, one which the injection pump draws from and another the injection system returns to, both connected a their bottoms by a large balance tube with a stand pipe in the suction side tank to keep any air crossing over well above the mechanical pumps suction. This would keep any return fuel aeration away from the pump suction. The return tank will be fed from the storage tanks with a 150gph electric pump, with the overflow returning to the storage tanks out of the tank which the mechanical pump draws from, I was planning to use a discriminator valve in the return tank to allow vapor to vent back to the storage tanks which when closed (no vapor present) would also cause a positive flow from the return tank to the suction tank at 150gph minus engine consumpsion. This would give the mechanical pump appoxamately 6" positive head pressure depending on how high I mount the surge tanks. Am I over complicating this? I just dont see many high mounted rear tanks feeding injection pumps and dont really care for that look either...
 

AngrySailor

Well-Known Member
Joined
Dec 1, 2024
Messages
56
Reaction score
79
Block for the 598 made a long trip but finally landed at my shop.
 

Attachments

  • 5B0FF78D-909E-40DA-A422-9DF862BEF7CA.jpeg
    5B0FF78D-909E-40DA-A422-9DF862BEF7CA.jpeg
    2.1 MB · Views: 0
  • 64EF8604-588E-44DA-9CD4-7F3BCBDAA3B7.jpeg
    64EF8604-588E-44DA-9CD4-7F3BCBDAA3B7.jpeg
    2.7 MB · Views: 0
  • 5E100BD5-6BDA-463D-B33D-79D16D483885.jpeg
    5E100BD5-6BDA-463D-B33D-79D16D483885.jpeg
    2.6 MB · Views: 0
  • 72E62CCB-9E3E-4016-85BB-F0AEBD99E6E6.jpeg
    72E62CCB-9E3E-4016-85BB-F0AEBD99E6E6.jpeg
    280.4 KB · Views: 0
  • 1DA99D8C-C860-4F57-9FAD-E035BCDD811B.jpeg
    1DA99D8C-C860-4F57-9FAD-E035BCDD811B.jpeg
    279.7 KB · Views: 0
  • 3EC965F6-E9F4-4045-9C31-1D0D82B73D27.jpeg
    3EC965F6-E9F4-4045-9C31-1D0D82B73D27.jpeg
    409 KB · Views: 0
  • 65F518D7-367B-48D5-8C00-FBEA7E6ECA85.jpeg
    65F518D7-367B-48D5-8C00-FBEA7E6ECA85.jpeg
    292.5 KB · Views: 0

@BigRedBryan13

Well-Known Member
Joined
Apr 20, 2024
Messages
115
Reaction score
517
Fuel system question for the Mechanical Injected guys... Fuel tank placement/surge tanks... How are you rigging your fuel systems? I have two 10gal tanks going side mounted using the original fill locations however the mechanical injection pump wants no suction head and the shortest possible inlet line. I was planning two small surge tanks mounted vertically either side of the injection pump, one which the injection pump draws from and another the injection system returns to, both connected a their bottoms by a large balance tube with a stand pipe in the suction side tank to keep any air crossing over well above the mechanical pumps suction. This would keep any return fuel aeration away from the pump suction. The return tank will be fed from the storage tanks with a 150gph electric pump, with the overflow returning to the storage tanks out of the tank which the mechanical pump draws from, I was planning to use a discriminator valve in the return tank to allow vapor to vent back to the storage tanks which when closed (no vapor present) would also cause a positive flow from the return tank to the suction tank at 150gph minus engine consumpsion. This would give the mechanical pump appoxamately 6" positive head pressure depending on how high I mount the surge tanks. Am I over complicating this? I just dont see many high mounted rear tanks feeding injection pumps and dont really care for that look either...
On my old jet I had 2 11 gallon saddle tanks that fend into a 2.5 gallon bullet tank, the bullet tank had a carb bowl, which never allowed it to overfill. It was filled by a clay smith mechanical pump. The bullet tank gravity fed my enderle pump. Never had an issue with the setup. It worked perfectly for many years.
 

AngrySailor

Well-Known Member
Joined
Dec 1, 2024
Messages
56
Reaction score
79
On my old jet I had 2 11 gallon saddle tanks that fend into a 2.5 gallon bullet tank, the bullet tank had a carb bowl, which never allowed it to overfill. It was filled by a clay smith mechanical pump. The bullet tank gravity fed my enderle pump. Never had an issue with the setup. It worked perfectly for many years.
I’ve heard of this working but Kinsler specifically poo-poo’d any thought of that set up...
 

AngrySailor

Well-Known Member
Joined
Dec 1, 2024
Messages
56
Reaction score
79
Spoke with Kinsler this morning to check my parts order and they said the Holley float bowls can work in lower flow/smaller pump systems, they didn’t feel it would work in my application. I’m curious how the BGF/BAF systems are set up?
 

@BigRedBryan13

Well-Known Member
Joined
Apr 20, 2024
Messages
115
Reaction score
517
I'll try and find some better up close pictures, but this is how my jet was, it was on gas, my current boat is on m1, it's stupid simple the way it's set up. I'm only running 1 tank on it tho.
 

AngrySailor

Well-Known Member
Joined
Dec 1, 2024
Messages
56
Reaction score
79
I'll try and find some better up close pictures, but this is how my jet was, it was on gas, my current boat is on m1, it's stupid simple the way it's set up. I'm only running 1 tank on it tho.
That is bad azz. Thanks. You must have a big needle and seat in that bowl to flow enough fuel.
 

n2otoofast4u

Well-Known Member
Joined
Apr 7, 2015
Messages
5,979
Reaction score
12,127
The motor will only consume more fuel than your “lift” pump can pump when under full throttle. My surge tank is 2 gallons and is constantly fed with a Holley mechanical pump in the OEM location. The surge tank is constantly fed and gravity feeds back into saddle tanks. I have a valve on the inlet and outlet on the saddle tanks to control which side the fuel is returned to.

I specifically stayed away from electric lift pump for simplicity and the fact they will virtually always prime because the saddle tanks don't have baffles and the lift pump will suck air on let off as the fuel sloshes forward.
 

AngrySailor

Well-Known Member
Joined
Dec 1, 2024
Messages
56
Reaction score
79
The motor will only consume more fuel than your “lift” pump can pump when under full throttle. My surge tank is 2 gallons and is constantly fed with a Holley mechanical pump in the OEM location. The surge tank is constantly fed and gravity feeds back into saddle tanks. I have a valve on the inlet and outlet on the saddle tanks to control which side the fuel is returned to.

I specifically stayed away from electric lift pump for simplicity and the fact they will virtually always prime because the saddle tanks don't have baffles and the lift pump will suck air on let off as the fuel sloshes forward.
Thanks, My concern with running a OEM style pump without any float bowl was the diaphragm travelling full stroke as its free flowing fuel with no restriction. Maybe that’s not an issue and would definitely simplify things...
 

n2otoofast4u

Well-Known Member
Joined
Apr 7, 2015
Messages
5,979
Reaction score
12,127
Thanks, My concern with running a OEM style pump without any float bowl was the diaphragm travelling full stroke as its free flowing fuel with no restriction. Maybe that’s not an issue and would definitely simplify things...

That is not something I thought of but I suppose it could be a potential issue? Probably not something I’m going to worry much about.
 

AngrySailor

Well-Known Member
Joined
Dec 1, 2024
Messages
56
Reaction score
79
That is not something I thought of but I suppose it could be a potential issue? Probably not something I’m going to worry much about.
It’s probably not an issue, I was mostly concerned with fuel in the oil but it’s not like the side tanks are higher than the pump in case of a diaphragm issue it shouldn’t gravity feed into the oil pan, probably just keep an eye on the pumps weep hole and be fine. I would rather eliminate having an electric pump...
 

n2otoofast4u

Well-Known Member
Joined
Apr 7, 2015
Messages
5,979
Reaction score
12,127
IMG_6358.png
IMG_4347.jpeg
This is the pump I used. I had to slot the motor plate just a bit to make room. It moves a pile of fuel!
 

AngrySailor

Well-Known Member
Joined
Dec 1, 2024
Messages
56
Reaction score
79
Nice. Whats the aeromotive pump for? Just a thought while bouncing "unconventional ideas" around (I have lots of time on night watch to come up with horrible ideas)... What about using a commonly available "in tank" pump/sending unit? Not trying to be cheap at all but pic attached is cheap as dirt, has a sender for fuel gauges and i could weld a flange in each tank with a fabricated drop in sump to help with fuel slosh, TIG some AN outlet fittings on too... It would also let me select which tank I'm drawing from with the throw of a switch then just use a single 3 way valve in the return from the surge tank. If one craps the bed the other hopefully doesn't at the same time... Just a thought...

intankpump.jpg
 

n2otoofast4u

Well-Known Member
Joined
Apr 7, 2015
Messages
5,979
Reaction score
12,127
That’s an Aeromotive filter. That particular one is my final filter. I filter before the mechanical then filter again (with the one you see) after the high pressure pump (pushes through) before fuel heads to injectors.

As for the in tank deal, probably would work fine. I always try to take user error out of the equation. If they would come on with the same switch as ignition, ok. But if it’s a separate step, or separate switch to remember to turn on, I am fearful of forgetting and running the surge tank dry. It’s also adding more load to the battery and alternator. My program is very sensitive to good/clean power and I didn’t want to run a big alternator so the mechanical option was the route I took.

That all to say, I have a dipshit buddy go is building something very similar to mine and he elected to use a Holley Black electric pump as his program doesn’t have provisions for a mechanical pump on the block. I suspect it will work fine as well. You’re on the right track with the “lots of ways to skin the cat” on this deal.
 

AngrySailor

Well-Known Member
Joined
Dec 1, 2024
Messages
56
Reaction score
79
Been thinking about the in tank pump deal... it’s got some advantages, the pump is away from any bilge water, an inline pump likes to be gravity fed so the in tank pump eliminates bottom tapped tanks/dry priming issues too. Disadvantages would be cheap chinesium pumps as well as issues n2Otoofast4u mentioned about current draw and remembering the darn things. That’s probably not too much of an issue as I’m the only one in the drivers seat other than my pops when he’s feeling adventurous but I’m right with him.

I’m running a little 35a Denso alternator so power draw is a bit of an issue. I’m gearing up a water to water heat exchanger for cooling so I have an electric pump for the fresh water loop, I am looking at a belt driven raw water pump from Hardin marine for the raw water side just not sure I can slow it enough with pulley ratio to survive.
 

Attachments

  • 9669AD2C-571E-4B21-B363-50BFB5B1511F.jpeg
    9669AD2C-571E-4B21-B363-50BFB5B1511F.jpeg
    6 MB · Views: 0

AngrySailor

Well-Known Member
Joined
Dec 1, 2024
Messages
56
Reaction score
79
Run a river rat or a splitter.
Have you got any links to them? I found the mike kuhl river rat but are they still in production? Only impeller kits come up and I have no idea what a splittler is as nothing comes up when I search that. Thanks, I had considered one of these sandwich pumps but had heard there’s issues?

Edit: found them available to Performance Motorsports, This could be a real good option... Thanks
 
Last edited:

@BigRedBryan13

Well-Known Member
Joined
Apr 20, 2024
Messages
115
Reaction score
517
Have you got any links to them? I found the mike kuhl river rat but are they still in production? Only impeller kits come up and I have no idea what a splittler is as nothing comes up when I search that. Thanks, I had considered one of these sandwich pumps but had heard there’s issues?

Edit: found them available to Performance Motorsports, This could be a real good option... Thanks
20231209_155611.jpg
20231209_155615.jpg

I have one if they are out of stock.
 

AngrySailor

Well-Known Member
Joined
Dec 1, 2024
Messages
56
Reaction score
79
Thanks for the reply/pics. Now thats something I haven't seen before. Who makes that? I'm not sure that would fit well with the blower drive though? I have to get assembly started and begin mocking the drive up to see where things land I guess. I'm diggin' the River Rat for fitment though, I only have a beat up old Nicson V-505 pump with a cracked mechancial seal face and beat up impeller cover so replacing that with a river rat gets me a pump extension and pump in one shot while saving space between the blower belt. I ordered blower pulleys on the smaller side so space might be at a premium in there but thats an easy change. I'm running a drive hub, no harmonic damper, one V belt accessory pulley for the alternator, the river rat is apparently about 3 1/2" long which I think will get things clear of the blower drive nicely. I'll be starting assembly in January when I get home from working on the Great Lakes. The crankshaft is out for a balance touch up as I changed plans and went with blower pistons which were 58g lighter. Kinsler almost has my fuel system parts and pump ready to ship, got Brodix DS365 heads on order, those should be ready in January, went with Jesel shaft rockers cuz I love the T&D's I have on my 496 but I bought them nearly 20 years ago before their pricing went to the moon! I'm hoping I have enough camshaft for 598 cube to pull to 7400rpm , its probably a bit small but I have it on the shelf, Crower grind, 278/[email protected]" with 0.765" lift. I'll be tearing the blower apart and clearancing it for gasoline use this winter also. That should be interesting if not tedious. I've done some Detroit blowers over the years but its been a while!
 

@BigRedBryan13

Well-Known Member
Joined
Apr 20, 2024
Messages
115
Reaction score
517
Thanks for the reply/pics. Now thats something I haven't seen before. Who makes that? I'm not sure that would fit well with the blower drive though? I have to get assembly started and begin mocking the drive up to see where things land I guess. I'm diggin' the River Rat for fitment though, I only have a beat up old Nicson V-505 pump with a cracked mechancial seal face and beat up impeller cover so replacing that with a river rat gets me a pump extension and pump in one shot while saving space between the blower belt. I ordered blower pulleys on the smaller side so space might be at a premium in there but thats an easy change. I'm running a drive hub, no harmonic damper, one V belt accessory pulley for the alternator, the river rat is apparently about 3 1/2" long which I think will get things clear of the blower drive nicely. I'll be starting assembly in January when I get home from working on the Great Lakes. The crankshaft is out for a balance touch up as I changed plans and went with blower pistons which were 58g lighter. Kinsler almost has my fuel system parts and pump ready to ship, got Brodix DS365 heads on order, those should be ready in January, went with Jesel shaft rockers cuz I love the T&D's I have on my 496 but I bought them nearly 20 years ago before their pricing went to the moon! I'm hoping I have enough camshaft for 598 cube to pull to 7400rpm , its probably a bit small but I have it on the shelf, Crower grind, 278/[email protected]" with 0.765" lift. I'll be tearing the blower apart and clearancing it for gasoline use this winter also. That should be interesting if not tedious. I've done some Detroit blowers over the years but its been a while!
Check out alkydigger.com. They have a ton of cool stuff available. I'm not sure who made the one I have tho, it's pretty cool tho, my intention was to use it with my setup but we decided not to run a water pump.
 

AngrySailor

Well-Known Member
Joined
Dec 1, 2024
Messages
56
Reaction score
79
Santa came to the ship today...
 

Attachments

  • 8373FC62-D817-4F8E-82B7-7FA8CD5F33A5.jpeg
    8373FC62-D817-4F8E-82B7-7FA8CD5F33A5.jpeg
    2.5 MB · Views: 0
  • 3E556CBD-03E1-4C3B-AB6E-C59225EE3E10.jpeg
    3E556CBD-03E1-4C3B-AB6E-C59225EE3E10.jpeg
    3 MB · Views: 0
  • 9162B719-C321-46FE-B05F-2E79E849D75D.jpeg
    9162B719-C321-46FE-B05F-2E79E849D75D.jpeg
    1.8 MB · Views: 0

AngrySailor

Well-Known Member
Joined
Dec 1, 2024
Messages
56
Reaction score
79
Have any of you guys ever mounted a retro case 14-71 on top of an aftercooler? I have to machine up a set back plate to put it on the manifold but wondering how the front discharge/delta outlet would work with a cooler like the super chiller? They seem to be designed for a standard full bottom discharge blower. I could put the set back plate on top of the aftercooler but I’d probably need a blower snout a mile long to clear it.
 

AngrySailor

Well-Known Member
Joined
Dec 1, 2024
Messages
56
Reaction score
79
Merry Christmas fellas! Finished working away a few days ago, visiting friends before heading back east to my place for six week vacation. Got a river rat pump and some goodies on order, heads for the 598 will be finished any day after New Years. I’ll be starting assembly of my 496 and the 598 next week. I’ve bored the 496 lifter bores to .903” lifters due to a damaged lifter bore from back in the day, I need to finish the final hone to size of those then that block is ready to assemble. That engine is getting an 8-71 and going in my square body with a Lenco trans and a narrowed 9” with an adjustable race style four link. Lots of work to do on projects... I’ve got to disassemble the Littlefield 14-71, check it over and clearance it for gasoline use also. Was chatting with Brendan from performance while ordering the pump and he mentioned machining there bottom of the blower out to a full bottom discharge which would probably work real well for my application. Probably make nozzle jetting/distribution adjustments more effective as I’m putting all the fuel in above the blower. I’m really considering adding an aftercooler due to the lack of good fuel in my area.
 

Attachments

  • 9B1F4DB6-628B-443D-BF72-7B7C9E64F6F9.jpeg
    9B1F4DB6-628B-443D-BF72-7B7C9E64F6F9.jpeg
    1.6 MB · Views: 0
  • 4AB45946-078C-425B-B65D-A8A8106F6F4B.jpeg
    4AB45946-078C-425B-B65D-A8A8106F6F4B.jpeg
    3.1 MB · Views: 0
  • 9284CC76-48F8-45FB-B1A4-E246530135CD.jpeg
    9284CC76-48F8-45FB-B1A4-E246530135CD.jpeg
    2.6 MB · Views: 0

AngrySailor

Well-Known Member
Joined
Dec 1, 2024
Messages
56
Reaction score
79
Kinsler pump arrived today. Doing the final block prep to the old 496 so I can wash and assemble along with the 598. I bored the lifter bores to .903 and had to final hone them. Used a modified expanding reamer and some good wet/dry sand paper to finish them. Came out nice and cylindrical then gave them a swipe with a ball hone for deburr/crosshatch. 0.0025” clearance minimum up to just a few tenths more maximum. Did a little work taking out sharp corners in the oil galleries and man them side plugs were fookin in there... got them out and scrubbed and brushed my brains out. Pressure washed it outside in the snow... block is ready for start of assembly.
 

Attachments

  • 686A3FB0-17C9-4F6C-B31B-5D40E39A840B.jpeg
    686A3FB0-17C9-4F6C-B31B-5D40E39A840B.jpeg
    1.6 MB · Views: 0
  • 9E995151-C44F-4E07-B42F-D793B54BC9CB.jpeg
    9E995151-C44F-4E07-B42F-D793B54BC9CB.jpeg
    3.4 MB · Views: 0
  • 0BFBAF9E-D2E7-430C-8C44-2187DCD9DDE1.jpeg
    0BFBAF9E-D2E7-430C-8C44-2187DCD9DDE1.jpeg
    1.8 MB · Views: 0
  • DB78C8A9-3009-4EEB-9009-CB24A5943882.jpeg
    DB78C8A9-3009-4EEB-9009-CB24A5943882.jpeg
    2.2 MB · Views: 0
  • 90C3C70B-B4ED-4FE2-B3C0-95E22014D020.jpeg
    90C3C70B-B4ED-4FE2-B3C0-95E22014D020.jpeg
    2.9 MB · Views: 0
  • 942BA17A-1C3B-477B-AAEB-7DFF8ADA8BCA.jpeg
    942BA17A-1C3B-477B-AAEB-7DFF8ADA8BCA.jpeg
    2.4 MB · Views: 0
  • F8967E4E-0A67-40D2-AC6E-8401A1262E54.jpeg
    F8967E4E-0A67-40D2-AC6E-8401A1262E54.jpeg
    2.4 MB · Views: 0
  • 7E6795C9-36C2-44ED-8376-4EBD062120A5.jpeg
    7E6795C9-36C2-44ED-8376-4EBD062120A5.jpeg
    2.1 MB · Views: 0

AngrySailor

Well-Known Member
Joined
Dec 1, 2024
Messages
56
Reaction score
79
Honing party today. Sized all the rods and pin bores today for both the 598 and the 496. Started to gap the rings for the 496 and they’re junk new out of the box. They’re 0.060” +5’s, the bore is 4.311” and they’re 0.030” gap right out of the box which is fine cuz boost but one is trashed, has a badly angled gap, looks like it was cut with a zip disc and has 0.065” gap at the cylinder wall and 0.030” at the inner circumference... that puts a stop to assembly on that engine till new rings show up. Didn’t expect to see that from such a prominent ring manufacturer...
 

Attachments

  • 0A4FED27-49B0-494B-B8A1-281D4C5CCE79.jpeg
    0A4FED27-49B0-494B-B8A1-281D4C5CCE79.jpeg
    2.4 MB · Views: 0
  • 998D8B22-A697-4518-A7A7-FA09E9AB4D4A.jpeg
    998D8B22-A697-4518-A7A7-FA09E9AB4D4A.jpeg
    1.1 MB · Views: 0
  • 1A32ACDD-D0C1-4C0F-90D5-80A92314D4FF.jpeg
    1A32ACDD-D0C1-4C0F-90D5-80A92314D4FF.jpeg
    2.4 MB · Views: 0
  • CEF8AACC-53DA-4FEE-8E83-59103400F24B.jpeg
    CEF8AACC-53DA-4FEE-8E83-59103400F24B.jpeg
    3.8 MB · Views: 0
  • 2E88671B-B4A6-4D90-BE8D-E04C9373C711.jpeg
    2E88671B-B4A6-4D90-BE8D-E04C9373C711.jpeg
    1.6 MB · Views: 0

AngrySailor

Well-Known Member
Joined
Dec 1, 2024
Messages
56
Reaction score
79
Got the 598 short block assembled. Double keyed the crank and went through a couple different sets of bearings before I was happy with the clearances. Had to machine up a tapered ring compressor for it too, nothing I had would fit these slugs without risking damage. Had to spend a fair bit of time on the sunnen to get the pin bores where I wanted them too. The JE pistons were pretty tight out of the box. Just looking at blower positioning now and set back plates, considering an aftercooler as well. It’s coming along, I have to pull the boat out and remove the gears from the V-drive to send to JJ soon too but it’s frigging some cold out rn! Also ordered a new oil pan from Armando’s pans. That should ship next week. My existing pan won’t clear the stroke and needed more baffles to control oil under deceleration better.
 

Attachments

  • 8B2899E2-5750-43A6-B8DD-CBD08D64E987.jpeg
    8B2899E2-5750-43A6-B8DD-CBD08D64E987.jpeg
    1.6 MB · Views: 0
  • 36E531D0-9D30-45FE-A589-D9A00188A34D.jpeg
    36E531D0-9D30-45FE-A589-D9A00188A34D.jpeg
    1.6 MB · Views: 0
  • AB41D2CE-35E4-4D64-BE8A-CE2B9FFEB53B.jpeg
    AB41D2CE-35E4-4D64-BE8A-CE2B9FFEB53B.jpeg
    1.8 MB · Views: 0
  • F1686C7E-5AE4-42FD-9CEB-F422ADFA26F0.jpeg
    F1686C7E-5AE4-42FD-9CEB-F422ADFA26F0.jpeg
    2 MB · Views: 0
  • 5FE9B363-FC71-49C0-A474-CB0C7D41AB9B.jpeg
    5FE9B363-FC71-49C0-A474-CB0C7D41AB9B.jpeg
    1.9 MB · Views: 0
  • 2662D3E4-73AD-462E-8BE8-F16357947223.jpeg
    2662D3E4-73AD-462E-8BE8-F16357947223.jpeg
    3.6 MB · Views: 0
  • 90DCD54F-6BFB-4F30-AEA7-E41C7F400094.png
    90DCD54F-6BFB-4F30-AEA7-E41C7F400094.png
    1.1 MB · Views: 0
  • 42CBEB21-8D08-4552-AF5C-95C6B884AB4B.png
    42CBEB21-8D08-4552-AF5C-95C6B884AB4B.png
    1 MB · Views: 0
  • 85C1106B-703B-4864-806A-D2F303674FEB.jpeg
    85C1106B-703B-4864-806A-D2F303674FEB.jpeg
    2 MB · Views: 0
  • AF8A1170-160A-4025-AE25-42300CCB3CBD.jpeg
    AF8A1170-160A-4025-AE25-42300CCB3CBD.jpeg
    2.3 MB · Views: 0
  • FECF885E-86F9-4DF1-842D-0A0AA5E9D0FB.jpeg
    FECF885E-86F9-4DF1-842D-0A0AA5E9D0FB.jpeg
    2.5 MB · Views: 0
  • A109CB89-DF34-4818-84E9-743040AC4AC1.jpeg
    A109CB89-DF34-4818-84E9-743040AC4AC1.jpeg
    2.1 MB · Views: 0
  • 428A80A9-2F45-4EFE-9076-BF3BF187FF7A.jpeg
    428A80A9-2F45-4EFE-9076-BF3BF187FF7A.jpeg
    3.5 MB · Views: 0
  • 5A422197-134A-4656-9D3F-52AB7856C8E3.jpeg
    5A422197-134A-4656-9D3F-52AB7856C8E3.jpeg
    1.7 MB · Views: 0
  • C26F5D76-7007-44EA-9DBB-B9B384006DBE.jpeg
    C26F5D76-7007-44EA-9DBB-B9B384006DBE.jpeg
    3.2 MB · Views: 0
  • 6D42AA8C-F20F-4170-ABB8-E8A820A8FF39.jpeg
    6D42AA8C-F20F-4170-ABB8-E8A820A8FF39.jpeg
    1.8 MB · Views: 0
  • ED1B27BF-9746-4759-8C4E-9168AF8BDFA0.jpeg
    ED1B27BF-9746-4759-8C4E-9168AF8BDFA0.jpeg
    1.6 MB · Views: 0
  • 6A0DD94E-6829-4481-9D3B-E6711001FF4F.jpeg
    6A0DD94E-6829-4481-9D3B-E6711001FF4F.jpeg
    2 MB · Views: 0
  • 8B563A08-EA39-47D8-A8D1-81FD06BE7081.jpeg
    8B563A08-EA39-47D8-A8D1-81FD06BE7081.jpeg
    1.8 MB · Views: 0
  • 7AE71C1D-8E17-4553-A749-7534E8596679.jpeg
    7AE71C1D-8E17-4553-A749-7534E8596679.jpeg
    2 MB · Views: 0

AngrySailor

Well-Known Member
Joined
Dec 1, 2024
Messages
56
Reaction score
79
UPS just dropped off some more goodies... setting up the jesel rocker stands rn.
 

Attachments

  • BB36ABD1-B111-47EC-BD2B-264FFB783AE5.jpeg
    BB36ABD1-B111-47EC-BD2B-264FFB783AE5.jpeg
    3.8 MB · Views: 0
  • 21970EBC-2295-4E05-A5B8-08BDDD446C97.jpeg
    21970EBC-2295-4E05-A5B8-08BDDD446C97.jpeg
    1.8 MB · Views: 0
  • A60C62EE-4FF1-468F-800B-F9DDB8E86EEC.jpeg
    A60C62EE-4FF1-468F-800B-F9DDB8E86EEC.jpeg
    3.7 MB · Views: 0
  • 68A79E5C-104B-4ED5-A675-63A80B6D5B0A.jpeg
    68A79E5C-104B-4ED5-A675-63A80B6D5B0A.jpeg
    3.8 MB · Views: 0
  • 41FAEC2E-5D1C-4A32-9DF3-99CF193F4F99.jpeg
    41FAEC2E-5D1C-4A32-9DF3-99CF193F4F99.jpeg
    4.1 MB · Views: 0
  • 0510258A-93FB-4AF1-A0B2-CE770D069EF1.jpeg
    0510258A-93FB-4AF1-A0B2-CE770D069EF1.jpeg
    1.6 MB · Views: 0
  • 91B6A9E4-8440-43C4-BCAE-F6C8598BCCEC.jpeg
    91B6A9E4-8440-43C4-BCAE-F6C8598BCCEC.jpeg
    1.9 MB · Views: 0

AngrySailor

Well-Known Member
Joined
Dec 1, 2024
Messages
56
Reaction score
79
A box of goodies arrived from Brendan yesterday. Got a river rat pump, some burn down tubes and a spare rebuild kit for the pump cuz I’m WAY in the boonies when it comes to v-drive parts... guess I’ll head out to the shop in a bit and pull some valve springs in the new heads, check out the valve job and install some test slings to check piston to valve. I have to measure for pushrods and order those still.
 

Attachments

  • FBD0EB03-0EF7-4154-B36E-F008C64BEDEA.jpeg
    FBD0EB03-0EF7-4154-B36E-F008C64BEDEA.jpeg
    1.7 MB · Views: 0

AngrySailor

Well-Known Member
Joined
Dec 1, 2024
Messages
56
Reaction score
79
Test springs on, valve job looks great from brodix. She’s got tons of piston to valve with the dished JE slugs, good thing my helper is here to help degree the cam. This kitty just been coming around every once in a while. Hangs out then leaves lol. The Mrs. wants to keep him but I’m sure he’s someone’s cat. He does make the rounds to lots of friends houses/farms nearby though. Definitely well fed! He always gets a snack here.
 

Attachments

  • 78096EE8-6064-4ADD-9567-CC1965AE0B53.jpeg
    78096EE8-6064-4ADD-9567-CC1965AE0B53.jpeg
    3.6 MB · Views: 0
  • 446A5891-2AB0-40E8-BB75-07A64FD07B2A.jpeg
    446A5891-2AB0-40E8-BB75-07A64FD07B2A.jpeg
    3.5 MB · Views: 0
  • 94CF0C60-9C99-4458-901B-04134CEBE48E.jpeg
    94CF0C60-9C99-4458-901B-04134CEBE48E.jpeg
    1.6 MB · Views: 0
  • 7A983234-E091-41E4-A932-F26B87620F03.jpeg
    7A983234-E091-41E4-A932-F26B87620F03.jpeg
    3.2 MB · Views: 0
  • FFE388E8-EED0-417C-B40A-5C0634C2E12E.jpeg
    FFE388E8-EED0-417C-B40A-5C0634C2E12E.jpeg
    4.8 MB · Views: 0
  • 6C244E7F-AC3B-4DF0-8314-6AB5F3220D7E.jpeg
    6C244E7F-AC3B-4DF0-8314-6AB5F3220D7E.jpeg
    1.4 MB · Views: 0
  • 533680F0-DAEE-4743-91D9-F33060943A00.jpeg
    533680F0-DAEE-4743-91D9-F33060943A00.jpeg
    3.5 MB · Views: 0

AngrySailor

Well-Known Member
Joined
Dec 1, 2024
Messages
56
Reaction score
79
This timing set is fucked Ricky! It’s 10 crank degrees retarded when “straight up”. Double checked everything as far as TDC and all my numbers. Installed a cloyes upper gear straight up and numbers were as expected. You can even see the timing marks are doubled up. The faint marks are correct but the machining is off. It’s 5* advanced on the cam gear for straight up. I’m probably going to run 4* retarded anyways but brings into question the quality of the rest of the set... I thought I had more piston to valve than I expected, being 10* retarded was a lot of that... it’s a wee bit tighter now... diggin’ the river rat pump. That sure will clean up the install/plumbing/belts.
 

Attachments

  • B978059F-8AED-4239-B2C1-C362F286EEC0.jpeg
    B978059F-8AED-4239-B2C1-C362F286EEC0.jpeg
    2 MB · Views: 0
  • 75FB33E1-4365-448F-AAED-DE8AD6BA13DD.jpeg
    75FB33E1-4365-448F-AAED-DE8AD6BA13DD.jpeg
    2.1 MB · Views: 0
  • 247EC041-5A2B-4900-971A-B668652D00E2.jpeg
    247EC041-5A2B-4900-971A-B668652D00E2.jpeg
    3.7 MB · Views: 0
  • 638F8FA8-04AA-4C4A-83CF-A74BD9B2B77B.jpeg
    638F8FA8-04AA-4C4A-83CF-A74BD9B2B77B.jpeg
    4.3 MB · Views: 0

AngrySailor

Well-Known Member
Joined
Dec 1, 2024
Messages
56
Reaction score
79
I don’t think I’m breaking any rules but delete it or let me know if I am, pretty sure other fellas have listed stuff for sale... I have these Diamond pistons here. I ordered them when I was going to build the 598 naturally aspirated. They’re 4.600” bore, 1.395” CH with a 12cc dome. They work out to ~11.4:1 with a 115cc head on 598ci +\- a bit for deck height. Never had rings or locks installed. If they are of any use to anyone drop me a message.

Got the cam degreed in at 108 intake centerline, took the Mrs. to bingo just now but I’m heading back to the shop to torque the heads down. I gotta pull boat out of storage barn and pull the engine. Need the timing cover for the 598. Gotta pull the V-drive gears out too. Not looking forward to that, I don’t have an empty bay in the heated shop to work on it and it’s darn cold out...
 

Attachments

  • 04C1C948-8CEA-4C0E-801F-46B3EC06C976.jpeg
    04C1C948-8CEA-4C0E-801F-46B3EC06C976.jpeg
    4 MB · Views: 0
  • 806F30D0-05FB-4F45-AC0B-0D104B5A9DC7.jpeg
    806F30D0-05FB-4F45-AC0B-0D104B5A9DC7.jpeg
    1.3 MB · Views: 0
  • 7249098F-0B73-48B6-AB3C-A0B696A2FE8A.jpeg
    7249098F-0B73-48B6-AB3C-A0B696A2FE8A.jpeg
    1.3 MB · Views: 0
  • 993F6046-27D2-4435-A3EC-842DD4F23D65.jpeg
    993F6046-27D2-4435-A3EC-842DD4F23D65.jpeg
    1.5 MB · Views: 0
  • CFCC4F22-5106-4642-AB1C-F929D956144D.jpeg
    CFCC4F22-5106-4642-AB1C-F929D956144D.jpeg
    2 MB · Views: 0
  • 4A0B77E1-4AE7-4D8E-BA38-153F126D9C39.jpeg
    4A0B77E1-4AE7-4D8E-BA38-153F126D9C39.jpeg
    3.3 MB · Views: 0

AngrySailor

Well-Known Member
Joined
Dec 1, 2024
Messages
56
Reaction score
79
Heads torqued down, push rods ordered. The tall deck blower manifold I have is from an old pro-mod and the darn thing is big in the ports. I’ve got a little overhang on the brodix heads. Leaning towards NOT port matching as I will probably replace this manifold at some time and I’m not competing with anyone but myself. I think I’m just going to tell myself that some “intake turbulence” will help atomization lol. Just can’t see port matching these heads for a manifold that likely won’t be permanent. I’ll be tearing the blower apart soon for inspection and clearance for gasoline use. Rotor end play will be the main issue that needs to be addressed.
 

Attachments

  • C5246D7F-89BC-4FEB-98E6-F36165E6BACF.jpeg
    C5246D7F-89BC-4FEB-98E6-F36165E6BACF.jpeg
    3.9 MB · Views: 0
  • 97702180-9A18-4260-833F-29C54E9A507E.jpeg
    97702180-9A18-4260-833F-29C54E9A507E.jpeg
    3.9 MB · Views: 0

AngrySailor

Well-Known Member
Joined
Dec 1, 2024
Messages
56
Reaction score
79
Thinking of running these vintage covers, painted yellow of course but removed the old breathers and mounted (temporarily) the burn down tubes. Need to TIG a boss on to seal them good. Cut the divider back a little in the big and ugly to allow me to turn it forward. Will need an adapter plate between the blower and hat to get the openings kinda lined up. I will likely make the adapter so it supports a screen gasket, I can see someone’s sunglasses getting eaten by the blower... that’s it for today, cold snack time and bed.
 

Attachments

  • 4501C51E-66E3-46BC-AD54-AE206046BEB2.jpeg
    4501C51E-66E3-46BC-AD54-AE206046BEB2.jpeg
    4.1 MB · Views: 0
  • 00A4DA72-10F8-4213-B23B-B2BCA59140EB.jpeg
    00A4DA72-10F8-4213-B23B-B2BCA59140EB.jpeg
    3.9 MB · Views: 0
  • 3F74C326-37AA-4B73-9842-21E7146BC79F.jpeg
    3F74C326-37AA-4B73-9842-21E7146BC79F.jpeg
    3.6 MB · Views: 0
  • CA231C9C-4C1A-4A92-A324-E4981840FB4C.jpeg
    CA231C9C-4C1A-4A92-A324-E4981840FB4C.jpeg
    3.8 MB · Views: 0

AngrySailor

Well-Known Member
Joined
Dec 1, 2024
Messages
56
Reaction score
79
Pulled the blower apart for inspection and gasoline clearance work. She’s got some issues to address but I think it’s workable. Two short pieces of valley Teflon are missing, the gears are in a bit tough shape but it’s the driving gear has me wondering if there’s a bent rotor as it’s worn one side and ok-ish 180* to the hard wear. Quick check with an indicator seems good, no runout to speak of there. The case isn’t bad, can’t catch a fingernail on any of the scratches. I have over 0.006” radial clearance case to rotor periphery strips, about 0.008” rotor to front case, looking for 0.010” and 0.015” rotor to rear case which I will open up to 0.024”. Need to figure out what to do with the valley strips, I don’t want it spitting Teflon through my engine... I can get the strip material but to rig it up on the mill between centres with a follower on the helix might be interesting... might look into letting the barber cut the hair and send it out. This thing was on a pro-mod b1 hemi, it will never see the speeds/boost or abuse it seen there. They were probably overdriven like mad and pushing over 50psi boost. It’s definitely been restripped a few times.
 

Attachments

  • 9EF75103-7EE0-446D-8E10-EF2E0029CC88.jpeg
    9EF75103-7EE0-446D-8E10-EF2E0029CC88.jpeg
    1.9 MB · Views: 0
  • E10FAF91-554D-4A5C-A35F-F4EA58CA8DE4.jpeg
    E10FAF91-554D-4A5C-A35F-F4EA58CA8DE4.jpeg
    1.8 MB · Views: 0
  • 8BB3F07F-A4A3-4FE9-BD3F-698130FD0E85.jpeg
    8BB3F07F-A4A3-4FE9-BD3F-698130FD0E85.jpeg
    1.9 MB · Views: 0
  • 91667C40-4137-42A3-9C40-A8C59EAC6524.jpeg
    91667C40-4137-42A3-9C40-A8C59EAC6524.jpeg
    1.9 MB · Views: 0
  • 398738B9-9F83-4BAC-B892-D5E2584914E9.jpeg
    398738B9-9F83-4BAC-B892-D5E2584914E9.jpeg
    2 MB · Views: 0
  • 1F687D01-AD9A-49C7-907A-C569875A892F.jpeg
    1F687D01-AD9A-49C7-907A-C569875A892F.jpeg
    1.6 MB · Views: 0
  • 4053B6A0-A4B6-40C2-A27E-8595024CAC93.jpeg
    4053B6A0-A4B6-40C2-A27E-8595024CAC93.jpeg
    2 MB · Views: 0
  • 1DDECF8E-B321-456B-9A98-43C3FDE69BF1.jpeg
    1DDECF8E-B321-456B-9A98-43C3FDE69BF1.jpeg
    1.9 MB · Views: 0
Top