WELCOME TO RIVER DAVES PLACE

Adding my personal touch "21 Daytona"

Outlaw

Polishing MOFO
Joined
Dec 20, 2007
Messages
3,256
Reaction score
61
I purchased a 97 21 Eliminator Daytona in May of 2007.


1997 Eliminator Daytona 21, 415 HP Marine power 502 Dominator 12S pump aluminum A impeller with a droop
and place diverter. It ran a blistering 69 MPH @3500 ft elevation. 77 with a 100 shot of NOS
When I purchased it it was good solid boat with 10 years of wear and tear at the River, I could have ran it like this for years but I wanted to make it more mine.


Here is what it looked like when I bought it.

P1010024.jpg


P1010021.jpg


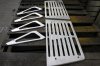
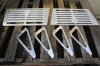
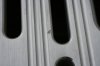
Although it was a good clean boat, I have this problem with taking things apart and redoing them to reflect my personal preferences.

Engine as it was

100-0007_IMG.jpg


interior as purchased

100-0001_IMG.jpg


My wife made me promise that I would use the boat "as is" the first summer. although I did add a 100HP shot if NOS:D


P1010023.jpg
 

Outlaw

Polishing MOFO
Joined
Dec 20, 2007
Messages
3,256
Reaction score
61
as promised we used it all summer, actually put 40 hrs on it.

October 2007 I started taking it apart

P1010030.jpg


P1010009.jpg


Seemed like at least 100 holes where everything was mounted

P1010010.jpg


this is from the bottom where the keel was trimmed to clearance the ride plate, looks like someone forgot to seal the area that was trimmed away
and the wood was rotten

P1010014.jpg


notice the battery mounting locations, one bolt was actually thru
the bottom and had worn a hole in the trailer bunk

P101002512.jpg


The original engine was mounted with a three point system.

P1010029.jpg


pic of the original rigging

p1010001.jpg
 

Outlaw

Polishing MOFO
Joined
Dec 20, 2007
Messages
3,256
Reaction score
61
After getting it stripped of the old rigging, I took a reciprocating saw to the transom to make room for a pump setback, the rotten wood was the deciding factor on how far to set it back. the pump will be reset with the hand hole on the outside of the transom, approximately 3-1/2 from the original set".

P1010005.jpg


The dominator pump was disassembled and inspected

P1010022.jpg


The pump was double drilled on the bearing retainer, bowl (both sides)
in anticipation of more HP:skull

Then it was sent to Embee for powder coating

P5280018.jpg


P5280020.jpg


Since the pump was apart and I was hoping to add more HP, I ordered
all new internals for it including a 17-4 shaft, detailed DPS inducer, bearings, wear ring,gaskets and a backcut shoe from Jack at MPD.

P5060052.jpg


loader was checked for cracks and detailed

P11221010047.jpg


before the intake was sent for powder coat I welded a filler panel on each side, I hope this helps when I set the pump

P101001111.jpg
 
Last edited:

Outlaw

Polishing MOFO
Joined
Dec 20, 2007
Messages
3,256
Reaction score
61
While my wallet was recovering from the pump parts and powder coating
I set my sites on my trailer. I disassembled the trailer and had it blasted.
After the sand blast job, I moved the trailer into the shop for paint.

New paint, new wiring and lights, new bunks and carpet, new diamond plate steps and new Competitive decals.


P5110066.jpg


P5110061.jpg


P5110066.jpg
 

BarryMac

An Adelanto 9...
Joined
Sep 20, 2007
Messages
7,570
Reaction score
383
Awesome, keep it coming. I was following your build on PB, badass what youre doing... :thumbsup
 

Outlaw

Polishing MOFO
Joined
Dec 20, 2007
Messages
3,256
Reaction score
61
Awesome, keep it coming. I was following your build on PB, badass what youre doing... :thumbsup


Thanks, I thought I would post it over here for those that don't frequent that site. Its so much more laid back over here(much less drama)
I'll try and get caught up to date ASAP.
 

BarryMac

An Adelanto 9...
Joined
Sep 20, 2007
Messages
7,570
Reaction score
383
Thanks, I thought I would post it over here for those that don't frequent that site. Its so much more laid back over here(much less drama)
I'll try and get caught up to date ASAP.

Good deal. I'll be checking for updates... :thumbsup
 

Outlaw

Polishing MOFO
Joined
Dec 20, 2007
Messages
3,256
Reaction score
61
Working on the hull, Since I'm moving the pump back I had to fill in the
area in front of the pump intake, I filled in 6" of the hole.

P1010125.jpg


It took several layers to build it up to the desired height, then rough sanded it down to match the keel

P1010128.jpg


Her you can see I built the inside up some to reduce the amount of
Poxy Puddy needed to set the intake. Notice the "Silver Carbon"
I overlayed the bilge area with.

P1010129.jpg


Another look at the overlay in progress, actually aluminumized fiberglass
or trade name silver texalium

P4200032.jpg
 

Outlaw

Polishing MOFO
Joined
Dec 20, 2007
Messages
3,256
Reaction score
61
I decided to flip the boat at this stage to do some bottom work, clean up the set back area, repair a few scratches, cap the rub rail on the transom
and fill in all those holes :blah:

P1010044.jpg


Since I had just received a new toy, I decided to use it to flip the boat.
Yes there was a safety strap connected to the stringers(just in case)


P1010047.jpg


I built a dolly trailer that attaches to the stringers for moving it around during the bottom up phase.

P1010050.jpg


Down and bolted up, ready for a workover, notice all those holes.

P1010052.jpg
 

Outlaw

Polishing MOFO
Joined
Dec 20, 2007
Messages
3,256
Reaction score
61
I've filled in all the holes that I will not be using
with dowel pins and resin. I filled in the drain holes
on the outer sponsons so I can install brass sleeves.
the hole for the steering cable was filled because I'll
install it in the transom plate for a straighter shot.

P10100116.jpg


More work on the transom, after most of the surface was filled with glass and resin, I used a mixture of resin and cab o sil and microspheres.

Thanks Jrork for that tip:D

P1010012-1.jpg


After blocking the transom till my arms felt like they were going to fall off
it was ready for a new coat of gel.

P1010030-1.jpg


after shooting the first coat I let it dry overnight and blocked it one more time

P1010026-1.jpg


I shot gel on the keel and bottom to blend the new gel.

you can see I still need to color sand the far side
P1010031.jpg


P1010033.jpg
 

Outlaw

Polishing MOFO
Joined
Dec 20, 2007
Messages
3,256
Reaction score
61
Before

CopyofP4190018.jpg


After

allstars09143.jpg


While I had the boat upside down I repaired all of the scratches and color sanded the entire bottom.

P1010044-1.jpg


P1010045-1.jpg


P1010051.jpg


P1010056.jpg


P1010055.jpg


P1010054-1.jpg
 
Last edited:

Outlaw

Polishing MOFO
Joined
Dec 20, 2007
Messages
3,256
Reaction score
61
Now its time to check the bow eye one more time, lets get this flipped
upright and on to the newly finished trailer:D

P1010059.jpg


P1010058.jpg


P1010048-1.jpg
 

Outlaw

Polishing MOFO
Joined
Dec 20, 2007
Messages
3,256
Reaction score
61
Next I did a color sand and polish on the top side

P1010067.jpg


P1010065.jpg


P1010064-2.jpg


P1010076.jpg


Once everything was polished out I started applying my new decals
from CYCO designs

P1010075.jpg


my new decals are a chrome vinyl with a silver night reflective shadow
Cy told me I would not like this combo, but after cutting them he changed his mind. Since the Flames are factory gel my theme is pretty much old school so why not add some checkers and more chrome, new rub rail wil be installed before I'm finished

P1010074.jpg


P1010072.jpg


Here you can see how the reflective pops and it has to be a little safer
when your boating at night. or just sitting on the trailer.

boatwork004.jpg
 
Last edited:

RiverDave

In it to win it
Joined
Sep 13, 2007
Messages
126,731
Reaction score
166,392
Dude you are my hero!!

That is what I'm talking about!! This thread right here!

RD
 

Outlaw

Polishing MOFO
Joined
Dec 20, 2007
Messages
3,256
Reaction score
61
Thanks for the compliments,

I'm trying to add more details and photos of my progress on this site.
 

hawkes24

this ***** sux
Joined
Apr 17, 2008
Messages
1,304
Reaction score
3
awesome awesome work buddy daves right this is what this section is all about :thumbsup:thumbsup
 

Outlaw

Polishing MOFO
Joined
Dec 20, 2007
Messages
3,256
Reaction score
61
I re did the gel on the dash to repair a few deep scratches,
installed new Autometer gauges, new steering Wheel and hub

boatwork057.jpg


installed the windshield and new dash trim

boatwork018.jpg


BEFORE

P1010009.jpg


AFTER

boatwork057.jpg


Autometer Platinum/Chrome gauges

boatwork039.jpg


boatwork054.jpg
 

Outlaw

Polishing MOFO
Joined
Dec 20, 2007
Messages
3,256
Reaction score
61
I'm going to dump the original three point engine mounts
and install a rail and plate system, here I'm building a rear engine plate
with a top mount starter. It will get polished after final fit into the boat.

P1010017-2.jpg


P1010014-3.jpg


P1010015-2.jpg


P1010016-2.jpg
 

Outlaw

Polishing MOFO
Joined
Dec 20, 2007
Messages
3,256
Reaction score
61
I disassembled the original Marine power 502 415 HP and sent the block
to Sunset racecraft in Lubbock Tx,

while the short block was being taken care of I sent my new AFR 325
heads to Barry (Obnoxious1) to get them fully polished Flowed and assembled
see this thread

Nice Head..................s! - River Dave's Place


DSCN4823.jpg


100_0060.jpg


DSCN4878.jpg
 
Last edited:

BarryMac

An Adelanto 9...
Joined
Sep 20, 2007
Messages
7,570
Reaction score
383
Outlaw, I think that Dave is out of the thread of the week shirts, this is definitely thread of the month worthy IMO. I have a couple at the river still that he gave me to hand out, I will grab one and send it to you on my dime, just let me know what size and an address... :thumbsup

People helpin People and Shit,,, ;)
 

RiverDave

In it to win it
Joined
Sep 13, 2007
Messages
126,731
Reaction score
166,392
Outlaw, I think that Dave is out of the thread of the week shirts, this is definitely thread of the month worthy IMO. I have a couple at the river still that he gave me to hand out, I will grab one and send it to you on my dime, just let me know what size and an address... :thumbsup

People helpin People and Shit,,, ;)

I sent him one yesterday. :)

RD
 

Outlaw

Polishing MOFO
Joined
Dec 20, 2007
Messages
3,256
Reaction score
61
Engine is back from Sunset, they built the short block and I finished it up.
here is whats inside:
Gen 6 block, GM 1053 steel crank cross drilled and nitrided,
H beam rods with ARP 2000 bolts
SRP blower pistons 8.4 : 1 compression, Clevite coated bearings,
Melling 10778C oil pump, Chris Straub custom roller cam, Morel solid roller lifters, Rollmaster Billet timing set, Smith brothers pushrods, Jomar Stud girdles, Teague style Crane wide body rockers, AFR 325 heads with 121cc CNC chambers, 2.30" REV stainless intake valves, 1.88" REV inconel exhaust valves Straub valve springs, Stefs custom aluminum oil pan,
Cometic head gaskets and ARP fasteners throughout.

Intake manifold is a Cutler/ Hirel EFI single plane with a 1000 CFM billet throttle body,
other parts include intercooled M3SC Procharger, F.A.S.T. 95 lbs injectors Haltech laptop programmable EMS, two Aeromotive A-1000 fuel pumps,
Teague Valve covers and IMCO powerflow exhaust manifolds.

After I got the short block back, I gave it 4 coats of Primer, 4 coats of custom mixed silver paint and 2 coats of epoxy clear.
the block was deburred prior to sending it to Sunset.

P1010001-2.jpg


P1010004-2.jpg


degreeing in the cam and measuring for pushrod length

P1010007-5.jpg


installing the fluidampner balancer, crank trigger and blower pulley.

misc099.jpg


valves adjusted and stud girdles installed

P1010021-2.jpg


valve covers installed

P1010029-2.jpg


Intake manifold and MSD installed

misc125.jpg


misc119.jpg


oil pan installed

P1010018-3.jpg
 

Outlaw

Polishing MOFO
Joined
Dec 20, 2007
Messages
3,256
Reaction score
61
Here I'm building a new Procharger mount, I wanted to move it down and to the left so it will fit under an engine cover(Stealth Mode)

P1010001-3.jpg


misc other pics of engine parts

P1010005-3.jpg


P1010046.jpg


P1010003-2.jpg


Haltech EMS installed in a waterproof box

P1010063-1.jpg


P1010014-5.jpg


Oil filter will be replaced with a adapter for remote filters and oil cooler, motor mounts are for roll around engine stand
P1010013-4.jpg
 
Last edited:

AMBUSHER

Well-Known Member
Joined
Dec 19, 2007
Messages
425
Reaction score
23
Outlaw, awesome thread and killer work you are doing. I've got a 25' Warlock that needs just about the same treatment and man you a making me feel bad but also giving me some good ideas as well. BTW, I would have been crappin my pants watching the boat flip over. Cant wait to see it all come together and keep up the great work.:thumbsup
 

Outlaw

Polishing MOFO
Joined
Dec 20, 2007
Messages
3,256
Reaction score
61
Thanks Ambusher,

Here is a pic of the bilge, needs a final coat of clear gel.

P1010062-2.jpg


I
 
Last edited:
Joined
Oct 7, 2009
Messages
10
Reaction score
0
DAMN!!!!!!!!!!!!!!!!:bowdown:

That looks AWESOME buddy! The motor looks ridiculously good! And I love the guages and column! I liked the red before but, now seeing the chrome...much sweeter! Can't wait to see more.:party2:

Tater
 

Outlaw

Polishing MOFO
Joined
Dec 20, 2007
Messages
3,256
Reaction score
61
Thanks Tater,
Lots of progress, but very little to take pics of.
Swim steps are heading to
Cigalert to get polished, Hopefully he will post some pics when he finishes:champagne:
I finished up my Procharger mount and it will be sent for a polish job soon.

I received my new stainless impeller from MPD today which completes
the pump:D

I also received all of my stainless fasteners, stainless hard line
fittings and tubing$$

My Compressor is at ATI/ Procharger for new seals and to be
checked out.
 

RiverDave

In it to win it
Joined
Sep 13, 2007
Messages
126,731
Reaction score
166,392
Post some pics of hte procharger mount. :)

RD
 

t&y

t&y
Joined
Jan 9, 2010
Messages
16,113
Reaction score
29,547
Nice thread man and very nice build! I too have the problem of wanting to modify/rebuild everything but the problem is I don't have a fraction of the talen you do. Makes for some interesting results.:D
 

Outlaw

Polishing MOFO
Joined
Dec 20, 2007
Messages
3,256
Reaction score
61
New AT Stainless impeller, MPD cleaned up the center hub a little
After I run it and see what RPM I can turn, it will be sent back for a full detail.

P1010030-3.jpg


Dave I'll take some tonight.

T&Y, thanks for the kind words, sometimes I bite off more than I can chew with my projects but it makes it fun.
 
Last edited:

Outlaw

Polishing MOFO
Joined
Dec 20, 2007
Messages
3,256
Reaction score
61
here you go dave the large front plate is the original part from ATI

P1010038.jpg


P1010037.jpg


P1010041-2.jpg


P1010040-4.jpg


P1010015-5.jpg


P1010016-3.jpg


P1010047-2.jpg
 
Last edited:

Cigalert

Banned
Joined
Jun 9, 2008
Messages
3,546
Reaction score
11
I got the steps yesterday.

Here's the before they look all pretty pictures.

The last 3 pics you can see the areas I'm not going to be able to do much about but I can clean them up. I look forward to getting the bracket.
 

Attachments

  • Plates and brackets01.jpg
    Plates and brackets01.jpg
    75.4 KB · Views: 872
  • Plates and brackets02.jpg
    Plates and brackets02.jpg
    82.6 KB · Views: 877
  • Damage03.jpg
    Damage03.jpg
    40.5 KB · Views: 895
  • Damage02.jpg
    Damage02.jpg
    39 KB · Views: 878
  • Damage01.jpg
    Damage01.jpg
    45 KB · Views: 884

Cigalert

Banned
Joined
Jun 9, 2008
Messages
3,546
Reaction score
11
I did a little polishing between on Saturday a down server, a down printer station and some real jacked up customer request.

I was a little surprised to see some of the deeper pits/dings lessen quite a bit. After seeing the pics I still need to take the step down a bit. As far as the machine marks on the bottom....geeze oh pete their deep.

Polished and raw plate side by side.
 

Attachments

  • Raw and Polished.jpg
    Raw and Polished.jpg
    67.6 KB · Views: 836

bead

bead
Joined
Jan 10, 2008
Messages
196
Reaction score
11
more progress,
I removed all of the vinyl and foam from the original seats

headrest1.jpg


lumbar2-1.jpg


pocketback.jpg


test fit the original foam on the new fiberglass seat frames

foamcomplete.jpg


left.jpg


the old vinyl had seen better days and the wood was rotten

armreatRH.jpg


bottomcushionwood.jpg


seatback2.jpg


original wood frame

originalwood.jpg


new fiberglass frame

frontfiberglass.jpg


the new rear seat is a wider version of the front seat, so after modifying
one of the front seat vinyl covers (widen it by 35-1/4")

I'm sending them to Copy Cat Covers http://www.copycatcovers.com/
and they will make new covers.

My wife had volunteered to make new covers but after getting a quote and samples from them we decided it was a no brainier to let them handle that job.
how much weight do you think you saved by going with the fiberglass? project coming out great btw.:thumbsup
 

Outlaw

Polishing MOFO
Joined
Dec 20, 2007
Messages
3,256
Reaction score
61
how much weight do you think you saved by going with the fiberglass? project coming out great btw.:thumbsup

Thanks Bead, Not sure, probably not enough to make any difference
if I get a chance tomorrow I'll weigh them. mainly did it to prevent the seats from rotting out again.
 

Outlaw

Polishing MOFO
Joined
Dec 20, 2007
Messages
3,256
Reaction score
61
started practicing on my stainless lines, I'm using some 304 scrap
for practice,
I not to sure I like the inlet this way, I'm going to try a different route tonight.
Once I get they the way I like I'll copy the bends on 316 tubing
and polish everything.
also mocking up the alternator and front engine plate

IMG00177.jpg
 

Outlaw

Polishing MOFO
Joined
Dec 20, 2007
Messages
3,256
Reaction score
61
Bent the outlets from 316 and polished them.
changed the inlet up, I like this design alot better.
now I need to polish the inlet.

P1010061.jpg


P1010062.jpg
 

Outlaw

Polishing MOFO
Joined
Dec 20, 2007
Messages
3,256
Reaction score
61
Everything polished,

feb2010029.jpg


feb2010042.jpg


feb2010043.jpg


feb2010030.jpg
 
Last edited:

Cigalert

Banned
Joined
Jun 9, 2008
Messages
3,546
Reaction score
11
One is done. Man that's some work using mothers polish. This stuff really works!!! Thanks mothers :p

I'll take some better completed pics of everything when I finished. This camera doesn't do the shine justice.

Disclaimer* if you think I actually used mothers please call them to nominate me for their sponsorship program.

All your stuff is looking amazing BTW.
 

Attachments

  • GOPR0012.jpg
    GOPR0012.jpg
    74.7 KB · Views: 991

Outlaw

Polishing MOFO
Joined
Dec 20, 2007
Messages
3,256
Reaction score
61
One is done. Man that's some work using mothers polish. This stuff really works!!! Thanks mothers :p

I'll take some better completed pics of everything when I finished. This camera doesn't do the shine justice.

Disclaimer* if you think I actually used mothers please call them to nominate me for their sponsorship program.

All your stuff is looking amazing BTW.

Thanks Roger, I cant wait to see this stuff in person. Go Mothers:party:
 

Cigalert

Banned
Joined
Jun 9, 2008
Messages
3,546
Reaction score
11
The SC bracket cleaned up nicely. The tensioner marred the crap out of the front side. You're going to have to be extremely careful putting this back together.
 

Attachments

  • outlawbracket1.jpg
    outlawbracket1.jpg
    51.8 KB · Views: 942
  • outlawbracket2.jpg
    outlawbracket2.jpg
    36.3 KB · Views: 951

Gelcoater

Well-Known Member
Joined
Sep 26, 2009
Messages
22,622
Reaction score
40,247
Dude you are my hero!!

That is what I'm talking about!! This thread right here!

RD
x2 Outlaw you da man,killer work.so whats your background?boat building? you seem to be a take the bull by the horn kinda guy.thats gunna be one baddass boat:bowdown:
 

Cigalert

Banned
Joined
Jun 9, 2008
Messages
3,546
Reaction score
11
Bottom of the bracket is done. I hammered on this thing with 80 grit to start. 2 hours of sanding the front side...those pits aren't coming out without a mill. Based on the close-up shot...I'd say it's going to come out extremely nice.
 

Attachments

  • Bottom SC Bracket.jpg
    Bottom SC Bracket.jpg
    36.8 KB · Views: 1,419
  • bottom SC bracket Close.jpg
    bottom SC bracket Close.jpg
    31.8 KB · Views: 1,403

Outlaw

Polishing MOFO
Joined
Dec 20, 2007
Messages
3,256
Reaction score
61
x2 Outlaw you da man,killer work.so whats your background?boat building? you seem to be a take the bull by the horn kinda guy.thats gunna be one baddass boat:bowdown:

Thanks Gelcoater, background is poor white boy that couldn't afford
to pay anybody to do anything so I had to learn do it myself:D
 
Top