lenmann
Well-Known Member
- Joined
- Apr 13, 2013
- Messages
- 1,732
- Reaction score
- 3,601
Next steps involved sanding the flow coat layers to get to a smooth surface suitable for the final gelcoat.

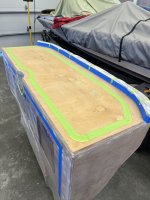
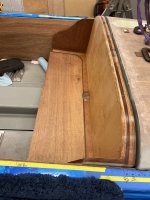
Once that was finished up I was able to set the hatch back in place and build the back seat matching the shape of the hatch leading edge The upholstery guys tell me the seat backs can flex and break under acceleration so I built up the top edge of the seat back with 3 layers of ¾” ply to reinforce it. The back of the seat got a layer of 1708 and several flow coats as a base for the gelcoat.


I decided that the hatch and seat would be a good project to try shooting multi-color gelcoat for the first time. They are small enough I could move them around easily and they would not require big batches of gelcoat making the spray process a little more manageable. As seen elsewhere in this thread shot the bottom of the boat in a single color gelcoat and I have painted a number of cars over the years so I wasn’t heading into this with zero experience. Like lots of inmates I follow the adventures @Gelcoater religiously and re-read his Gelcoat 101 and 102 threads in preparation. I was feeling like I had a pretty good handle on the process and was ready to give inlaid stripes a try.
There are several key differences in shooting paint and gelcoat. Gel has to applied in a thick layer, .020-.025” thick because it needs mass to cure and enough thickness that it can be sanded and polished after it cures. Gel starts to cure in roughly 18 minutes after being catalyzed making the working window quite small when you take into account mixing time, filling the gun, spray out time (multiple coats), gun clean up time, and time to pull the tape and masking.
My plan was to match the stripe scheme that Poncho laid down on the inside of the transom: an Iridium Gray field with a 1” wide Electric Blue stripe bordered with two ¼” wide Crimson Red pin stripes. I used fresh RevChem DuraKote marine gelcoat and to aid in spray ability I thinned each batch 30% with Duratec Clear High Gloss Additive.
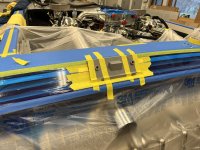
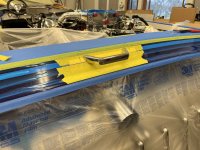
My first spray out was the gray field on the back of the seat. Overall it went pretty well I thought. The ¼’ fineline tape pulled cleanly and although there were some minor rough edges but I felt they would be “buried” in the red gel and wouldn’t be a big problem. At this point was feeling pretty good.


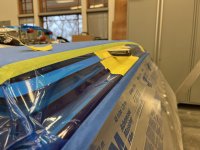
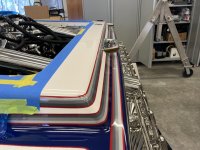
My second spray was the red pins. My plan all along was to spray each subsequent color over the previous with the expectation that the excess would all be sanded off in the end revealing the inlaid stripes. This turned out to be a bad choice. I should have waited a day and masked off the grey before spraying the red, and then subsequently the blue. Mistake #1. The red sprayed out fine but I ended up having much more trouble gauging when the gelcoat had gelled enough to be able to pull the tape cleanly. I pulled a small area and the adjacent gel drooped into the are that was going to be blue. Then I ended up waiting too long and the tape pulled up some of the red gel with. Mistake #2.

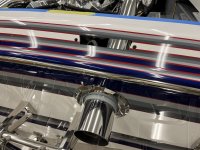
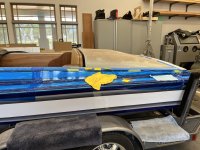
The screw ups were in an area that would be pretty hard to see so I proceeded to shoot the blue stripe. The good news is there wasn’t any de-masking left to do! The bad news is the Electric Blue gel doesn’t “hide” very well as there isn’t a lot of pigment in it. That coupled with the 30% Clear made it worse. You can see in the pics how transparent it is and how you can see the light color of the plywood underneath. I should have sprayed a darker shade base coat under the blue first. Mistake #3.


With all of the colors sprayed, I waited a day for full cure, and started sanding the surplus blue and red gelcoat off down the same level as the gray. Because each layer of gel is about .025” thick I need to sand almost a 1/16” off to level everything out and I have to be really careful not to sand too much. Remember Mistake #1? If I had masked around each subsequent color this would be much easier and much less sensitive to sand through. As it happened I did sand thought the blue up near the top of the seat back. Mistake #4, thanks to mistakes #1 and #3. Compounding mistakes, wonderful...

OK, lots of learning. This stuff definitely isn’t as easy as it looks on the internet. It’s very technique sensitive and there appears to be a big learning curve that has to be conquered the hard way. Grrrr.
Remember a couple of posts ago when I said I had a date with the upholstery shop? Well by now I have rescheduled once and the new date is coming up fast. I need to get in there before the spring rush and my window of opportunity is closing. Rather than screw around some more on the learning curve I threw in the towel (for now) and decided to call in a professional.
My first try was Poncho but he is slammed with other inmates boats. I pinged @Boat211 to see if he knew anyone local that was good and he reminded me that @Orangegazm owns Smooth As Glass not far from Sacramento. I called Jeff and he said he could turn them quick if I brought them down right away so off to Riverbank I went.
The end result is beautiful, clearly the guys at Smooth As Glass have mastered the art. Me, I am still a work in progress. Next time I will try to learn on something that doesn't have a deadline.


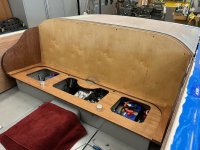
Ready for upholstery.
Once that was finished up I was able to set the hatch back in place and build the back seat matching the shape of the hatch leading edge The upholstery guys tell me the seat backs can flex and break under acceleration so I built up the top edge of the seat back with 3 layers of ¾” ply to reinforce it. The back of the seat got a layer of 1708 and several flow coats as a base for the gelcoat.
I decided that the hatch and seat would be a good project to try shooting multi-color gelcoat for the first time. They are small enough I could move them around easily and they would not require big batches of gelcoat making the spray process a little more manageable. As seen elsewhere in this thread shot the bottom of the boat in a single color gelcoat and I have painted a number of cars over the years so I wasn’t heading into this with zero experience. Like lots of inmates I follow the adventures @Gelcoater religiously and re-read his Gelcoat 101 and 102 threads in preparation. I was feeling like I had a pretty good handle on the process and was ready to give inlaid stripes a try.
There are several key differences in shooting paint and gelcoat. Gel has to applied in a thick layer, .020-.025” thick because it needs mass to cure and enough thickness that it can be sanded and polished after it cures. Gel starts to cure in roughly 18 minutes after being catalyzed making the working window quite small when you take into account mixing time, filling the gun, spray out time (multiple coats), gun clean up time, and time to pull the tape and masking.
My plan was to match the stripe scheme that Poncho laid down on the inside of the transom: an Iridium Gray field with a 1” wide Electric Blue stripe bordered with two ¼” wide Crimson Red pin stripes. I used fresh RevChem DuraKote marine gelcoat and to aid in spray ability I thinned each batch 30% with Duratec Clear High Gloss Additive.
My first spray out was the gray field on the back of the seat. Overall it went pretty well I thought. The ¼’ fineline tape pulled cleanly and although there were some minor rough edges but I felt they would be “buried” in the red gel and wouldn’t be a big problem. At this point was feeling pretty good.
My second spray was the red pins. My plan all along was to spray each subsequent color over the previous with the expectation that the excess would all be sanded off in the end revealing the inlaid stripes. This turned out to be a bad choice. I should have waited a day and masked off the grey before spraying the red, and then subsequently the blue. Mistake #1. The red sprayed out fine but I ended up having much more trouble gauging when the gelcoat had gelled enough to be able to pull the tape cleanly. I pulled a small area and the adjacent gel drooped into the are that was going to be blue. Then I ended up waiting too long and the tape pulled up some of the red gel with. Mistake #2.
The screw ups were in an area that would be pretty hard to see so I proceeded to shoot the blue stripe. The good news is there wasn’t any de-masking left to do! The bad news is the Electric Blue gel doesn’t “hide” very well as there isn’t a lot of pigment in it. That coupled with the 30% Clear made it worse. You can see in the pics how transparent it is and how you can see the light color of the plywood underneath. I should have sprayed a darker shade base coat under the blue first. Mistake #3.
With all of the colors sprayed, I waited a day for full cure, and started sanding the surplus blue and red gelcoat off down the same level as the gray. Because each layer of gel is about .025” thick I need to sand almost a 1/16” off to level everything out and I have to be really careful not to sand too much. Remember Mistake #1? If I had masked around each subsequent color this would be much easier and much less sensitive to sand through. As it happened I did sand thought the blue up near the top of the seat back. Mistake #4, thanks to mistakes #1 and #3. Compounding mistakes, wonderful...
OK, lots of learning. This stuff definitely isn’t as easy as it looks on the internet. It’s very technique sensitive and there appears to be a big learning curve that has to be conquered the hard way. Grrrr.
Remember a couple of posts ago when I said I had a date with the upholstery shop? Well by now I have rescheduled once and the new date is coming up fast. I need to get in there before the spring rush and my window of opportunity is closing. Rather than screw around some more on the learning curve I threw in the towel (for now) and decided to call in a professional.
My first try was Poncho but he is slammed with other inmates boats. I pinged @Boat211 to see if he knew anyone local that was good and he reminded me that @Orangegazm owns Smooth As Glass not far from Sacramento. I called Jeff and he said he could turn them quick if I brought them down right away so off to Riverbank I went.
The end result is beautiful, clearly the guys at Smooth As Glass have mastered the art. Me, I am still a work in progress. Next time I will try to learn on something that doesn't have a deadline.
Ready for upholstery.
Attachments
-
 1B991FCA-1152-4470-856E-FFE74E2D6B06_1_201_a.jpeg731 KB · Views: 69
 -
 A8887B5C-BA77-438E-BC53-48FD30D51C9C_1_105_c.jpeg280.3 KB · Views: 68
 -
 18EE5DED-183C-4935-B1C6-71B984405BFD_1_105_c.jpeg330 KB · Views: 69
 -
 7CB7DCBA-A86E-4F33-9A3A-21C130B6D32F_1_105_c.jpeg333.3 KB · Views: 70
 -
 2FA9EF23-18D4-4642-9178-09DB91E437A8_1_105_c.jpeg293.9 KB · Views: 62


