WELCOME TO RIVER DAVES PLACE

Southwind - can o worms - hull reinforcement

Roosta

Well-Known Member
Joined
Aug 28, 2012
Messages
57
Reaction score
48
progress goes very slowly when all of us are pulling in different directions .

As I understand boating web sites, if you post anything, it is subject to everyone's comments and opinions .

I've posted in here with photos and text on; house repairs, engines, boats, hulls, modifications, cars, trucks, and even politics .

Once I put it out there, it's all up for everyone to comment or whatever .

I don't claim to know everything, but what I have done, I do know, and it has always turned out to work well, or even better than new . Often I 'over-build', and I will cling to that as ONE of my personal FLAWS . IF you bring your boat to me, I'm in control . I'll answer ALL of your questions, but all the work will be done MY WAY, or leave . If I say "100 MPH" you can take that to the bank .

Posting on the net, asking for help is a good place to start, but this is where you need to find ONE shop, ONE person, ONE expert, and stick with just ONE . Mixing 10 opinions, and 10 methods will result in "1/10th" of a good job .

IMO, there are so many things that SHOULD be done BEFORE doing structural glass work (stringers, bulkheads, floors) on any 'scooped out' hull, that I cringe every time I read one of these project threads .

IMO, the professionals who do this kind of work at 'upper to middle of the road quality', are not charging enough, and yet some would still rather 'save money' and do it themselves .

OK, go ahead do it . Ask around the net, get a bunch of 'responses', dive in and SAVE MONEY .

But, just like getting a 'heart transplant in a strip mall Dr's office', a lot of the 'details' get overlooked .

Those boats 'ran good' because they were LIGHT, more unproductive weight, less performance .

The hull needs to be on a 'level surface/dolly/board fixture' . This must be LEVEL, so as to keep the hull/bottom, SQUARE . Do the inside structural and then FLIP it over and do the cosmetic (gel) and FIX the HOOK, in the riding surfaces . Sitting on it's own trailer, is just not adequate .

I want to HELP PEOPLE to learn how all this stuff has worked for me, you may disagree and that is OK too .

SURE, there are many methods to do most everything, but I don't give 'advise' on subjects that I have not done myself . I don't 'guess', should you agree with me or not .

There was a guy on here a few months ago who had a Tahiti I rebuilt in 1980 . (the same design as the Southwind here) It was a jet and I rebuilt it into an outboard with a 200 HP on a bracket . He bought the boat last year, with a 300 HP on it and it did NOT FALL APART . (over all those years) The paint and seats were done, but the structure held intact, even with the 'overpowering abuse' .

Powerboating CAN be a dangerous hobby, how you approach it, and how you respect it, will directly make a difference in how much fun or trouble you have doing it .

My feelings are not hurt, read my sig line below ..........

Appreciate all of the info. If I had known this project was going to snowball like it did, I would have seeked professional advise, but this was kind of like a slow motion train wreck. IF i had known there were structural design flaws that needed to be addressed, I would have seeked out professional advice, at that point, I could decide to drop the coin to fix an old relic, or find a bare hull and do a swap out? or who knows what other options.

But at this point, it's propped up in my driveway, and in pieces, so I need to carry on and fix it right myself. I did support the hull properly (or at least attempted to) before I glassed in the stringer...
Any advice on where I should go from here (bulk heads epoxied in, but not glassed) is much appreciated.
 

Backlash

Well-Known Member
Joined
Jan 14, 2011
Messages
14,435
Reaction score
28,014
When it comes to the marine industry, George has been around and has his hands in a number of successful projects. I would try to get past the previous interactions and follow his recommendations. The man is a wealth of knowledge and I have nothing but good things to say about him. ;)

Me personally, I would secure the hull. Brace it temporarily if need be. Then cut out one half of one side of the structure you have put in. Don't cut everything out all at once. Then, install a full-length stringer from the bow to the transom. Buy quality kiln-dried lumber that is straight and has the proper grain orientation. Install that and get as much lumber down in the hull as you can. Glass that in with quality materials. Me personally, I don't use epoxy. I'd use vinylester resin though. Not the crap from Home Depot. Only because I'm gel coating afterwards and am steering away from paint.

Once you get one stringer installed and glassed in, take out the other half of the work you have done. Then replace that with another full-length stringer like you just did on the opposite side. Glass them both in with at least 1708.

If you'd like to do the work to install four stringers, then now would be the time. If it was my boat, that's what I would do. Actually, that's what I'm doing! :D

Add a few bulkheads between the stringers and glass those in as well.

Don't give up and don't get frustrated. Just pick up and keep moving forward. For removing the work you did, a cutoff wheel on a grinder will cut right through it. Grind all of the epoxy and cloth out and replace the work as explained above.

Keep posting progress pics Buddy it is helpful for others. ;)

Henry
 

Roosta

Well-Known Member
Joined
Aug 28, 2012
Messages
57
Reaction score
48
When it comes to the marine industry, George has been around and has his hands in a number of successful projects. I would try to get past the previous interactions and follow his recommendations. The man is a wealth of knowledge and I have nothing but good things to say about him. ;)

Me personally, I would secure the hull. Brace it temporarily if need be. Then cut out one half of one side of the structure you have put in. Don't cut everything out all at once. Then, install a full-length stringer from the bow to the transom. Buy quality kiln-dried lumber that is straight and has the proper grain orientation. Install that and get as much lumber down in the hull as you can. Glass that in with quality materials. Me personally, I don't use epoxy. I'd use vinylester resin though. Not the crap from Home Depot. Only because I'm gel coating afterwards and am steering away from paint.

Once you get one stringer installed and glassed in, take out the other half of the work you have done. Then replace that with another full-length stringer like you just did on the opposite side. Glass them both in with at least 1708.

If you'd like to do the work to install four stringers, then now would be the time. If it was my boat, that's what I would do. Actually, that's what I'm doing! :D

Add a few bulkheads between the stringers and glass those in as well.

Don't give up and don't get frustrated. Just pick up and keep moving forward. For removing the work you did, a cutoff wheel on a grinder will cut right through it. Grind all of the epoxy and cloth out and replace the work as explained above.

Keep posting progress pics Buddy it is helpful for others. ;)

Henry

Thanks Henry. I didn't realize the history on these boards. I was just looking for some help from other boat owners that maybe were crazy enough to take on one of these projects.

Definitely had to temper the frustration since day 1 when I was just going to put the battery in the boat, do a quick carb clean and take her to the lake.

I just don't know if this old Southwind is worth the effort. It's been a great boat over the last 18 years up until now. The gel is pretty hammered, but the interior is good. I'm sure if I put it back together as is, maybe pour some foam under the floor will last a decent while. But now would the time to do it right, and it seems the worst part of the job is already done.

I was looking at the boat today, and I was thinking that perhaps I could cut vertical slots down those 'bulkheads' and drop in a 2x. glue them in and glass the whole mess with 1708. I just don't know if leaving those bulkheads in will be a problem. Maybe George will chime in here and give his expert opinion. It's too bad the boat doesn't reside in Havasu anymore.
 

Backlash

Well-Known Member
Joined
Jan 14, 2011
Messages
14,435
Reaction score
28,014
I'm the kind of person who tries to do everything I do to the best of my abilities. It usually takes longer, costs me more money and may never be recognized by anyone else. Ever.

But,

I will know what type of job was done. Doing things halfass is exactly that. Halfass. My Grandfathers didn't operate that way, neither of my Dads operate that way and I am trying to carry on that attitude in my life and try to live up to their standards.

If it's worth doing, it's worth doing right. ;)

Fix the structure with the intent on keeping the boat. Do it right. Worry about the gel later. Worry about the interior later.

Get that rebuilt correctly and then you KNOW everything you do later will be resting on a solid foundation. Later on, you may decide to sell the boat. Or you may decide to keep it. Either way, you know the work YOU did won't be considered halfass. ;)

Henry
 

coolchange

Lower level functionary
Joined
Jan 1, 2008
Messages
10,414
Reaction score
15,425
I don't know that I would build a 12,000 dollar, 3500$ jet boat. Not that I haven't, but wouldn't again,LOL. If it wet mine, and its not, I would do what I could to make it work for.my desired outcome. Can I make it SAFE, and get 5 more years out of it? Are the motor stringers good, the transom? The motor and pump? I've done some work on boats for people that I thought were crazy. " IT was my dads boat, it was my brothers boat" etc. Boats are an emotional object with little sensibility to them.
 

Roosta

Well-Known Member
Joined
Aug 28, 2012
Messages
57
Reaction score
48
I don't know that I would build a 12,000 dollar, 3500$ jet boat. Not that I haven't, but wouldn't again,LOL. If it wet mine, and its not, I would do what I could to make it work for.my desired outcome. Can I make it SAFE, and get 5 more years out of it? Are the motor stringers good, the transom? The motor and pump? I've done some work on boats for people that I thought were crazy. " IT was my dads boat, it was my brothers boat" etc. Boats are an emotional object with little sensibility to them.

Wife and I met at Parker (me in my "Bitchen White and Rust Brown" jet boat) and so yeah the boat has turned into a sentimental object to throw money at... I tried to get rid of it about 3 years ago, and yet here I am today all itchy and pissed off.... :grumble:

Pump is solid and the engine has a fairly fresh top end... Got to weigh it all and decide what to do. Think I'll work on the bottom side for a bit before dig myself any deeper.
 

Roosta

Well-Known Member
Joined
Aug 28, 2012
Messages
57
Reaction score
48
Well folks, I only had a few hours to mess with the boat today. So I did some glassing on the bottom side of the hull.

The 'wet out bench' worked really slick. much better than trying to apply layer by layer upside down. Also the roller was the hot set up for upside down work.:thumbsup

IMG_1867.jpg IMG_1868.jpg IMG_1878.jpg IMG_1879.jpg
 

Roosta

Well-Known Member
Joined
Aug 28, 2012
Messages
57
Reaction score
48
Hey George,

I read your posts multiple times, very informative. From what everyone is saying you're the guru. I'm hoping you can help me out with a few questions.

1. The 'bulkheads' I put in have been epoxied and filleted, but I haven't glassed them in yet. I was thinking that i could make vertical cuts down the bulkheads (slot them out) and drop two new stringers in from the 'T' bulkhead/engine forward. Do you think it will be a problem to leave those bulkheads in place, or would you recommend removing them all together? Or just the outside edges?

2. Do you think it's worth the effort to put new stringers in from the 'T' forward? or is it a waste of time not putting the stringer in all the way from the transom forward. My concern with doing the latter is the floor height/configuration. Not to mention the amount of work involved.

3. As far as extra bulkheads to support the coamings go, There were bulkheads in front of the tanks (and under the bow), but I think there should be additional support where the engine cover and top of back seat are resting. Any recommendations on how to install a bulkhead support with the tanks behind it?
I am also considering adding some bulkheads between the dash and the bulkheads in front of the tanks.

IMG_1723.jpg IMG_1718.jpg IMG_1719.jpg
 

Backlash

Well-Known Member
Joined
Jan 14, 2011
Messages
14,435
Reaction score
28,014
Roosta I would wrap up the glass work you are doing on the bottom. Hold off on that until you get the structure fixed.

I would do as I said in the previous post. You need 4 stringers in that hull. From the transom as far forward as you can make them. Set the two "Main" stringers about 26" apart. Run those as high as they need to be. Depending on the depth of the hull, you'll need either 2x6 or 2x8. Then add two more stringers on the outside of those. There you may be using 2x4 or 2x6 depending on what you used as the main stringers. Once you get these four main stringers set in the hull, then you would add whatever bulkheads you needed. Once you have the structure solid and set, flip the hull over and work on the bottom. At that point you can grind and fill the hull to make it straight. New gel and then flip the hull back over. Finish any glass work on the inside and call it a day. Obviously this is a condensed version but you get the idea.

Check my "Schiaward" thread in the Schiada section and look at what I've started. My project isn't finished but I tried to include a lot of pictures to let people see how I've done things. I'll be setting my main stringers in the next few weeks once it cools down a little bit and I get a break from other projects.

Henry
 

Roosta

Well-Known Member
Joined
Aug 28, 2012
Messages
57
Reaction score
48
Roosta I would wrap up the glass work you are doing on the bottom. Hold off on that until you get the structure fixed.

I would do as I said in the previous post. You need 4 stringers in that hull. From the transom as far forward as you can make them. Set the two "Main" stringers about 26" apart. Run those as high as they need to be. Depending on the depth of the hull, you'll need either 2x6 or 2x8. Then add two more stringers on the outside of those. There you may be using 2x4 or 2x6 depending on what you used as the main stringers. Once you get these four main stringers set in the hull, then you would add whatever bulkheads you needed. Once you have the structure solid and set, flip the hull over and work on the bottom. At that point you can grind and fill the hull to make it straight. New gel and then flip the hull back over. Finish any glass work on the inside and call it a day. Obviously this is a condensed version but you get the idea.

Check my "Schiaward" thread in the Schiada section and look at what I've started. My project isn't finished but I tried to include a lot of pictures to let people see how I've done things. I'll be setting my main stringers in the next few weeks once it cools down a little bit and I get a break from other projects.

Henry

Damn Henry, that's quite a project. Killer craftsmanship Dude! I don't think I have it in me to take the Southwind to that level.
 

Backlash

Well-Known Member
Joined
Jan 14, 2011
Messages
14,435
Reaction score
28,014
Thank you for the kind words I truly appreciate it. I wouldn't consider myself a craftsman but I definitely try to do my best. And to be honest with you, I LOVE this kind of work. If I could figure out a way to earn an honest living doing this type of work, I would again pursue it. The marine industry is just so difficult to navigate and there are times when work is hard to come by. ;)

I have two very different boat projects that are both long-term projects that I will eventually finish. The Howard and a Formula. Both are fantastic hulls and both are worth the time, money and energy (In my opinion). So for those reasons, I can justify spending time working on them.

For a project of your magnitude, you either have to pay someone else to do the work, or commit to it and see it through. If you choose to pay someone, it won't be cheap. If you choose to tackle the project yourself, it will cost you less but will take much longer. You just have to choose which route to take based on your goals. Set the course and roll with it. ;)

Again, thank you for the compliments I truly appreciate it.

Henry
 

Roosta

Well-Known Member
Joined
Aug 28, 2012
Messages
57
Reaction score
48
Thank you for the kind words I truly appreciate it. I wouldn't consider myself a craftsman but I definitely try to do my best. And to be honest with you, I LOVE this kind of work. If I could figure out a way to earn an honest living doing this type of work, I would again pursue it. The marine industry is just so difficult to navigate and there are times when work is hard to come by. ;)

I have two very different boat projects that are both long-term projects that I will eventually finish. The Howard and a Formula. Both are fantastic hulls and both are worth the time, money and energy (In my opinion). So for those reasons, I can justify spending time working on them.

For a project of your magnitude, you either have to pay someone else to do the work, or commit to it and see it through. If you choose to pay someone, it won't be cheap. If you choose to tackle the project yourself, it will cost you less but will take much longer. You just have to choose which route to take based on your goals. Set the course and roll with it. ;)

Again, thank you for the compliments I truly appreciate it.

Henry

Hey Man, the proof is in the puddin.
Wish I had a solid hull to begin with... Kind of feel like I'm puttin lipstick on a pig. Got some decision making to do and then I will finish it up. I don't think the ole Southwind is worth it to go full on redo like you're doing, but at least it will be better than it was...
 

AzGeo

Fair winds and following seas George.. Rest Easy..
Joined
Jan 28, 2009
Messages
8,298
Reaction score
7,922
Out at Billy B's, and back here working on the Hondo runner . I think I have a method that will make it 'strong', but not 'very light', at this point in the process .

Doing all this work, you really need to work on the bottom . The hull has a big hook near the transom and this must be removed, to make the boat run well with all this extra weight .

So as not to upset the motor mounts, I would get 2 pieces of 1" X 6" X 10' or 12', dry fur wood . The length depends on where the TOE board is mounted and that is where I would end these long stingers . I would grind the bottom, stringers, and an area at the transom . Mount these two boards to the 'outside' of the '1/2' stringers, and to the hull bottom (contouring required) all the way up to the toe board . The TOP of them should be equal height to BONDING to the BOTTOM of the new 3/4" plywood center floor piece . (one piece) The added glass used to bond these two new stringers will 'branch out' and start at 2" , then 4", then 6" and 8", wider than the stringers, so that you are 'holding them in' AND making the hull thicker on both sides of them . Notch all those small bulkheads to accept the long pieces, and glass them all together .

Place a 'straight edge' across the hull, BEFORE you install the 3/4" floor piece . If you plan to place the new floor into the outer strake lines, as the original one was, that's OK . BUT you need to add 2 more pieces of wood to the hull bottom .

'Half round hard wood molding', 2" wide and about 3/4" tall, 10' or 12' long .

This will be placed UNDER the floor, and will TOUCH/bonded the floor bottom . They will start at the TRANSOM, and go forward to beyond your foot throttle, or at the toe board . (yes it will need to curve and it will bend to do it) Glassing them in all the way to the new stringers will THICKEN the weak area next to the motor, and spread out the weight of the seats/passengers .

The floor needs to be BONDED to all the wood under it . Line everything up, pencil lines on the floor where you plan to put STAINLESS WOOD SCREWS into the tops of all the stringers and bulkheads under it . REMEMBER, it must all be 'marked and ready' because ALL the wood under the floor MUST have WET mat stacked on it, for the BOND to take place during the install . DO NOT drill thru the hull bottom, some areas will require SHORT screws .

Once the floor is BONDED in, you can work on the side bulkheads near the front of the tanks . Take measurements of your seating framework . You will need to make 'seating pedestals' for correct seating height . Once you have the rectangles for the seating bases, they need to be 'angle cut' to fit the hull outside of the flat floor area . Set them into place, and reinforce the hull in the areas of the bases, and add 6"+ more to the outer side parallel, right up to the tanks . Thicker hull in all these areas.

Measure the height of the 'thicker hull' up to the bottom of the WOOD in the side gunnels (both sides may be different) Cut 2 pieces of 3/4" plywood 6" wide and long enough to go between the new thick hull and the wood in each gunnel PLUS ONE HALF OF AN INCH ! YES ! taller than what you have now . The sides are sagging, and this will stop that problem too .

These 6" bulkheads will go in 'front to rear' and hold up the sides of the deck, once glassed to the floor, and you make a couple of aluminum plates that have 2 thru bolts to the deck and 2 thru bolts to the new piece of wood . I use 1/4" flat head stainless machine screws for all of this .

Now you can GLASS IN the seating pedestals, to the new floor and the angled area of the newly thicker hull . This will support all the fat asses you will ever give rides to .

I didn't even go into re-mounting the tanks here .

You will need longer motor mount bolts, but I think this will fix any 'weaknesses' the hull currently has .

DO THE BOTTOM WORK, you just don't know how how much that HOOK kills the performance of the boat .

GOOD LUCK, ask questions as they come up ..........
 

Roosta

Well-Known Member
Joined
Aug 28, 2012
Messages
57
Reaction score
48
George, I sure appreciate all the time, thought and energy you put into this debacle I'm working on. I will try to absorb all you have laid out for me before I start asking dumb questions. I will have a few no doubt.

Thanks,
Jon
 

Headless hula

I’ve found boating heaven in Florida!
Joined
May 24, 2016
Messages
11,141
Reaction score
24,701
Question.
If he'd have pulled the motor out would it have as bad a hook? Is that the result of pulling the structure out that was bad?
Curious.
Thanks.
 

Backlash

Well-Known Member
Joined
Jan 14, 2011
Messages
14,435
Reaction score
28,014
The hook commonly found in a hull bottom can occur for several reasons. One, the builder created a slight hook when the mold was created. This was done to get the boat "Over the hump" a little more quickly when initial acceleration occurred. Other times, molds could sit dormant for some time where they weren't supported appropriately and the hook could develop that way (In the mold). Other times, a hook occurs when the boat sits on a trailer that offers insufficient support of the boat. And again, it could be caused due to insufficient structure in the hull bottom when the boat was initially built. Solid framework equals more weight which creates a heavier and now slightly slower boat. Manufacturers would have a hard time selling a boat that "Was built solid like a tank and could achieve speeds of 45mph." :D

I'm not trying to speak for George but felt I would throw in my .02.
 

AzGeo

Fair winds and following seas George.. Rest Easy..
Joined
Jan 28, 2009
Messages
8,298
Reaction score
7,922
Question.
If he'd have pulled the motor out would it have as bad a hook? Is that the result of pulling the structure out that was bad?
Curious.
Thanks.

As Henry said, the 'hook' is/was in the hull bottom before all the work began .

Many reasons for 'hook' to occur, and it can happen on the sides, and deck of a boat too .

I just know that this boat will have it, and repairing it is the most effective way to gain more speed without throwing a bunch of money at it, just lots of dirty work .

Actually, when the motor weight is not properly supported by the trailer, the gets 'belly' in it, and then never runs right, because they become 'too deep' and cannot be repaired .

This 'hook' will be in the last '1' to 3' of the rear center hull riding surfaces . It acts like 'down trim tabs', and lifts the tail at all speeds .
 

Roosta

Well-Known Member
Joined
Aug 28, 2012
Messages
57
Reaction score
48
As Henry said, the 'hook' is/was in the hull bottom before all the work began .

Many reasons for 'hook' to occur, and it can happen on the sides, and deck of a boat too .

I just know that this boat will have it, and repairing it is the most effective way to gain more speed without throwing a bunch of money at it, just lots of dirty work .

Actually, when the motor weight is not properly supported by the trailer, the gets 'belly' in it, and then never runs right, because they become 'too deep' and cannot be repaired .

This 'hook' will be in the last '1' to 3' of the rear center hull riding surfaces . It acts like 'down trim tabs', and lifts the tail at all speeds .

Before I put the new center stringer in, I checked out the bottom, and yes it does have a very slight hook in the last foot or so. I have read that this may be why it has a tendency to porpoise.
Do you think fixing the hook will take care of the porpoise? Or is that a whole nother can o worms to open?.....

It's been raining over here for the last couple of days, so I haven't looked anything over since you sent the structural recommendations.
 

AzGeo

Fair winds and following seas George.. Rest Easy..
Joined
Jan 28, 2009
Messages
8,298
Reaction score
7,922
I don't know what you have for a nozzle and set up, so it's tough to guess .

The 'hook' will make the top end speeds much better, but removing it often ADDS more Porpoise at mid-speeds , so what are you looking for and what do you have as equipment ?

IF you have a 'short droop' and a Place Diverter, you will be able to 'adjust your nozzle trim' and have smooth boating at all speeds, if not, it won't .

I have never and would never do any glass work on that kind of boat, and not fix the 'hook', it makes no sense to me .
 

Roosta

Well-Known Member
Joined
Aug 28, 2012
Messages
57
Reaction score
48
No droop, but it has a place diverter. The porpoise is at cruising speeds. I can trim it down to make it go away, but then it's plowing... Or if I put my foot into it, it will go away... It's never porpoised at WOT.
 

Roosta

Well-Known Member
Joined
Aug 28, 2012
Messages
57
Reaction score
48
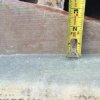
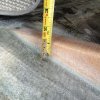
Well, I just ran out there with a straight edge. There's a hook about 1' back. it's a 1/16" or less and is very gradual (maybe 18" long)

On the Driver side there's an old bottom repair and they built it up too high, so there's a minor hump (with a hook on each side)... Since the 'hump' has stress cracks, I will be grinding it down and refinishing, so I may as well get rid of the hook.

Maybe they put that hook in there from the factory.
 

Backlash

Well-Known Member
Joined
Jan 14, 2011
Messages
14,435
Reaction score
28,014
I'm glad to hear you moving forward with this project. I would still set the structure first and get that boat's final shape locked in place. Otherwise, in my opinion, you will spend all this time, money and energy fixing the bottom only to risk things being "Out of whack" AFTER you set the stringers and bulkheads. It just seems like you're doing things in the reverse order of how they should be done.

I relate it to hanging drywall on the interior walls of a raised foundation home. It seems like you're hanging the drywall and taping and mudding the walls knowing the foundation is out of level and needs to be corrected. After you've got all the walls finished inside the home, you THEN go under the house and start jacking things up to be level.

Again, this is just my opinion. Using the above scenario, it makes sense to ME to frame the structure for the boat BEFORE you work on the running surfaces.
 

Roosta

Well-Known Member
Joined
Aug 28, 2012
Messages
57
Reaction score
48
I'm glad to hear you moving forward with this project. I would still set the structure first and get that boat's final shape locked in place. Otherwise, in my opinion, you will spend all this time, money and energy fixing the bottom only to risk things being "Out of whack" AFTER you set the stringers and bulkheads. It just seems like you're doing things in the reverse order of how they should be done.

I relate it to hanging drywall on the interior walls of a raised foundation home. It seems like you're hanging the drywall and taping and mudding the walls knowing the foundation is out of level and needs to be corrected. After you've got all the walls finished inside the home, you THEN go under the house and start jacking things up to be level.

Again, this is just my opinion. Using the above scenario, it makes sense to ME to frame the structure for the boat BEFORE you work on the running surfaces.

Thanks Man. Yep, I'm going to work on the structure next. I was keeping busy repairing the strakes until I have a path forward on the structure. Going to take a look at that tomorrow.
 

Backlash

Well-Known Member
Joined
Jan 14, 2011
Messages
14,435
Reaction score
28,014
Good to hear. Don't go rush over to the local Homie Depot to buy the lumber for your stringers. That wood is junk. Go to an actual lumber yard and pay for "Kiln Dried Douglas Fir." Take your time looking for the straightest boards with the best grain alignment. For the Howard, I had to go through a ton of lumber just to find four pieces that would work. So take your time and buy the best you can find. ;)
 

Backlash

Well-Known Member
Joined
Jan 14, 2011
Messages
14,435
Reaction score
28,014
And buy material that is taller than you may need. Meaning, if you think a 2x6 will work, pay for the 2x8 and then cut it down to size. Don't try to "Make it fit." Get the height of the stringers to be where the height of the floor needs to go.
 

Roosta

Well-Known Member
Joined
Aug 28, 2012
Messages
57
Reaction score
48
Out at Billy B's, and back here working on the Hondo runner . I think I have a method that will make it 'strong', but not 'very light', at this point in the process .

Doing all this work, you really need to work on the bottom . The hull has a big hook near the transom and this must be removed, to make the boat run well with all this extra weight .

So as not to upset the motor mounts, I would get 2 pieces of 1" X 6" X 10' or 12', dry fur wood . The length depends on where the TOE board is mounted and that is where I would end these long stingers . I would grind the bottom, stringers, and an area at the transom . Mount these two boards to the 'outside' of the '1/2' stringers, and to the hull bottom (contouring required) all the way up to the toe board . The TOP of them should be equal height to BONDING to the BOTTOM of the new 3/4" plywood center floor piece . (one piece) The added glass used to bond these two new stringers will 'branch out' and start at 2" , then 4", then 6" and 8", wider than the stringers, so that you are 'holding them in' AND making the hull thicker on both sides of them . Notch all those small bulkheads to accept the long pieces, and glass them all together .

Place a 'straight edge' across the hull, BEFORE you install the 3/4" floor piece . If you plan to place the new floor into the outer strake lines, as the original one was, that's OK . BUT you need to add 2 more pieces of wood to the hull bottom .

'Half round hard wood molding', 2" wide and about 3/4" tall, 10' or 12' long .

This will be placed UNDER the floor, and will TOUCH/bonded the floor bottom . They will start at the TRANSOM, and go forward to beyond your foot throttle, or at the toe board . (yes it will need to curve and it will bend to do it) Glassing them in all the way to the new stringers will THICKEN the weak area next to the motor, and spread out the weight of the seats/passengers .

The floor needs to be BONDED to all the wood under it . Line everything up, pencil lines on the floor where you plan to put STAINLESS WOOD SCREWS into the tops of all the stringers and bulkheads under it . REMEMBER, it must all be 'marked and ready' because ALL the wood under the floor MUST have WET mat stacked on it, for the BOND to take place during the install . DO NOT drill thru the hull bottom, some areas will require SHORT screws .

Once the floor is BONDED in, you can work on the side bulkheads near the front of the tanks . Take measurements of your seating framework . You will need to make 'seating pedestals' for correct seating height . Once you have the rectangles for the seating bases, they need to be 'angle cut' to fit the hull outside of the flat floor area . Set them into place, and reinforce the hull in the areas of the bases, and add 6"+ more to the outer side parallel, right up to the tanks . Thicker hull in all these areas.

Measure the height of the 'thicker hull' up to the bottom of the WOOD in the side gunnels (both sides may be different) Cut 2 pieces of 3/4" plywood 6" wide and long enough to go between the new thick hull and the wood in each gunnel PLUS ONE HALF OF AN INCH ! YES ! taller than what you have now . The sides are sagging, and this will stop that problem too .

These 6" bulkheads will go in 'front to rear' and hold up the sides of the deck, once glassed to the floor, and you make a couple of aluminum plates that have 2 thru bolts to the deck and 2 thru bolts to the new piece of wood . I use 1/4" flat head stainless machine screws for all of this .

Now you can GLASS IN the seating pedestals, to the new floor and the angled area of the newly thicker hull . This will support all the fat asses you will ever give rides to .

I didn't even go into re-mounting the tanks here .

You will need longer motor mount bolts, but I think this will fix any 'weaknesses' the hull currently has .

DO THE BOTTOM WORK, you just don't know how how much that HOOK kills the performance of the boat .

GOOD LUCK, ask questions as they come up ..........

Ok, so I measured the area next to the stringer and where it would continue under the floor. The floor is very close to the bottom, and so the 1x6 would be cut down to 2-1/2" at the engine stringer, and then would taper down to 1" at the toe board. Not sure if this is going to add much structurally.

If I put the moulding all the way from the transom to the toe board, it's going to be pretty much right next to the 1x6 as the boat starts to taper in. Plus I would have to notch all of the 'bulkheads' to run the moulding or run short pieces in between. At that point I may as well chop the outside part of the bulkheads off. I like the idea, I just don't think there's enough room.

I'm thinking that I still should run the moulding (or a short stringer from the transom to the 'engine bulkhead'. and build up the glass between the engine stringers and the fuel tanks.

Back to considering dropping a 2x from the engine bulkhead to toe board bulkhead. or fill voids with 4lb foam. AND building up the bottom between engine stringers and fuel tanks.

IMG_1885.jpg IMG_1888.jpg IMG_1891.jpg IMG_1892.jpg
 

AzGeo

Fair winds and following seas George.. Rest Easy..
Joined
Jan 28, 2009
Messages
8,298
Reaction score
7,922
If you use a 'rear bench seat', you can go from the 6" tall new stringer with a taper, down to the floor level over the 20" of distance under the rear bench base pedestal . You can then screw on a 1" X 1" strip on each side of both stingers, to attach the now 'notched out floor' under the seat base .

edit; You can do this with 'side seating bases too' .

You will need a piece of 1" X 1" on at least one side of the new stringer going forward, for screwing and bonding to the floor bottom . So just put the strips on both sides of the tapered areas, and notch out the floor plywood there .

Does this make sense ?

The 'moulding goes 'outside of the floor area', in that flat zone between the floor and the fuel tanks .
Bonding it down and then glassing it in will thicken the hull from the tanks to the new stringers at the motor, and thicken the hull at the seat bases, and new side bulkhead installation area . (near front of fuel tanks .
 

AzGeo

Fair winds and following seas George.. Rest Easy..
Joined
Jan 28, 2009
Messages
8,298
Reaction score
7,922
In photo 3, you need to thicken up that whole strake area that you will be bonding the floor onto .

The 'moulding' goes outside/above that strake/bonding area . But when you do install the moulding at the rear engine area, you must go all the way down to the new glass you installed the new stringer with . That area, next to the motor on both sides is very thin and weak too . The hull is 1/2" there and needs to be at least 3/4", down to the motor stringers . (it's all old and fractured) Thicker there and the new 1" LONG stringers will take the 'pounding' off of the weak area where the short stingers met the old floor .
 

Roosta

Well-Known Member
Joined
Aug 28, 2012
Messages
57
Reaction score
48
Ok, yes that makes sense on the moulding. The hull has actually already been thickened up along there due to to the fuel tanks being tabbed in (more than once) and the floor being replaced at least once. Plus I will be tabbing in the new tanks... The old 1/2" ply floor was heavily laminated with at least 2 layers of heavy roving. It's 1/4" + thicker along there. In the engine area from the strakes down to the stringer it definitely does need to be beefed up. Along the strake where the floor will lay down, yes you're right - it could use some more glass along there.

The seats - that's another cluster...... See below. Previous owner built stainless steel seat peds. I am seriously considering making new wood pedestals for the front as the passenger side (my fat ass friends) top is buckled. The rear seat has a real big stainless pan that holds a crap load of stuff, so hope it would still fit in between. I'll need to measure. But like the front seats, they were all just attached straight to the 1/2" floor with wood screws.

I'm beginning to think it may be easier to yank the engine and put in new stringers...
 

Attachments

  • IMG_1881.jpg
    IMG_1881.jpg
    66.1 KB · Views: 199

Roosta

Well-Known Member
Joined
Aug 28, 2012
Messages
57
Reaction score
48
Because I am SERIOUSLY considering yanking the engine and replacing the short engine stringers with full length.... I guess I must like the boat to even consider doing this...
 

Headless hula

I’ve found boating heaven in Florida!
Joined
May 24, 2016
Messages
11,141
Reaction score
24,701
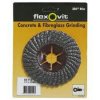
Did you look up that "zek" wheel? Believe me, you'll like it.
Worth every penny of 8 bucks. Ebay.
 

Backlash

Well-Known Member
Joined
Jan 14, 2011
Messages
14,435
Reaction score
28,014
That's exactly what I would do. Cut all this out and start over from scratch. The end result will be a more solid product. Set 2x6 stringers in where the engine mounts will go (Typically 26" apart from one another), and then add a second set of stringers out board of those two (About 12" further out from the centerline of the hull). Just my .02.
 

coolchange

Lower level functionary
Joined
Jan 1, 2008
Messages
10,414
Reaction score
15,425
Did you look up that "zek" wheel? Believe me, you'll like it.
Worth every penny of 8 bucks. Ebay.

Man those things look brutal. I may just buy some to put in the box. Thanks for the heads up.
 

HydroSkreamin

StressEliminator
Joined
Jan 12, 2014
Messages
2,121
Reaction score
5,727
Man those things look brutal. I may just buy some to put in the box. Thanks for the heads up.

They make a 7" version as well. Hold on! I don't suggest trying to trim fingernails with either one....:D

The 4" is nicer for getting into corners, and the 7" just covers more ground when you are prepping the surface for layup.
 

Roosta

Well-Known Member
Joined
Aug 28, 2012
Messages
57
Reaction score
48
Yep, need to get one of those wheels... I've been going through the 36 grit sand pads on the 4" grinder.

Well, I got the engine out............. the fun continues.

IMG_1917.jpg IMG_1919.jpg
 

Roosta

Well-Known Member
Joined
Aug 28, 2012
Messages
57
Reaction score
48
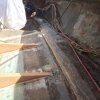
Cut out the old stringers, PS stringer and transom were fuel soaked from the original fuel leak that started this whole mess.... The stinger weep holes were not sealed.

Other problems found, the DS rear engine mount holes were oblong and that rear corner was 1/4" lower than the other mounts. Also, found some rot around one of the front DS engine mount holes.

Probably going to remove the 'wings' from the bulkheads once I get my templates done....

The 460 is being gone through by my engine builder (Pops). He's retired and needs a project, the price is right, plus I know he's going to take the time to do it right.

IMG_1925.jpg
 

AzGeo

Fair winds and following seas George.. Rest Easy..
Joined
Jan 28, 2009
Messages
8,298
Reaction score
7,922
You do have the hull on a sturdy LEVEL platform or dolly, supporting the stringer areas and bottom, right ? (so the center does not BELLY, or, 'twist' out of shape)

You are learning first hand, that 'all boat builders' don't always do their best work on every boat .

Quality and detail levels, are not 'crimes', but what you learn here (unfortunately the hard dirty way) will serve you when shopping for a new boat, working on your own, and helping friends .

Your work here has made you a 'resource' of your knowledge for everyone you talk with in this realm .

Now you MUST fix the HOOK in the hull bottom, it's a 'moral imperative' . The Place Diverter will control any 'bounce' .

Few more points; Ford marine 460" motors of the 1970's, have a cam timing that is retarded 8 degrees, from the factory .

Please use an AFTERMARKET timing chain set, aftermarket camshaft (your choice), and NEW VALVE SPRINGS (never used here). The springs must have 100 lbs on the seat, and 'at least' 285 lbs, 'over the nose' . (prefer 300) Otherwise the thing won't run well . 80 lbs factory valve springs on those motors MADE THEM WEAK, and allowed the motors to have a "1 year warranty", when new .

Degree the cam in 3 or 4 degrees advanced, and it will 'settle down' right around @2+, for quickness .

750 CFM or less on an iron head Ford . 180 style, factory or Performer II, (never performer I!) NO tunnel rams ! (ask Scott Foxwell)

Good luck, go faster ............
 

Roosta

Well-Known Member
Joined
Aug 28, 2012
Messages
57
Reaction score
48
Thanks for the advice. I'm learning a lot - that is for sure.

Yes, I think it's supported well. I may get another support under the keel back towards the engine area just to be safe.

My goal this weekend is to get the new stringers shaped and glued in...
 

mesquito_creek

Well-Known Member
Joined
Sep 25, 2009
Messages
3,905
Reaction score
6,782
Won't those "wings" almost act like a clam shell jig in securing the stringers? While they are going go be removed eventually almost seems like a waste not to leverage them as long as they are already in there?
 

Roosta

Well-Known Member
Joined
Aug 28, 2012
Messages
57
Reaction score
48
Some progress... Shaping the stringers was a bit more work than I anticipated, but got em glued in over the weekend. Threw everything but the kitchen sink on them to hold them down... :cool

Now on to glassing them in...

IMG_1950.jpg
 

Attachments

  • IMG_1951.jpg
    IMG_1951.jpg
    64 KB · Views: 180

Backlash

Well-Known Member
Joined
Jan 14, 2011
Messages
14,435
Reaction score
28,014
Roosta this looks great!! Having the full-length stringers is imperative. ;) When you glass the stringers in, make sure you rough up the bottom of the hull to give the new glass some teeth to adhere to. Don't just lay the glass and resin down to a smooth surface. Looking a lot better that what you started with. Keep it up! ;)
 

Headless hula

I’ve found boating heaven in Florida!
Joined
May 24, 2016
Messages
11,141
Reaction score
24,701
So, update here?
Have you tried the grinding wheel that was suggested?
I mentioned it, and the specific grit for exactly that purpose. to rough up the surface to provide more mechanical "bite".


Hope things are progressing.
 

Roosta

Well-Known Member
Joined
Aug 28, 2012
Messages
57
Reaction score
48
Here's where I'm at now... Hoping to get the stringers glassed in this week. Just got to get off my a$$ and get it done, then I can move on to the floor...

I got the zek wheels (and they are bad ass), but they're not working to well with my 4" makita. I had to use some adapters to get it to fit the smaller shaft, but I can't seem to get it centered well. When I turn it on it shakes like a mutha. I'm afraid the SOB is going to come apart... So I went back to my 36 grit sanding pads. They work OK. Ideally, I would upgrade to a 4-1/2" grinder. Most of the grinding is done by now - Hopefully.

IMG_1959.jpg IMG_1962.jpg
 

Jimmy

Well-Known Member
Joined
Jul 25, 2015
Messages
2,290
Reaction score
1,625
I used one of these. I'm still on the first one and it still goes hard.

Edit: Just googled what a zek wheel was... haha. Disregard above statement.
 

Attachments

  • download%20(3).jpg
    download%20(3).jpg
    13.1 KB · Views: 198

Roosta

Well-Known Member
Joined
Aug 28, 2012
Messages
57
Reaction score
48
Life keeps getting in the way. I did get all of the stringers and bulkheads glassed in finally. just cut the first piece of floor, need to level everything out and should be good to start laying it in.

IMG_2049.jpg
 

spectra3279

Vaginamoney broke
Joined
May 17, 2011
Messages
16,874
Reaction score
17,812
I have a question for ya. Where you gonna put your fuel tank now?
 

Headless hula

I’ve found boating heaven in Florida!
Joined
May 24, 2016
Messages
11,141
Reaction score
24,701
Life keeps getting in the way. I did get all of the stringers and bulkheads glassed in finally. just cut the first piece of floor, need to level everything out and should be good to start laying it in.

View attachment 527717

That looks great man! Nice job. Patience and tenacity will pay off. It's worth it.
 
Top