WELCOME TO RIVER DAVES PLACE

Back on it

djunkie

Broke mo fo
Joined
Sep 24, 2007
Messages
32,821
Reaction score
4,275
Don't forget the dielectric grease under it. [emoji3]
 

slowride

Well-Known Member
Joined
Dec 19, 2007
Messages
1,357
Reaction score
484
No guessing with this post. Heated and bent the brake pedal to hug the left frame rail and leaves me room for the steering column (broomstick). It'll be a left foot brake but in all honesty, it's more natural to me as I got used to doing it back in the old bracket racing days. It's tight, but everything's measured and ready to bend some sheet metal for the 5-1/2" recessed firewall.
firewall2.jpg
firewall1.jpg
 

Flyinbowtie

Well-Known Member
Joined
Sep 25, 2007
Messages
12,003
Reaction score
10,889
Looking sweet with the body on it. The heat sink is over the top!
I am with you on the hood. Mixed emotions.
I think I'd try it with just the top of the hood, no sides...I'd also consider getting some aftermarket hood sides and punching a ton of louvers in them. The hood top will give you some protection from the weather but let that lovely little SBF show, and I think it should show, ya know?
Just my take...
 

slowride

Well-Known Member
Joined
Dec 19, 2007
Messages
1,357
Reaction score
484
Looking sweet with the body on it. The heat sink is over the top!
I am with you on the hood. Mixed emotions.
I think I'd try it with just the top of the hood, no sides...I'd also consider getting some aftermarket hood sides and punching a ton of louvers in them. The hood top will give you some protection from the weather but let that lovely little SBF show, and I think it should show, ya know?
Just my take...

I'm trying to ignore the whole hood deal for the time being and concentrate on the firewall and other assorted little details. The heat sink is off some industrial power supply and is a tad excessive, but I tend to lean that way with a lot of things......
 

slowride

Well-Known Member
Joined
Dec 19, 2007
Messages
1,357
Reaction score
484
Tonight was supposed to be removing the fuel tank, but I got sidetracked. I wanted something different for a dual feed Holley.... something old school but modern. I think I slipped back into 80's street rod though.......
fline1.jpg
fline2.jpg
 

slowride

Well-Known Member
Joined
Dec 19, 2007
Messages
1,357
Reaction score
484
Today I thought I'd try to blow up the garage. Since I'm not using the original fuel tank for fuel (see 2nd pic) and it's a lot of wasted space, I'm using it to house all the electronics,
First, gotta be able to access everything so a drop down panel needed to be cut out. Of course there were baffles to deal with, so after that was figured out, the cuts were cleaned up. The same style hinge that was used on the battery mount is what will be used on the dropdown panel. It can be unhinged and removed if necessary. A raised panel will be fabbed and spotwelded onto the access panel to mount the fuse block and relay panel. Cool thing about using the tank is basically ALL the wires and components will be hidden and what has to exit will either go down the cowl pillar or right down onto the firewall recess for the engine harness. The inside of the tank will be blasted before any finish work is done to it.
tank1.jpg
tank2.jpg
tank3.jpg
 

slowride

Well-Known Member
Joined
Dec 19, 2007
Messages
1,357
Reaction score
484
So why am I dealing with stinky gas fumes and sharp sheet metal? To hide all the electronics on this hinged access panel. :D Out for media blast tomorrow and start it's new life.
panel2.jpg
panel3.jpg
 

slowride

Well-Known Member
Joined
Dec 19, 2007
Messages
1,357
Reaction score
484
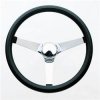
I'm conflicted .... again. The steering column is on it's way..... 28"long 2"dia polished stainless tilt, column shift, but I've hit a wall on the steering wheel. I've narrowed it to 2 choices which both appeal to me but for different reasons. The first is a little street roddy, but has really classic styling cues. The other is REALLY understated old school (in my way of thinking).
Opinions?
wheel1.jpg
grt-832_30_w_ml.jpg
 

Flyinbowtie

Well-Known Member
Joined
Sep 25, 2007
Messages
12,003
Reaction score
10,889
Second one.
No comparison.
This wheel belongs on the car. Tis a hot rod, right?
Either that or a Banjo Wheel...:D
Or a 13 inch painted version of the classic '40 Ford De-luxe model, complete with burgundy Ford horn button and gold lettering..
Of course, all this is just my humble opinion.
Cool idea on the tank mod. gonna file that one away...
:thumbup:
 

slowride

Well-Known Member
Joined
Dec 19, 2007
Messages
1,357
Reaction score
484
Second one.
No comparison.
This wheel belongs on the car. Tis a hot rod, right?
Either that or a Banjo Wheel...:D
Or a 13 inch painted version of the classic '40 Ford De-luxe model, complete with burgundy Ford horn button and gold lettering..
Of course, all this is just my humble opinion.
Cool idea on the tank mod. gonna file that one away...
:thumbup:

There's one big (stupid) downside to running that wheel..... the adapter. I've searched high and low and the only Grant adapters made now days have black bezels and it really needs to be chrome. It's really kind of a deal breaker. The only shiny one I've found for a 3 bolt wheel that I'd use is a polished aluminum piece from Ididit... at $115. Just something really wrong about a $50 wheel and a $115 adapter......:grumble:
 

slowride

Well-Known Member
Joined
Dec 19, 2007
Messages
1,357
Reaction score
484
Found a chrome adapter bezel at Speedway and pulled the trigger. Old school it is.....:D
 

slowride

Well-Known Member
Joined
Dec 19, 2007
Messages
1,357
Reaction score
484
I've had a full NOS set of vintage Sun's tucked away for this car for a few years and after picturing both steering wheels with this behind it, the choice was made.
1402.jpg
 

SuperJet

Well-Known Member
Joined
Aug 30, 2011
Messages
1,802
Reaction score
419
When I did my closed cab I modified the stock 31 gauge cluster (round speedo) to house my three accessory gauges (vintage SW). I had to relieve the two side gauge holes in the tank but it looked pretty sharp . Just an idea for you.
 

slowride

Well-Known Member
Joined
Dec 19, 2007
Messages
1,357
Reaction score
484
When the tank comes back, the gauge recess will be cut out and smoothed. The gauge layout will be as below. I tried to talk myself into only running 4 gauges for a better look, but that didn't work. Is what it is.....
dash.jpg
 

rvrrun

Well-Known Member
Joined
May 15, 2015
Messages
6,515
Reaction score
7,385
I'm conflicted .... again. The steering column is on it's way..... 28"long 2"dia polished stainless tilt, column shift, but I've hit a wall on the steering wheel. I've narrowed it to 2 choices which both appeal to me but for different reasons. The first is a little street roddy, but has really classic styling cues. The other is REALLY understated old school (in my way of thinking).
Opinions?
View attachment 477479
View attachment 477478

Go with the cheaper wheel. I ran a moon just because it was quick and inexpensive, I'll decide what's staying after the interior is done.

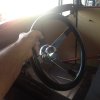
Have you run one of those columns before? I put one in my car because it was tilt and the bell had more of a Chevy van look than the ididit look, but they have a ton of slop in them that really bugs me. I thought it might be the borgensens or the box, but it's the tilt in the column. Also, no bearings in them, hollow shaft riding on a steel bushing.

They are very easy to shorten and get the perfect length, though.
 

slowride

Well-Known Member
Joined
Dec 19, 2007
Messages
1,357
Reaction score
484
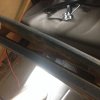
Have you run one of those columns before? I put one in my car because it was tilt and the bell had more of a Chevy van look than the ididit look, but they have a ton of slop in them that really bugs me. I thought it might be the borgensens or the box, but it's the tilt in the column. Also, no bearings in them, hollow shaft riding on a steel bushing.

They are very easy to shorten and get the perfect length, though.
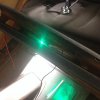
Haven't run it before but heard complaints similar to yours about the cheaper columns but not the Flaming Rivers. The length is just about perfect, but the proof will be on mock up with the firewall in.
 

rvrrun

Well-Known Member
Joined
May 15, 2015
Messages
6,515
Reaction score
7,385
That one didn't look like the FR, it looked like the overseas knockoffs on eBay. Theirs is probably better quality.
 

slowride

Well-Known Member
Joined
Dec 19, 2007
Messages
1,357
Reaction score
484
More little stuff before the column comes and the firewall gets bent.
WTH am I putting in the cowl above the tank? I ONLY want the gauges on the dash, so little things like turn signal lights need to be seen when ON, but hidden when they're not. When on, they'll project onto the L&R face of the tank and on the floor.
ts1.jpg
ts2.jpg


And the wheel......
wheel.jpg
 

slowride

Well-Known Member
Joined
Dec 19, 2007
Messages
1,357
Reaction score
484
I'm using Molex connectors throughout the car, but some areas need a little extra attention. For the headlights, I need a 3 wire connector, but it has to fit through the grommet hole in the radiator shell. A little trimming and detailing and it JUST fits through.
Before and after
hdcon1.jpg
I'll have to split the grommet, but problem solved
hdcon2.jpg
 

slowride

Well-Known Member
Joined
Dec 19, 2007
Messages
1,357
Reaction score
484
Bought some woven sheathing to use on the harnesses, but haven't used this one before. Figured the only way to seal the ends (and keep it from unraveling is with shrink tubing. Using the headlights for the guinea pigs. Won't really show, but it's about consistency ya know.
hdcon3.jpg
 

SuperJet

Well-Known Member
Joined
Aug 30, 2011
Messages
1,802
Reaction score
419
Bought some woven sheathing to use on the harnesses, but haven't used this one before. Figured the only way to seal the ends (and keep it from unraveling is with shrink tubing. Using the headlights for the guinea pigs. Won't really show, but it's about consistency ya know.
View attachment 484372

Is it that split woven stuff from McMaster? The stuff I use at the shop is called F6 and I also seal the ends with heat shrink. Absolutely love the stuff and it is head and shoulders above that corrugated crap.
 

slowride

Well-Known Member
Joined
Dec 19, 2007
Messages
1,357
Reaction score
484
Is it that split woven stuff from McMaster? The stuff I use at the shop is called F6 and I also seal the ends with heat shrink. Absolutely love the stuff and it is head and shoulders above that corrugated crap.

Not split woven, real woven sheathing (tube). I have to pre-assemble everything but the connector, but like the finished look.
 

slowride

Well-Known Member
Joined
Dec 19, 2007
Messages
1,357
Reaction score
484
Finally on the recessed firewall. A LOT of bends on different planes with very little wiggle room. Once this is done it'll fall together REALLY quick. Not looking pretty yet.....
firewall3.jpg
firewall4.jpg
 

slowride

Well-Known Member
Joined
Dec 19, 2007
Messages
1,357
Reaction score
484
Summer's over, done messing with the Canyon, and time to get the '31 done. Pulled the tank to start the mods. Since the tank will be housing the electronics (such as they are), a little air flow wouldn't hurt. The heat sink and HEI module will mount inside so to keep the stock look I'll be opening up the back of the tank (facing the firewall and hidden) to keep everything cool. You can see the hinged access door I made out of the bottom as well. The fuse and relay blocks will mount on it so I can just flip the door down to access them.
tankmod.jpg
 

slowride

Well-Known Member
Joined
Dec 19, 2007
Messages
1,357
Reaction score
484
Turning the tank into what I want. Backside's done, now to cut out the front........:yikes
tank2.jpg
 

slowride

Well-Known Member
Joined
Dec 19, 2007
Messages
1,357
Reaction score
484
if you looked really close in the photo above, you saw how the access panel will latch closed. It's called a Quik Latch and is really kinda cool and almost flush.
QUL-QL-25-B_ml.jpg

Of course that means I had to come up with a way to mount the post INSIDE the tank. Had some sheetmetal left over from the cutouts, so time to cut and bend and tweak. The bottom tab is bent to the contour of the bottom. Drill some holes in the tabs and plug weld it place. Wish I was a bit faster.....
brkt.jpg
 

slowride

Well-Known Member
Joined
Dec 19, 2007
Messages
1,357
Reaction score
484
I'll be mounting a modular relay block as well as the fuse block on platforms on the inside of the access panel. I was going to just make one big panel but as long as I'm playing with sheet metal, might as well do it right. When the panel swings down both blocks will be easily accessible.

door.jpg
 

slowride

Well-Known Member
Joined
Dec 19, 2007
Messages
1,357
Reaction score
484
I'm at that point where I need the wiring harness, so I have an American Autowire Route 9 coming. The components aren't in "normal" locations, so since all the wires and terminations are custom, I went bare bones. Here's the positive cable and starter relay. The loom will run down the A pillar behind the kick panel and come out behind the relay. More to come when I get the blocks mounted in the tank and start the layouts......
cable.jpg
 

slowride

Well-Known Member
Joined
Dec 19, 2007
Messages
1,357
Reaction score
484
Wire's here! Now to fab the sheetmetal risers for each block, tack them on the access door and finish the firewall.
fuse.jpg
 

slowride

Well-Known Member
Joined
Dec 19, 2007
Messages
1,357
Reaction score
484
More brackets. Do I NEED to do this? Naw, but I need the practice making brackets. Bracket for the fuse block tomorrow night.....
brkt1.jpg

brkt2.jpg

brkt3.jpg
 

slowride

Well-Known Member
Joined
Dec 19, 2007
Messages
1,357
Reaction score
484
Sometimes you're into it, sometimes you're not. Tonight I made a bracket for the fuse block and it was f'ed from the get go. Didn't take my time on the layout and made the first bend the wrong direction. Decided to use it to fine tuned the height of each leg since each one is a different length to make it level. Both are level just different heights (camera angle throws it off). I'll make a GOOD one tomorrow night.
Got the rivet nuts and gun tonight, so no need to thru bolt with nuts on the backside. :thumbsup
brkt4.jpg
 

slowride

Well-Known Member
Joined
Dec 19, 2007
Messages
1,357
Reaction score
484
Got a little sidetracked as I was fabbing the access door. I want a real dome light with door switches, but didn't want something obvious. I found a cool booted switch that would blend in to the pillar, but was from a VW Golf and used a VW connector. So rather than deal with micro pins and a bastard connector, I decided to go old school (if there is such a thing for dome light switches) and went with old Ford switches.
Little bit of hand work for the tabs in the hole, but not a big deal. Next.......
dome1.jpg
dome2.jpg
 

76 Southwind

Well-Known Member
Joined
May 12, 2011
Messages
397
Reaction score
417
Not sure how I missed this one but I'm all up to speed know... Unbelievable Mr. Ride.. Your got some over the top stuff going on...
 

slowride

Well-Known Member
Joined
Dec 19, 2007
Messages
1,357
Reaction score
484
More little stuff. I don't want ANY indicator lights visible on the dash, so am using green LED's for the turn signals on the left and right and a blue LED in the middle for the hi beam indicator. Here's the brackets that'll be tacked behind the dash rail so when they light up you'll only see the light aimed down at the dash face.
ts1.jpg

ts2.jpg
 

TomD

Breathing Member
Joined
Jul 24, 2008
Messages
4,233
Reaction score
1,417
That will work out nicely!:thumbup:
 

slowride

Well-Known Member
Joined
Dec 19, 2007
Messages
1,357
Reaction score
484
Tacked the brackets under the rail
ts3.JPG

Looks a little Xmas-y but will look good flashing. The tank will be painted black metallic, so thinking about ghosting a left and right arrow where they shine on the tank. Just an idea..... I'll paint a test panel and see if it works or not.
ts4.JPG
 

slowride

Well-Known Member
Joined
Dec 19, 2007
Messages
1,357
Reaction score
484
Time to go all Frankenstein on this tank so I can get the gauges, switches and wiring done. Cut out the bottom so I can tack in a flat piece, so as long as it's accessible, it's a good time to cap the old filler neck from the inside. Still looks stock, but now nobody can pour anything inside (I don't put it past some people).
tank6.jpg

tank7.jpg

tank8.jpg
 

slowride

Well-Known Member
Joined
Dec 19, 2007
Messages
1,357
Reaction score
484
Fun with sheetmetal.....
Fitted the bottom patch first. Want to get it tacked in place before I cut out the front for that patch. Don't need to cut out too much and have it twist.
tank9.jpg
 

fmo24

Well-Known Member
Joined
Nov 14, 2008
Messages
6,280
Reaction score
4,376
Are the red dealios magnets? Is this instead of using clamps to locate the patch?
 

slowride

Well-Known Member
Joined
Dec 19, 2007
Messages
1,357
Reaction score
484
Fun with sheetmetal.....
Fitted the bottom patch first. Want to get it tacked in place before I cut out the front for that patch. Don't need to cut out too much and have it twist.
tank9.jpg

Yes they're welding magnets. Quite strong and helps level the surfaces.
 

slowride

Well-Known Member
Joined
Dec 19, 2007
Messages
1,357
Reaction score
484
I didn't want the (purists stop reading now) power window switches exposed either and had just enough room behind the ends of the dash rail to mount them. weld up one hole, cut another. Easy access and out of sight......
tank13.JPG

tank14.JPG
 

slowride

Well-Known Member
Joined
Dec 19, 2007
Messages
1,357
Reaction score
484
Things are speeding up a bit. I don't want switches on the dash, and after laying them out it was obvious I didn't have the space to mount them all in the center patch panel.
Decided to mount the ignition and headlight switch on the bottom of the tank by the left kick panel.
tank10.JPG

tank11.JPG

tank12.JPG
 

slowride

Well-Known Member
Joined
Dec 19, 2007
Messages
1,357
Reaction score
484
Had a day locked in the garage figuring stuff out. Power windows will be on their way tomorrow, but had to figure out how to get the power to them.
Can't get conduit in to the door because the window tracks are tack welded where they would need to go. After trying a few alternatives wound up using the Painless JamTac. Not too obvious or street roddy......

jam1.jpg


jam2.jpg

Painless designed it for the flange to bolt on the outside of the pillar
jam3.jpg

Not quite enough gap between the door and the pillar (and it looked kind of "off-the-shelf" too), so inside it went
jam4.jpg

Opened up the back of the pillar to get it in from the backside, adjust the contact height and it was good to go
jam5.jpg
 
Top