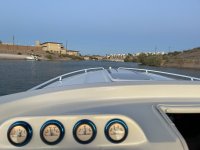
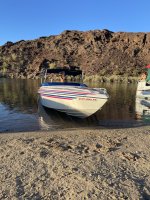
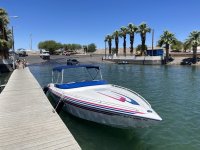
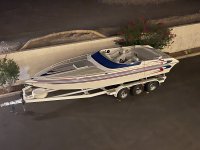
WELCOME TO RIVER DAVES PLACE

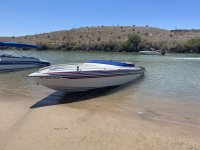
1994 25' Eliminator Eagle 250

Nanu/Nanu

Don't wait til' life's easy to be happy
Joined
Jul 30, 2020
Messages
2,721
Reaction score
4,935
So we boat at lake Powell exclusively. So we travel the I40 and at times its been nasty. Last summer was one of them. The good lord must have been looking out for us, because for some reason i pulled off the interstate in Flagstaff to got through town. First stop light guy pulls up hey you lost a hub.

So there we were in the parking lot between target and a AutoZone. No biggie, just run over to AutoZone get bearings and races head back over to the truck and boat. Go to drive the race out and hmmmmm? Im looking at this hub and something isn't right. Ahhhh! It hits me the hub broke in a perfect ring behind the inside race. Now i need a hub!! Ahhhhh!

So when all this started it was near closing time for most mom and pop shops now its like 10 minutes till closing time. I find a trailer store on the east side of Flagstaff. And they are definitely closing before i can get there. Call them up and tell them the skinny offer to pay more money on top to keep the doors open for me. They tell me just get here. I show up and they have an idler hub packed and pressed ready to go. So i get back to the trailer slap it all together and down the road we go.

Haha fast forward almost a year later i get a new caliper and hub/disk ordered and today i had some more time to get it all together. Unfortunately I didn't have a bottle of brake fluid. Must have loaned it out. Anyways i couldn't bleed the brakes but none the less i got it back together!

My apologies for the crummy pics but here ya go.

IMG_20230625_161742910.jpg
IMG_20230625_161804790_HDR.jpg
IMG_20230625_173933331_HDR.jpg
IMG_20230625_173948155_HDR.jpg
 

Todd Mohr

Will Race For Beer
Joined
Feb 26, 2019
Messages
1,902
Reaction score
5,275
We can be boating twins, just picked this up last week. Put 10 hours on it this weekend.
 

Attachments

  • IMG_3954.jpeg
    IMG_3954.jpeg
    661.4 KB · Views: 64
  • IMG_3944.jpeg
    IMG_3944.jpeg
    1.1 MB · Views: 64
  • IMG_3923.jpeg
    IMG_3923.jpeg
    937.2 KB · Views: 70
  • IMG_3906.jpeg
    IMG_3906.jpeg
    887.5 KB · Views: 70
  • 70932429876__11534EDE-C16A-4C4C-8FB4-1BBE95635983.jpeg
    70932429876__11534EDE-C16A-4C4C-8FB4-1BBE95635983.jpeg
    916.7 KB · Views: 77

Nanu/Nanu

Don't wait til' life's easy to be happy
Joined
Jul 30, 2020
Messages
2,721
Reaction score
4,935
@Todd Mohr Yeah we could most definitely be boating twins! I like the blue windshield on yours adds a nice touch.
 

Todd Mohr

Will Race For Beer
Joined
Feb 26, 2019
Messages
1,902
Reaction score
5,275
I hope to take it to Powell someday, haven’t been for over 20 years.
 

Nanu/Nanu

Don't wait til' life's easy to be happy
Joined
Jul 30, 2020
Messages
2,721
Reaction score
4,935
So a couple weeks ago i had some time and I started to go through my boat a little bit. Ive had to do some electrical here and there and have always been very annoyed knowing there was just a bunch of garbage behind my upholstery panels. The stereo has some nice components but just never really seemed to work at its fullest potential. i took the time and started to pull panels and really see what was going on.
IMG_20240206_095008777_HDR.jpg


This is picture above is in my engine bay. As you can see they previous audio tech mounted the amps directly to the panel. One of the amps may have been an after thought or it fell off but either way this was what it looked like.

So to continue on with the story. I didn't take a ton of pictures but the mess basically carried on from here all the way up to the stereo as well as behind my gauges. So i slowly picked my way through the nonsense and this is what was left that was absolutely critical to carry on.

IMG_20240206_104820547_HDR.jpg
IMG_20240206_132923785_HDR.jpg


So over the last week i hav been able to poke around at my project and have built a nice little rack for my amps. As for now the plan is to just seal the wood with resin but in the future i may cover it with felt carpet.
IMG_20240209_132320521_HDR.jpg
IMG_20240209_143622984_HDR.jpg
IMG_20240217_175650167_HDR.jpg


I ran out of my #2 ring terms. So i apologize for not having all my grounds made up. Hopefully this works.
 

ChrisV

Well-Known Member
Joined
Nov 30, 2020
Messages
4,186
Reaction score
13,065
So a couple weeks ago i had some time and I started to go through my boat a little bit. Ive had to do some electrical here and there and have always been very annoyed knowing there was just a bunch of garbage behind my upholstery panels. The stereo has some nice components but just never really seemed to work at its fullest potential. i took the time and started to pull panels and really see what was going on.
View attachment 1336346

This is picture above is in my engine bay. As you can see they previous audio tech mounted the amps directly to the panel. One of the amps may have been an after thought or it fell off but either way this was what it looked like.

So to continue on with the story. I didn't take a ton of pictures but the mess basically carried on from here all the way up to the stereo as well as behind my gauges. So i slowly picked my way through the nonsense and this is what was left that was absolutely critical to carry on.

View attachment 1336347 View attachment 1336348

So over the last week i hav been able to poke around at my project and have built a nice little rack for my amps. As for now the plan is to just seal the wood with resin but in the future i may cover it with felt carpet. View attachment 1336349 View attachment 1336350 View attachment 1336351

I ran out of my #2 ring terms. So i apologize for not having all my grounds made up. Hopefully this works.
Beautiful man! Are you going to gel coat it or resin?
 

Nanu/Nanu

Don't wait til' life's easy to be happy
Joined
Jul 30, 2020
Messages
2,721
Reaction score
4,935
Beautiful man! Are you going to gel coat it or resin?
Thanks man, coming from you that means a lot. Your work inspires me.

For now just resin. I think if anything i may cover it with felt carpet. In theory there will be an upholstered panel over it so it really wont be visible.
 

ChrisV

Well-Known Member
Joined
Nov 30, 2020
Messages
4,186
Reaction score
13,065
Thanks man, coming from you that means a lot. Your work inspires me.

For now just resin. I think if anything i may cover it with felt carpet. In theory there will be an upholstered panel over it so it really wont be visible.
Haha thanks. We’re all trying to learn.

Water will drip on that when people get out of the water and stand on the hatch imo. Coat it good.
 

02HoWaRd26

DCBroke
Joined
Dec 19, 2007
Messages
12,213
Reaction score
29,077
Any space to move it forward? Ideally into the side panel in front of the rear seat?
As Chris said you’ll have a bit of water from boarding as well, the heat and moisture from engine. If you could slide into the passenger compartment you’d eliminate that heat and a lot of the moisture. If not maybe look for something to use as a drip guard between the top of your interior panel and the amps. But looking great, wiring is smooth and clean keep it up.
 

Nanu/Nanu

Don't wait til' life's easy to be happy
Joined
Jul 30, 2020
Messages
2,721
Reaction score
4,935
Any space to move it forward? Ideally into the side panel in front of the rear seat?
As Chris said you’ll have a bit of water from boarding as well, the heat and moisture from engine. If you could slide into the passenger compartment you’d eliminate that heat and a lot of the moisture. If not maybe look for something to use as a drip guard between the top of your interior panel and the amps. But looking great, wiring is smooth and clean keep it up.
Thank you as well for the compliments you are also a big motivation too.

So i did consider that. I actually kinda considered doing the amp box design like yours in my mid cabin. (It looks so cool) however For now it was just easier to keep things kind of where they were. The ultimate plan is to move it to the cabin right next to the head unit. My list of things too get done before boating season is getting long though. I need to wrap this stereo work and then im going to change out my fuse panel. I also would like to install some usb chargers like @pull-on did in his 300t.

And then i need to jump on my trailer. I have new axles and leaf springs for it.
 

Mcob25rg

Well-Known Member
Joined
Aug 2, 2017
Messages
1,544
Reaction score
3,233
Fantastic thread. You are making it awesome, and I’m jealous of your welding skills. I’ve never done it, but wish I could
 

Nanu/Nanu

Don't wait til' life's easy to be happy
Joined
Jul 30, 2020
Messages
2,721
Reaction score
4,935
Ok so for now the amp and stereo stuff is on the back burner. I wanted to focus on wiring under my dash and getting rid of a tube type fuse block. Since we purchased the boat, ive always had a high draw on the voltage gauge when we would turn the blower on or use the trim tabs. Also when we would use the trim tabs we would get a pop in the speakers. I was never able to really narrow any of the problems down, however i hadn't ever pulled the interior panel off. So i was looking at stuff from a 12" square hole. The blower i figured was a loose connection to ground, and for the speaker pop it could be a ground or positive connection. So lets see what we got.
IMG_20240222_171031002.jpg

Ok, so this may appear as if i am acting a bit dramatic. 😂 But honestly i had already started cleaning this up a little bit before i remembered to take this picture. Basically this is what I started with. If you look at the old fuse block you may already be able to tell why i would get the speaker pop when using my trim tabs. Yep they were piggy backed on my stereo fuse...

And then you can see how the switches in the upper right hand corner were grounded. Im not saying it's wrong. I personally don't think this is a good practice to run your grounds in series like that. Case in point is if you lose a ground at the beginning of the run everything else behind it has a crummy ground. Which you cant tell by the photo but yep gound connection number 1 sucked. So hopefully redoing these and giving them individual spots on the ground bus will help out a little bit and i may just have switches that light up too. Ehh well see.
IMG_20240222_182305358.jpg

So this is where i ended up after the first night.
IMG_20240224_032457708.jpg

IMG_20240224_033621179.jpg

Between a little bit of time last night and getting up early this morning this is where im at.

I still have some clean up to do here. But these will end up being my lighting circuits for the navigation, interior, and cabin lights. I have been waiting on some distribution blocks to come in.

Over all im happy with how it has turned out.
 

02HoWaRd26

DCBroke
Joined
Dec 19, 2007
Messages
12,213
Reaction score
29,077
Looks good but you need to work on your ziptie placement. It’s all about having them the same distance away from the next. Also buy some flush cut pliers so you can make them smooth and not worry about cutting yourself later. Another thing would to go with a fresh power wire straight from the perko back in at minimum 8 gauge and run a matching 8g, or better yet 4g for both, ground from the block to your distribution panel. I’d bet you’ll find that your power and probably your ground both have at least one or two butt connectors between then battery and dash.
 

Nanu/Nanu

Don't wait til' life's easy to be happy
Joined
Jul 30, 2020
Messages
2,721
Reaction score
4,935
Looks good but you need to work on your ziptie placement. It’s all about having them the same distance away from the next. Also buy some flush cut pliers so you can make them smooth and not worry about cutting yourself later. Another thing would to go with a fresh power wire straight from the perko back in at minimum 8 gauge and run a matching 8g, or better yet 4g for both, ground from the block to your distribution panel. I’d bet you’ll find that your power and probably your ground both have at least one or two butt connectors between then battery and dash.
I bet i do have a couple splices. I do have the material to do the power and ground solid from engine to console. I was planning on doing it for the ground hadnt given much thought for the power source but your point makes absolute sense.

Thanks for the honest critique. I know im not super excited about my zip tie placement. This will probably all be re worked again soon. A super awesome Friend of mine bought me a gaffrig water depth and temp gauge for xmas. However its platinum and i have white gauges i dont have the heart to say anything. So im going to be back in here again when i change out all my gauges to match, at which point ill make you proud. I PROMISE!
 

02HoWaRd26

DCBroke
Joined
Dec 19, 2007
Messages
12,213
Reaction score
29,077
I bet i do have a couple splices. I do have the material to do the power and ground solid from engine to console. I was planning on doing it for the ground hadnt given much thought for the power source but your point makes absolute sense.

Thanks for the honest critique. I know im not super excited about my zip tie placement. This will probably all be re worked again soon. A super awesome Friend of mine bought me a gaffrig water depth and temp gauge for xmas. However its platinum and i have white gauges i dont have the heart to say anything. So im going to be back in here again when i change out all my gauges to match, at which point ill make you proud. I PROMISE!
This is my go to ziptie, they have a nice semi curved edge so they do not cut into the wires, it’s a stainless locking tooth as well they’re only 0.09” wide so they keep a clean look. To be honest in some of my work I’ve used cheap zipties until i was done, ie: your secondary ziptie on the red wire, and then I’ll go through and put these on and be best i can at spacing after. I have these flush cuts in snap on as well Harbor Freight and their identical so I’d recommend going with the HF Icon brand as well.

Zipties

Flush Cuts
 

Nanu/Nanu

Don't wait til' life's easy to be happy
Joined
Jul 30, 2020
Messages
2,721
Reaction score
4,935
Im back from the hiatus! We had some family issues come up and the boat went on the back burner. And then i had a jeep transmission issue arise... After pulling the tranny 3 times and still not having it resolved to the mechanic it went! But this aint no jeep thread!

If any of you keep tabs on me , you know my family and i are lake Powell fanatics. We exclusively boat there. (Maybe we are missing out but Powell is a hard lake to beat!) anyway we usually make about 5/6 trips a year. Unfortunately our crew lost a member this summer and it has been a big devastating loss! However in her honor we have decided to make our first trip this year without her. It will be bittersweet and very hard for us here on earth, however we know she will be jumping for joy and watching over us from heaven.

So over the months in my spare time ive been taking bites at the boat. As previously posted i had tore apart the interior rewiring gauges, fuse panels, courtesy lighting, audio system, installed some usb charging ports courtesy of Mr. @pull-on for the idea. Beyond the electrical work i have been battling an engine oil leak that developed between the pan and block. Took me forever to find until i pulled my back seat for a different job. It was bad! Any way, i had to pull the motor and the pan had been repaired at some point. The person welded the pan right down the middle of the mating surface leaving a ridge. My assumption would be that was causing the oil leak because it wasnt making a good seal.

So i pulled the motor out, found out i got the wrong pan, but found out i got a really nice block. So in comes the new pan and oil pump to match. Drop the motor back in. Drive didn't really line up too well so i became well versed in that discipline. Best way i found to do it was leaving the engine hooked to the hoist and and make your adjustments until you get the 1 finger sllide in and one hand pull out with good even spline marks all the way around. Set your motor mount nuts relieve hoist tension and recheck with alignment tool. While the motor was out i installed and automatic bilge pump. This is pretty nice considering i anchor off shore for multiple days on Powell.

Thursday night my wife gave me an ultimatum to get the boat ready or i wouldn't be aloud to go to the lake this coming week! Haha yes ma'am! So i got it to the point to fire off Thursday night. Saturday i took it to a local lake that only allows 10hp or less boats on. I wanted to dip it in for a leak test. Haha its mainly a paddle boarders lake. So there i was backing her in 7 am Saturday morning. NO LEAKS! and the looks i got firing the engine up were 100% opposite of my big giant grin!

After a successful leak test (no water or oil leaks) i took it home and got to working on the trailer axles. I have not been able to get a set of tires to last me a full season. (Really bad camber issues) So i ordered new axles last fall. I believe my problem was that the original axles had no camber (accounting for additional weight and i believe the axles were kind of loaded up from weight of the boat).so after loading the boat with our camp gear the axles were bowed (not extremely noticable but my tires were only lasting 4 trips max with inside wear. So go the new axles on and brake lines connected. Thanks to the idea from Mr @02HoWaRd26 i used the brake bleeder he suggested and it made bleeding brakes a breeze!

Seriously you just fill the pump up with brake fluid, put in a couple pumps, go crack your lines working from furthest to closest. Wahlah, freaking truck was grunting putting the trailer back in the garage. Today i was able to get the interior fully assembled back together wire in some engine bay lights and clean upholstery and call it day. Tomorrow will be a wash wax and pack day... Seems like i may make this trip after all!

I apologize in advance for my lack of photos ill try to get some in the next couple days.
IMG_20240804_194355446_HDR.jpg
IMG_20240804_194330702.jpg
IMG_20240804_194123876_HDR.jpg
IMG_20240804_161524989.jpg
f74cc590-80cf-4415-acb9-003c02d7a158.jpg
 
Last edited:

mattyc

Well-Known Member
Joined
Sep 9, 2017
Messages
496
Reaction score
604
Im back from the hiatus! We had some family issues come up and the boat went on the back burner. And then i had a jeep transmission issue arise... After pulling the tranny 3 times and still not having it resolved to the mechanic it went! But this aint no jeep thread!

If any of you keep tabs on me , you know my family and i are lake Powell fanatics. We exclusively boat there. (Maybe we are missing out but Powell is a hard lake to beat!) anyway we usually make about 5/6 trips a year. Unfortunately our crew lost a member this summer and it has been a big devastating loss! However in her honor we have decided to make our first trip this year without her. It will be bittersweet and very hard for us here on earth, however we know she will be jumping for joy and watching over us from heaven.

So over the months in my spare time ive been taking bites at the boat. As previously posted i had tore apart the interior rewiring gauges, fuse panels, courtesy lighting, audio system, installed some usb charging ports courtesy of Mr. @pull-on for the idea. Beyond the electrical work i have been battling an engine oil leak that developed between the pan and block. Took me forever to find until i pulled my back seat for a different job. It was bad! Any way, i had to pull the motor and the pan had been repaired at some point. The person welded the pan right down the middle of the mating surface leaving a ridge. My assumption would be that was causing the oil leak because it wasnt making a good seal.

So i pulled the motor out, found out i got the wrong pan, but found out i got a really nice block. So in comes the new pan and oil pump to match. Drop the motor back in. Drive didn't really line up too well so i became well versed in that discipline. Best way i found to do it was leaving the engine hooked to the hoist and and make your adjustments until you get the 1 finger sllide in and one hand pull out with good even spline marks all the way around. Set your motor mount nuts relieve hoist tension and recheck with alignment tool. While the motor was out i installed and automatic bilge pump. This is pretty nice considering i anchor off shore for multiple days on Powell.

Thursday night my wife gave me an ultimatum to get the boat ready or i wouldn't be aloud to go to the lake this coming week! Haha yes ma'am! So i got it to the point to fire off Thursday night. Saturday i took it to a local lake that only allows 10hp or less boats on. I wanted to dip it in for a leak test. Haha its mainly a paddle boarders lake. So there i was backing her in 7 am Saturday morning. NO LEAKS! and the looks i got firing the engine up were 100% opposite of my big giant grin!

After a successful leak test (no water or oil leaks) i took it home and got to working on the trailer axles. I have not been able to get a set of tires to last me a full season. (Really bad camber issues) So i ordered new axles last fall. I believe my problem was that the original axles had no camber (accounting for additional weight and i believe the axles were kind of loaded up from weight of the boat).so after loading the boat with our camp gear the axles were bowed (not extremely noticable but my tires were only lasting 4 trips max with inside wear. So go the new axles on and brake lines connected. Thanks to the idea from Mr @02HoWaRd26 i used the brake bleeder he suggested and it made bleeding brakes a breeze!

Seriously you just fill the pump up with brake fluid, put in a couple pumps, go crack your lines working from furthest to closest. Wahlah, freaking truck was grunting putting the trailer back in the garage. Today i was able to get the interior fully assembled back together wire in some engine bay lights and clean upholstery and call it day. Tomorrow will be a wash wax and pack day... Seems like i may make this trip after all!

I apologize in advance for my lack of photos ill try to get some in the next couple days. View attachment 1412567 View attachment 1412568 View attachment 1412569 View attachment 1412570 View attachment 1412571
Great job sticking it out. It can be overwhelming when multiple things need attention before a deadline. It will all be worth it when you hit the water though 👍
 

Nanu/Nanu

Don't wait til' life's easy to be happy
Joined
Jul 30, 2020
Messages
2,721
Reaction score
4,935
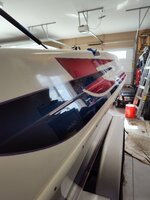
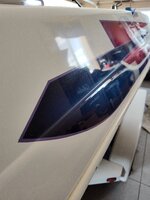
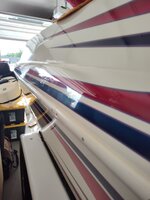
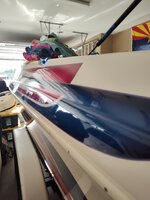
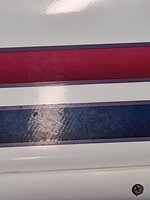
So I have always had a water spot haze in my gel that i could not get out. Sso i finally got the gumption to try something a little more aggressive. Im a fan of diy products that actually produce good results. I know there are plenty of products out there that would truly provide good results however I chose to use chemical guys products.

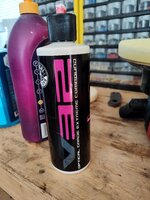
Over the last couple days i have been working on a cut/buff using v32, pad conditioner and a dual action polisher and heavy cutting pad. After achieving the results i wanted i followed up with a wipe out cleanse and micro fiber towel to remove any left over compound. After the wipe down i used their hydro slick ceramic coating. Honestly i am very impressed and i like the fact that they provide YouTube videos to support their products and show you how to apply them and achieve good results.

As a side note: it is also a good idea to clean your pad when passes do not reveal the results wanted as quickly as having a clean pad. So i would use chemical guys pad cleaner which helps break down the compound and rinse out with water. Squeeze the crap out of the pad and start over.
IMG_20240822_174943451.jpg
IMG_20240822_173213015.jpg
IMG_20240822_173204356.jpg
IMG_20240824_115010751_HDR.jpg
IMG_20240824_164155472.jpg
d5e97e24-0048-4a92-a441-db8bc285e1fe.jpg
86c6b75b-7f23-44c6-8cb2-a936baf2511e.jpg
 

Attachments

  • IMG_20240824_164155472.jpg
    IMG_20240824_164155472.jpg
    1.3 MB · Views: 0
  • IMG_20240824_113126708.jpg
    IMG_20240824_113126708.jpg
    2.1 MB · Views: 0
  • 86c6b75b-7f23-44c6-8cb2-a936baf2511e.jpg
    86c6b75b-7f23-44c6-8cb2-a936baf2511e.jpg
    2.4 MB · Views: 0
  • IMG_20240822_173204356.jpg
    IMG_20240822_173204356.jpg
    1,008.3 KB · Views: 0
  • IMG_20240822_173213015.jpg
    IMG_20240822_173213015.jpg
    1.1 MB · Views: 0
  • IMG_20240822_174943451.jpg
    IMG_20240822_174943451.jpg
    1,008 KB · Views: 0
Top