Caydens Cat
all I got was a t-shirt
- Joined
- Feb 11, 2010
- Messages
- 1,403
- Reaction score
- 1,221
Can you add the dump to the exhaust (under the hatch?).
Hmm never seen it done that way, or even to T it into the crossover tube. But i think most do separate as to be able to verify it is pumping. But I’ll be looking into that idea. Cut the tube off the plate, and then weld in at an angle to go with the water flow would be trick.Can you add the dump to the exhaust (under the hatch?
Are you adding an external water pick-up? Is this dump for the Strainer blow-off? On a single application, it is sometime utilized best above the transom assy. This is both aesthetically nice and provides another way to cool the top of the drive. We run a dump on the twins below the exhaust for many reasons but on the one pictured, it has one on each side. One for the inner-cooler dump and the other side for the Strainer blow-off.So when i did the blower i really didn’t want to add any holes to the boat so we T’d the two outer sponson bilge drains together and then used the rear hole for the intercooler. It looks dope, but cannot start on hose in garage as it’s a squirt gun, and the water spots if i don’t clean ever stop get bad. So i ordered a new TCM stainless flush drain and have all my hardware polished and ready to roll. But…… now to decide where to put it is the hard part. The engine uses a pickup tube so the lower unit lwp solely runs water to the top of the drive cap/shower, so the water there would be more but not necessary. So I’m thinking under or next to the exhaust. I know @Tony DCB Boats does it under, but it’s almost like a bov tube for a turbo buggy lol.
Any input would be great. View attachment 1123069 View attachment 1123070 View attachment 1123071 View attachment 1123072 View attachment 1123077 View attachment 1123074
No this is solely for the intercooler dump. The lwp on the nose cone solely feeds the drive cap/showerAre you adding an external water pick-up? Is this dump for the Strainer blow-off? On a single application, it is sometime utilized best above the transom assy. This is both aesthetically nice and provides another way to cool the top of the drive. We run a dump on the twins below the exhaust for many reasons but on the one pictured, it has one on each side. One for the inner-cooler dump and the other side for the Strainer blow-off.
Your WP is fine and if you're adding the single dump I would put it above the transom and it will look the best and give you a little added cooling to your drive, which never hurts.No this is solely for the intercooler dump. The lwp on the nose cone solely feeds the drive cap/shower View attachment 1123340
I do not have a strainer blow off, curious if maybe i should, however at wot I’m only seeing 24-27psi. Maybe I’ll do two singles each on the sides of the tails. As the exhaust is way above the water line at idle.
View attachment 1123341
Thanks now get off the fucking internet and get yours back on the water. Cannot wait to see the new psi wait new power adder’S lol.Damn... Ive been out for awhile trying to get my junk finished. You have done a ton of stuff, detail stuff that only OCD people will ever see. Some people will never appreciate the little stuff but thats the stuff I live for. Congrats.... so much work goes into the details and your killing it !!!!
Always a way….Time to pull my hair out now!
Was going to be perfect but….. i need 4” before the cables attach and they’re a hard connection so probably closer to 5.5” but!!!!!
View attachment 1125050
Nothing is ever easy. One more idea once that actual com arrives. At least it only took about an hour to pull the com out of the buggy!!
View attachment 1125051
Well to the inner side of the tailpipe was really where i wanted it, but that would’ve included moving some wiring and well it’s got 5 P clamps and so perfect i decided against that location and went under the tail, pretty happy with the outcome. Will get better photos when i pull her out of the garage. May be a while tho due to some personal issues but hopefully still get to use it a little this season.So when i did the blower i really didn’t want to add any holes to the boat so we T’d the two outer sponson bilge drains together and then used the rear hole for the intercooler. It looks dope, but cannot start on hose in garage as it’s a squirt gun, and the water spots if i don’t clean ever stop get bad. So i ordered a new TCM stainless flush drain and have all my hardware polished and ready to roll. But…… now to decide where to put it is the hard part. The engine uses a pickup tube so the lower unit lwp solely runs water to the top of the drive cap/shower, so the water there would be more but not necessary. So I’m thinking under or next to the exhaust. I know @Tony DCB Boats does it under, but it’s almost like a bov tube for a turbo buggy lol.
Any input would be great. View attachment 1123069 View attachment 1123070 View attachment 1123071 View attachment 1123072 View attachment 1123077 View attachment 1123074

Twice for the interior to completely come out. It’s not an easy task either. They utilized a lot of typically dead space to offer such a large open cockpit.Somehow missed updates to this thread over the last five weeks.
The intercom install is very clean as expected. At this point in ownership, how many times have you disassembled the interior?
No my system rips but it’s mostly inside the boat because of speaker locations. But you can hear it at any speed. I wanted the intercom to be able to chat on the longer runs, like down to and back from Havasu as well the damn dam run. I have mouse ears can hear a pin drop next door, so it’ll also be nice to be able to turn the exhaust down with the squelch lol.So you spent all that money on speakers recently only to add headsets so you can’t hear them? Or they only for channel/3 dune battles?
Haha jk sick! Talking while running sounds amazing!
Because ProCharger isn’t actually an install shop, nor would that have been a job for them. Just like the drain for the intercooler, that was on me, they utilized an already available hole but wasn’t the one it was to stay in anyway.Peter, @02HoWaRd26 why was the boost gauge not installed at Pro Charge when they did the instalation?
One of the most stressful things is having to drill holes in your boat!Two hours of measurements and marking it, looks a little high but it’s spot on for height.
View attachment 1140437 View attachment 1140438 View attachment 1140439 View attachment 1140440
Very nice!I don’t have a lot of plans as of yet, this boat is fully loaded but i really cannot leave anything alone and really enjoyed rereading stuff i did on the Orion so figure wtf let’s start this off right away.
2019 Desert Storm! Rolling through the channel, “that will be our next boat” her reply haha ok.
View attachment 913744 View attachment 913745
My buddy sent me the link to the Craigslist ad, had been listed for 25 minutes when i first talked to the guy. Everything sounded good, so i sent the link to the wife, her reply was “buy it, or I’ll divorce you”. Well that’s what we did. I want to name the boat “Cheap’r 2 Keep’r” because of that, but for some reason the wife hates that idea.
View attachment 1070409
Night we picked her up. View attachment 913746 View attachment 913747
I actually had mine stripped and powder coated before doing the GatorLike the gator step! I was trying to figure out what to do with mine as it needs either reanonodized or powder coated. Boat looks great and I enjoy following your upgrades.

Definitely be less stressful to drill into your boat than my ownLooks great. Come do my magic
Yea because i wanted to be able to see everything, as i had to use the upper radius etc. with the boat being on the trailer it just wasn’t right. I actually had it taped two or three times but trying to get it to where the top of the light laid directly against the top of the radius of the tunnel.Was there a reason you didn't do your layout on masking or painter's tape or just an oversight?
Final result looks great.
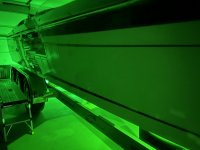
Gettin lit! Ready to practice your night movesHad everything to do the under bow lights for a while now, was bored and was only 95° today so decided to go play in the garage.
Measure 12 times drill once. Drilled the hole for the wiring, then drilled the bolt holes to be able to tap the fiberglass.
View attachment 1160247
Test fit then duplicate to other side. View attachment 1160248
Then removed cleaned the lines, black sharpie doesn’t like to come off white geltook forever.
Then slid the wires in put 3M 4200 on the end of wire as well a little on the Rigid housing and then final bolt on. Wiring was easy as i had previously ran wires up there for this project. View attachment 1160249 View attachment 1160250 View attachment 1160251 View attachment 1160252
We’ll be out the next two days for the Regatta. We only did about 60 hours and 28 times out on the water this year lol.More pics using the boat and less of you making it pretty please......
Childs play! Common man!We’ll be out the next two days for the Regatta. We only did about 60 hours and 28 times out on the water this year lol.
More pics using the boat and less of you making it pretty please......
What a great pic... The lines on the F-series look great and classy today.
Much cleaner, looks like you’ll be a fuel system pro now!Was never Happy with the fuel system routing, i felt i made it look better than how i got back from PC’s development team, but still was ugly. While apart i spent a bunch of time pondering and ultimately wasting a ton of money on fittings till i came up with this. Then i had to wait for two more pieces to make it just right. I’m happy now.
View attachment 1168369 View attachment 1168370 View attachment 1168371
I agree, great work!Much cleaner, looks like you’ll be a fuel system pro now!
It’s a standard bilge hose, but cheapest i could find was here, https://www.wakemakers.com/collections/wakeboard-ballast-hose/products/premium-marine-ballast-hoseI agree, great work!
Were do you get the bildge hose?