WELCOME TO RIVER DAVES PLACE

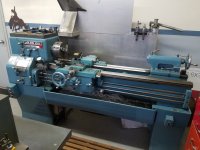
Anyone know leblond regals?

mattyc

Well-Known Member
Joined
Sep 9, 2017
Messages
494
Reaction score
603
Hi everyone,

Newby machinist here. My grandpa was a machinist and I learned a ton growing up and working on various projects with him. I am fairly proficient in most cases. He passed away last year and left me all his equipment and tooling. One thing I never learned from him before his passing was how to cut threads on the lathe. I have been experimenting and watching videos and reading his machinist books but I'm missing something.

Can anyone offer any insight on this?
 

Attachments

  • 20220507_113547.jpg
    20220507_113547.jpg
    736.2 KB · Views: 170
  • 20220507_113621.jpg
    20220507_113621.jpg
    877.9 KB · Views: 188

motormonkey

Well-Known Member
Joined
Dec 20, 2007
Messages
728
Reaction score
773
That's a nice lathe and have used those models before. I find that cutting threads take some practice to get down and every machine has it quirks. What problems are you having?
 

Racey

Maxwell Smart-Ass
Joined
Sep 18, 2007
Messages
22,201
Reaction score
50,060
Firsr thing is there will be a lever on the headstock to switch power from the auto feed lead (keyed shaft) to the screw lead (threaded shaft). This is in regards to the lead screws that run the length of the machine. Only one can be on at a time (auto feed OR screw lead)

Looks like it could be the very lowest right handle.

The screw lead has to be spinning to cut threads
 

rivermobster

Club Banned
Joined
Dec 28, 2009
Messages
59,247
Reaction score
59,487
Damm. How big of threads are you cutting?? And what are you gonna build with those bolts??

Welcome!
 

mattyc

Well-Known Member
Joined
Sep 9, 2017
Messages
494
Reaction score
603
Thanks for the replies! I cant get the feed rate right but I think Racey may know what's wrong. The keyed lead screw turns but I've never seen the threaded lead screw turn. Not quite sure how to control that. I will look into that next time I'm there.

Rivermobster, what bolts are you referring to?

I have a user manual for the machine but it's pretty vague, I'll have to look through it again
 

Racey

Maxwell Smart-Ass
Joined
Sep 18, 2007
Messages
22,201
Reaction score
50,060
Thanks for the replies! I cant get the feed rate right but I think Racey may know what's wrong. The keyed lead screw turns but I've never seen the threaded lead screw turn. Not quite sure how to control that. I will look into that next time I'm there.

Rivermobster, what bolts are you referring to?

I have a user manual for the machine but it's pretty vague, I'll have to look through it again
Yes, the keyed lead screw is for making cutting/surfacing passes IT WILL NOT CUT THREADS. The threaded screw is timed and geared for threading.

The reason they both can't run simultaneously is because you could accidentally engage both of them on the carriage at once and obliterate the gearboxes, or at minimal shear the safety pins which still requires extensive disassembly to repair.

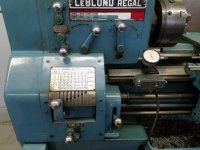
On the gearing chart you will see two sets of numbers in each box, one is the movement in thousandths of an inch per rotation for surfacing speeds (the small bottom number) the other is your thread per inch for threading ( the large top number)
 
Last edited:

JUSTWANNARACE

I will not let them take me🤣🤣
Joined
Aug 28, 2018
Messages
9,105
Reaction score
25,457
Also when you engage the feed thread this needs to be on the same number when you engage for proper feed. But I'm sure you already knew that.
Screenshot_20220508-105312_Gallery.jpg
 

lenmann

Well-Known Member
Joined
Apr 13, 2013
Messages
1,690
Reaction score
3,499
Leblond lathes, of the vintage that you (and I) have, use the collar circled in red below on the lead screw to engage the lead screw. Slide the collar towards the head stock to engage it for threading, and away to disengage. This can be done with the spindle running or with it off by manually rotating the chuck to engage the collar.

There isn't a means to disengage the feed shaft to prevent the simultaneous engagement of both shafts as @Racey mentions. The user is expected to avoid such errors.

20220507_113621.jpeg


BTW, here are factory manuals available for your machine on ebay.


Racey

Maxwell Smart-Ass
Joined
Sep 18, 2007
Messages
22,201
Reaction score
50,060
Leblond lathes, of the vintage that you (and I) have, use the collar circled in red below on the lead screw to engage the lead screw. Slide the collar towards the head stock to engage it for threading, and away to disengage. This can be done with the spindle running or with it off by manually rotating the chuck to engage the collar.

There isn't a means to disengage the feed shaft to prevent the simultaneous engagement of both shafts as @Racey mentions. The user is expected to avoid such errors.

View attachment 1113931

BTW, here are factory manuals available for your machine on ebay.


Bam! There you have it! 👍👍👍
 

lenmann

Well-Known Member
Joined
Apr 13, 2013
Messages
1,690
Reaction score
3,499
Probably more than you were looking for, but there is a useful email group for LeBlond lathes that while not very active, has a pretty good historical archive of repair info.


Also, LeBlond USA is still an operating company. If you email them your serial number they will respond with year of manufacture. They also sell replacement parts. Most are made to order and are incredibly expensive.


mattyc

Well-Known Member
Joined
Sep 9, 2017
Messages
494
Reaction score
603
Thanks for all the help guys!

I have contacted leblond with the serial number and they were able to provide me a copy of the original sales invoice from 1959 for $3600. Thought that was so cool. Also bought a user manual from them but as I said it seems fairly vague but I will go through it again. Funny, grandpa had a manual filed for literally everything, except the lathe and the Bridgeport, haha must have all been in his head. That email group may end up being a good resource so thank you for that.

Ok, let me see if I have this right. When the collar on the threaded lead screw is moved over toward the headstock, this engages the threaded screw, but the keyed auto feed screw continues to turn also? A lever on the carriage initiates cross feed and long feed, does this lever initiate threading feed also? What engagement will cause damage if done simultaneously?
 

lenmann

Well-Known Member
Joined
Apr 13, 2013
Messages
1,690
Reaction score
3,499
Thanks for all the help guys!

I have contacted leblond with the serial number and they were able to provide me a copy of the original sales invoice from 1959 for $3600. Thought that was so cool. Also bought a user manual from them but as I said it seems fairly vague but I will go through it again. Funny, grandpa had a manual filed for literally everything, except the lathe and the Bridgeport, haha must have all been in his head. That email group may end up being a good resource so thank you for that.

Ok, let me see if I have this right. When the collar on the threaded lead screw is moved over toward the headstock, this engages the threaded screw, but the keyed auto feed screw continues to turn also? A lever on the carriage initiates cross feed and long feed, does this lever initiate threading feed also? What engagement will cause damage if done simultaneously?
Correct on the engagement for rotation of the lead screw and feed shaft. Incorrect on the engagement of the lead screw for threading.

The lever on the far right of the apron engages the lead screw for threading (circled in pic below). You may also need to need to make sure the half nut (right side of apron, numbered dial on top) is fully engaged with the lead screw. The bolt that holds the half nut to the carriage can be loosened to swing the half nut in or out of engagement with the lead screw.

If you got confused somehow and engaged both the feed lever and the threading lever you could cause some damage, likely a sheared tapered pin or the like. IIRC correctly Leblond have a clutch on the feed shaft in the event there is a collision. Best bet is to pay attention to which lever you are engaging in any case.


leblond 2.jpeg
 

rivermobster

Club Banned
Joined
Dec 28, 2009
Messages
59,247
Reaction score
59,487
@mattyc

Well, if you're cutting threads, I'm assuming they are external threads?

So if they are, I'm guessing you're making some big azz bolts or threaded rod for something huge??

Otherwise, why use a lathe?

Hoping you're building something bad azz. 👍🏼
 

mattyc

Well-Known Member
Joined
Sep 9, 2017
Messages
494
Reaction score
603
Damn I cant thank you enough!

Lenmann, it's all making sense now. Never knew what that lever was for. Thanks so much.

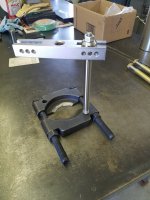
Rivermobster, sorry to disappoint, nothing real bad ass, I machined some spacers for a friend ( look in the restoration section at 02howard26s thread ) which could have used some threads but ended up doing internal threads on the spacer and studs in the supercharger. Actually I'm trying to put a puller together for use at work with a bearing splitter and puller bridge but wanted to make several length legs. They would be 5/8-18 thread and the legs need to be 12" long with a step to fit my bridge and additional threads for a nut. Nothing real exciting.

I will post some recent projects soon. Like I said, fairly proficient but lots to learn.
 

mattyc

Well-Known Member
Joined
Sep 9, 2017
Messages
494
Reaction score
603
Here is a little something I did over the weekend. Recently, I was drilling with a #53 near one inch deep and broke several drills because I dont have a good feel for the pressure applied with the wheel on the tailstock. So I made this little holder to hold a small jacobs and I can feed the drill by hand when doing tiny stuff. Hopefully the video loads
 

Attachments

  • 20220507_111959.mp4
    68.2 MB

Toolman

Well-Known Member
Joined
Aug 19, 2014
Messages
461
Reaction score
718

rivermobster

Club Banned
Joined
Dec 28, 2009
Messages
59,247
Reaction score
59,487
Here is a little something I did over the weekend. Recently, I was drilling with a #53 near one inch deep and broke several drills because I dont have a good feel for the pressure applied with the wheel on the tailstock. So I made this little holder to hold a small jacobs and I can feed the drill by hand when doing tiny stuff. Hopefully the video loads

Very cool!
 

mattyc

Well-Known Member
Joined
Sep 9, 2017
Messages
494
Reaction score
603
How coincidental. We are searching to buy one of these tools right now because we’ve taken on a job to drill a .007 hole through an aluminum disc.
Wow, what is the application? How thick is the disc?
 

Toolman

Well-Known Member
Joined
Aug 19, 2014
Messages
461
Reaction score
718
Around .060
It’s an air bleed off hole for a miniature air compressor. Normally an air compressor has a bleed off valve that kicks on when the compressor shuts off to take the pressure off the head so that when the compressor starts up again it doesn’t have to fight being under a compression stroke. This miniature air compressor does not have a bleed off valve. When the compressor shuts off, the hole bleeds off the air so that the next time the compressor starts up it doesn’t have to fight the head pressure. When the compressor is running, the hole is so small the compressor doesn’t Even notice it.
 
Last edited:

mattyc

Well-Known Member
Joined
Sep 9, 2017
Messages
494
Reaction score
603
@Toolman
Awesome, that is very small and tedious. Will you rotate the work or the drill? May be dependent on acquiring that adapter?
Are those adapters intended to be used stationary or rotating?
 

Toolman

Well-Known Member
Joined
Aug 19, 2014
Messages
461
Reaction score
718
The work will be stationary and we need to spin that drill at around 8 to 10,000 RPMs. We’re looking at using a high speed air spindle. The adapter can be used either stationary or rotating.
 

mattyc

Well-Known Member
Joined
Sep 9, 2017
Messages
494
Reaction score
603
Update!
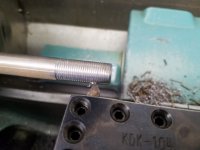
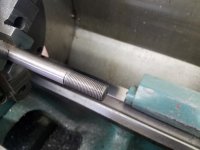
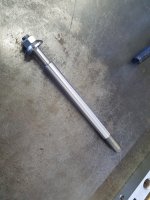
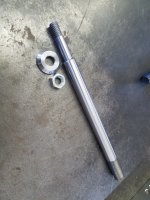
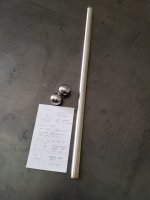
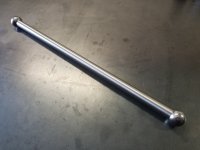
Well I was able to make some threads today thanks to all the help. This is one of several legs to be used with this puller. 5/8-18 on one end and 7/16-14 on the other. Made the washer also. Takes a little practice but caught on quick.
 

Attachments

  • 20220514_105046.jpg
    20220514_105046.jpg
    631.2 KB · Views: 68
  • 20220514_131827.jpg
    20220514_131827.jpg
    565.6 KB · Views: 61
  • 20220514_111413.jpg
    20220514_111413.jpg
    661.3 KB · Views: 62
  • 20220514_131858.jpg
    20220514_131858.jpg
    764.3 KB · Views: 65
  • 20220514_131913.jpg
    20220514_131913.jpg
    755.6 KB · Views: 60

mattyc

Well-Known Member
Joined
Sep 9, 2017
Messages
494
Reaction score
603
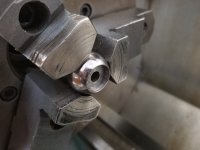
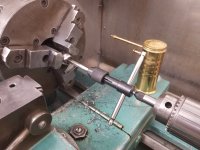
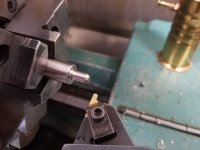
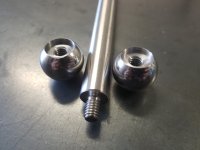
Another project over the weekend. A friend of mine is restoring an old Wilton he found in the trash at work. Asked me to make him a new handle.
 

Attachments

  • 20230624_090935.jpg
    20230624_090935.jpg
    369.2 KB · Views: 53
  • 20230624_115934.jpg
    20230624_115934.jpg
    570.8 KB · Views: 48
  • 20230624_120513.jpg
    20230624_120513.jpg
    727.3 KB · Views: 47
  • 20230624_151156.jpg
    20230624_151156.jpg
    588.2 KB · Views: 46
  • 20230624_153846.jpg
    20230624_153846.jpg
    709.1 KB · Views: 45
  • 20230624_153926.jpg
    20230624_153926.jpg
    799.1 KB · Views: 57

Racey

Maxwell Smart-Ass
Joined
Sep 18, 2007
Messages
22,201
Reaction score
50,060
Another project over the weekend. A friend of mine is restoring an old Wilton he found in the trash at work. Asked me to make him a new handle.
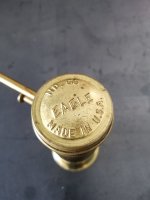
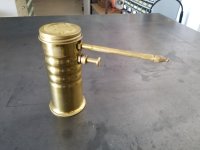
Is that an Eagle 66 oil can? Super jealous that thing looks PRISTINE.

Nice work btw 🤙
 

mattyc

Well-Known Member
Joined
Sep 9, 2017
Messages
494
Reaction score
603
Is that an Eagle 66 oil can? Super jealous that thing looks PRISTINE.

Nice work btw 🤙
Thanks!
Haha yeah it is! Started using it for cutting oil, I'll post a picture of it after the weekend.
 

mattyc

Well-Known Member
Joined
Sep 9, 2017
Messages
494
Reaction score
603

Attachments

  • 16881650979816374746882384120623.jpg
    16881650979816374746882384120623.jpg
    313.6 KB · Views: 44
  • 16881651192596188501564071603564.jpg
    16881651192596188501564071603564.jpg
    566.3 KB · Views: 44

RiverDave

In it to win it
Joined
Sep 13, 2007
Messages
126,105
Reaction score
164,124
I didn’t see this in the replies but if you are single pointing threads you would want to set the compound to half the total degrees 31 in most cases and then adjust depths with the compound not the slide way.
 

mattyc

Well-Known Member
Joined
Sep 9, 2017
Messages
494
Reaction score
603
I didn’t see this in the replies but if you are single pointing threads you would want to set the compound to half the total degrees 31 in most cases and then adjust depths with the compound not the slide way.
I've seen this approach somewhere. What's the benefit?
 
Top